Friday Sabbath

It’s been awhile. I’m being pretty forgiving of myself these days. Long weeks of Zoom meetings day and night has me good for little else than housekeeping and reading by the weekend. I haven’t been doing much in my sewing room or anything.

However, I have lots of unused vacation days, (thanks, lockdown), so I’m taking every Friday in November and December off. Instead of just thinking of them as a “day off,” or a “vacation day,” I’m very intentionally calling them Sabbath days. This simply makes me much more intentional about thinking through what would be renewing and restoring rather than just what I can do with free time. It comes out to a lot of the same activities, it’s just a little different mindset going into them.

One piece of my plan was to go for a long walk with the Aug-dog. I wanted to take him to a place up on the shores of Lake Ontario that’s a nature preserve and I recalled some really nice paths through it from a family hike we’d taken a number of years ago.

Unfortunately, it’s not really obvious which trail is which and they don’t all lead off a common trailhead—not even close. They’re spaced over about a 6-7 mile area. Ultimately, Auggie and I ended up driving around for a good 45 minutes total between finding trailheads, realizing it wasn’t the one I wanted, finding another one that looked good and heading off only to find out that it was a very short, loopy trail through brush and trees with only the slightest glimpse of the lake far off over a lot of reeds. Not particularly interesting. And I’m trying to stay ahead of the rain that I can see gathering on the horizon so I don’t feel like I’ve got a whole lot of time to mess around.

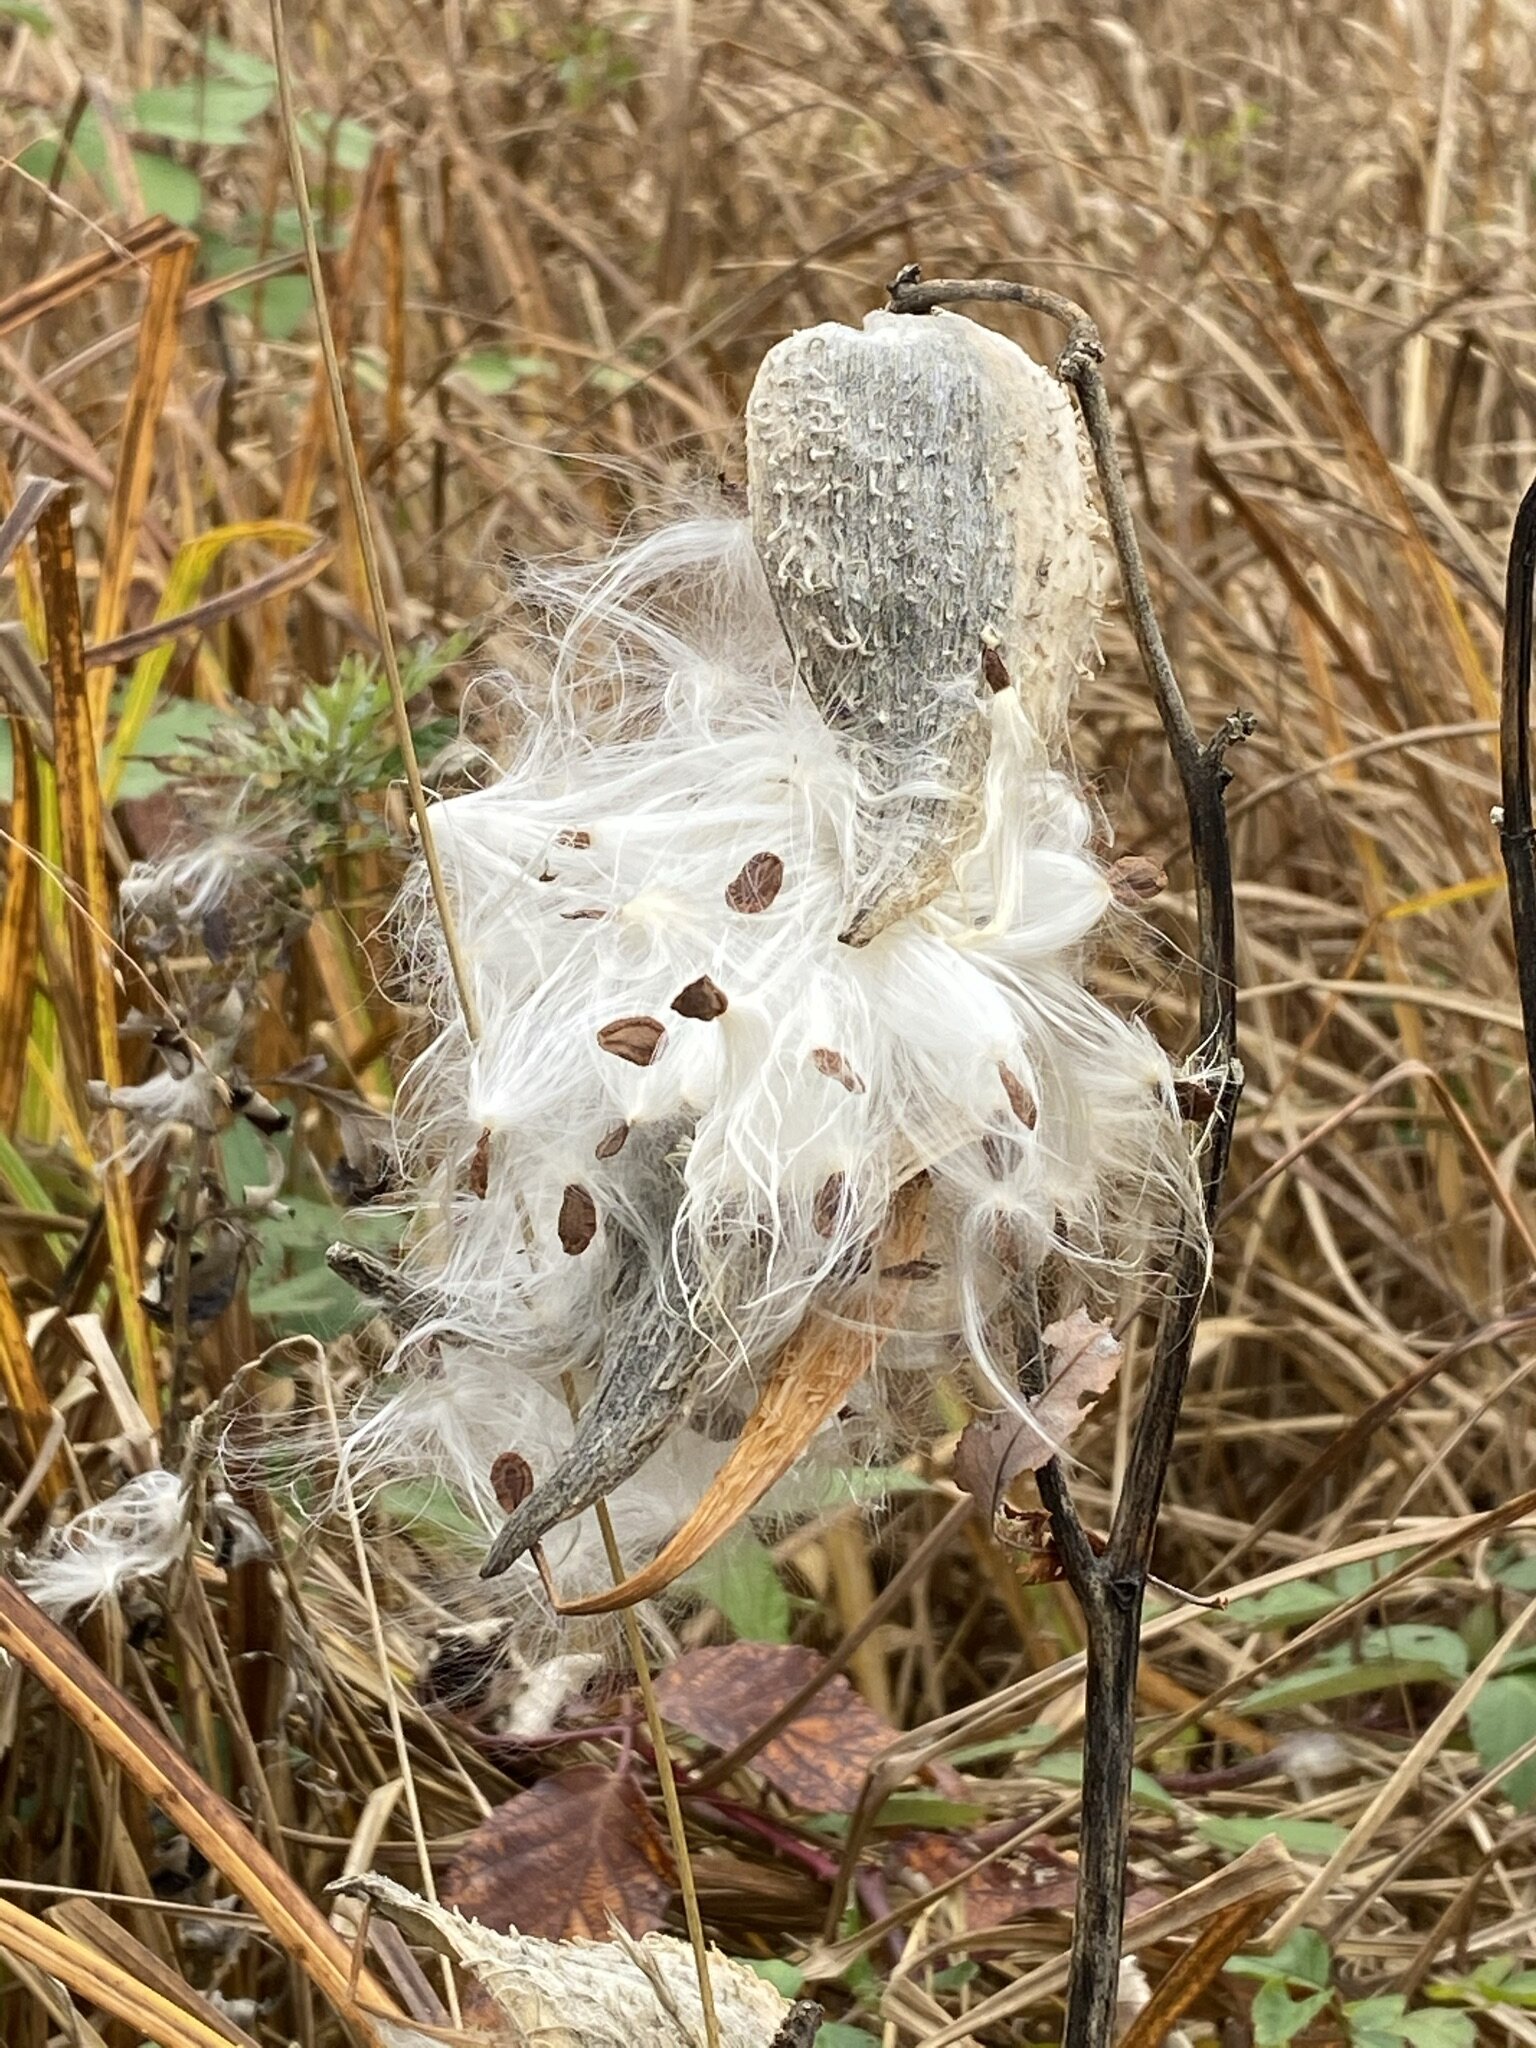
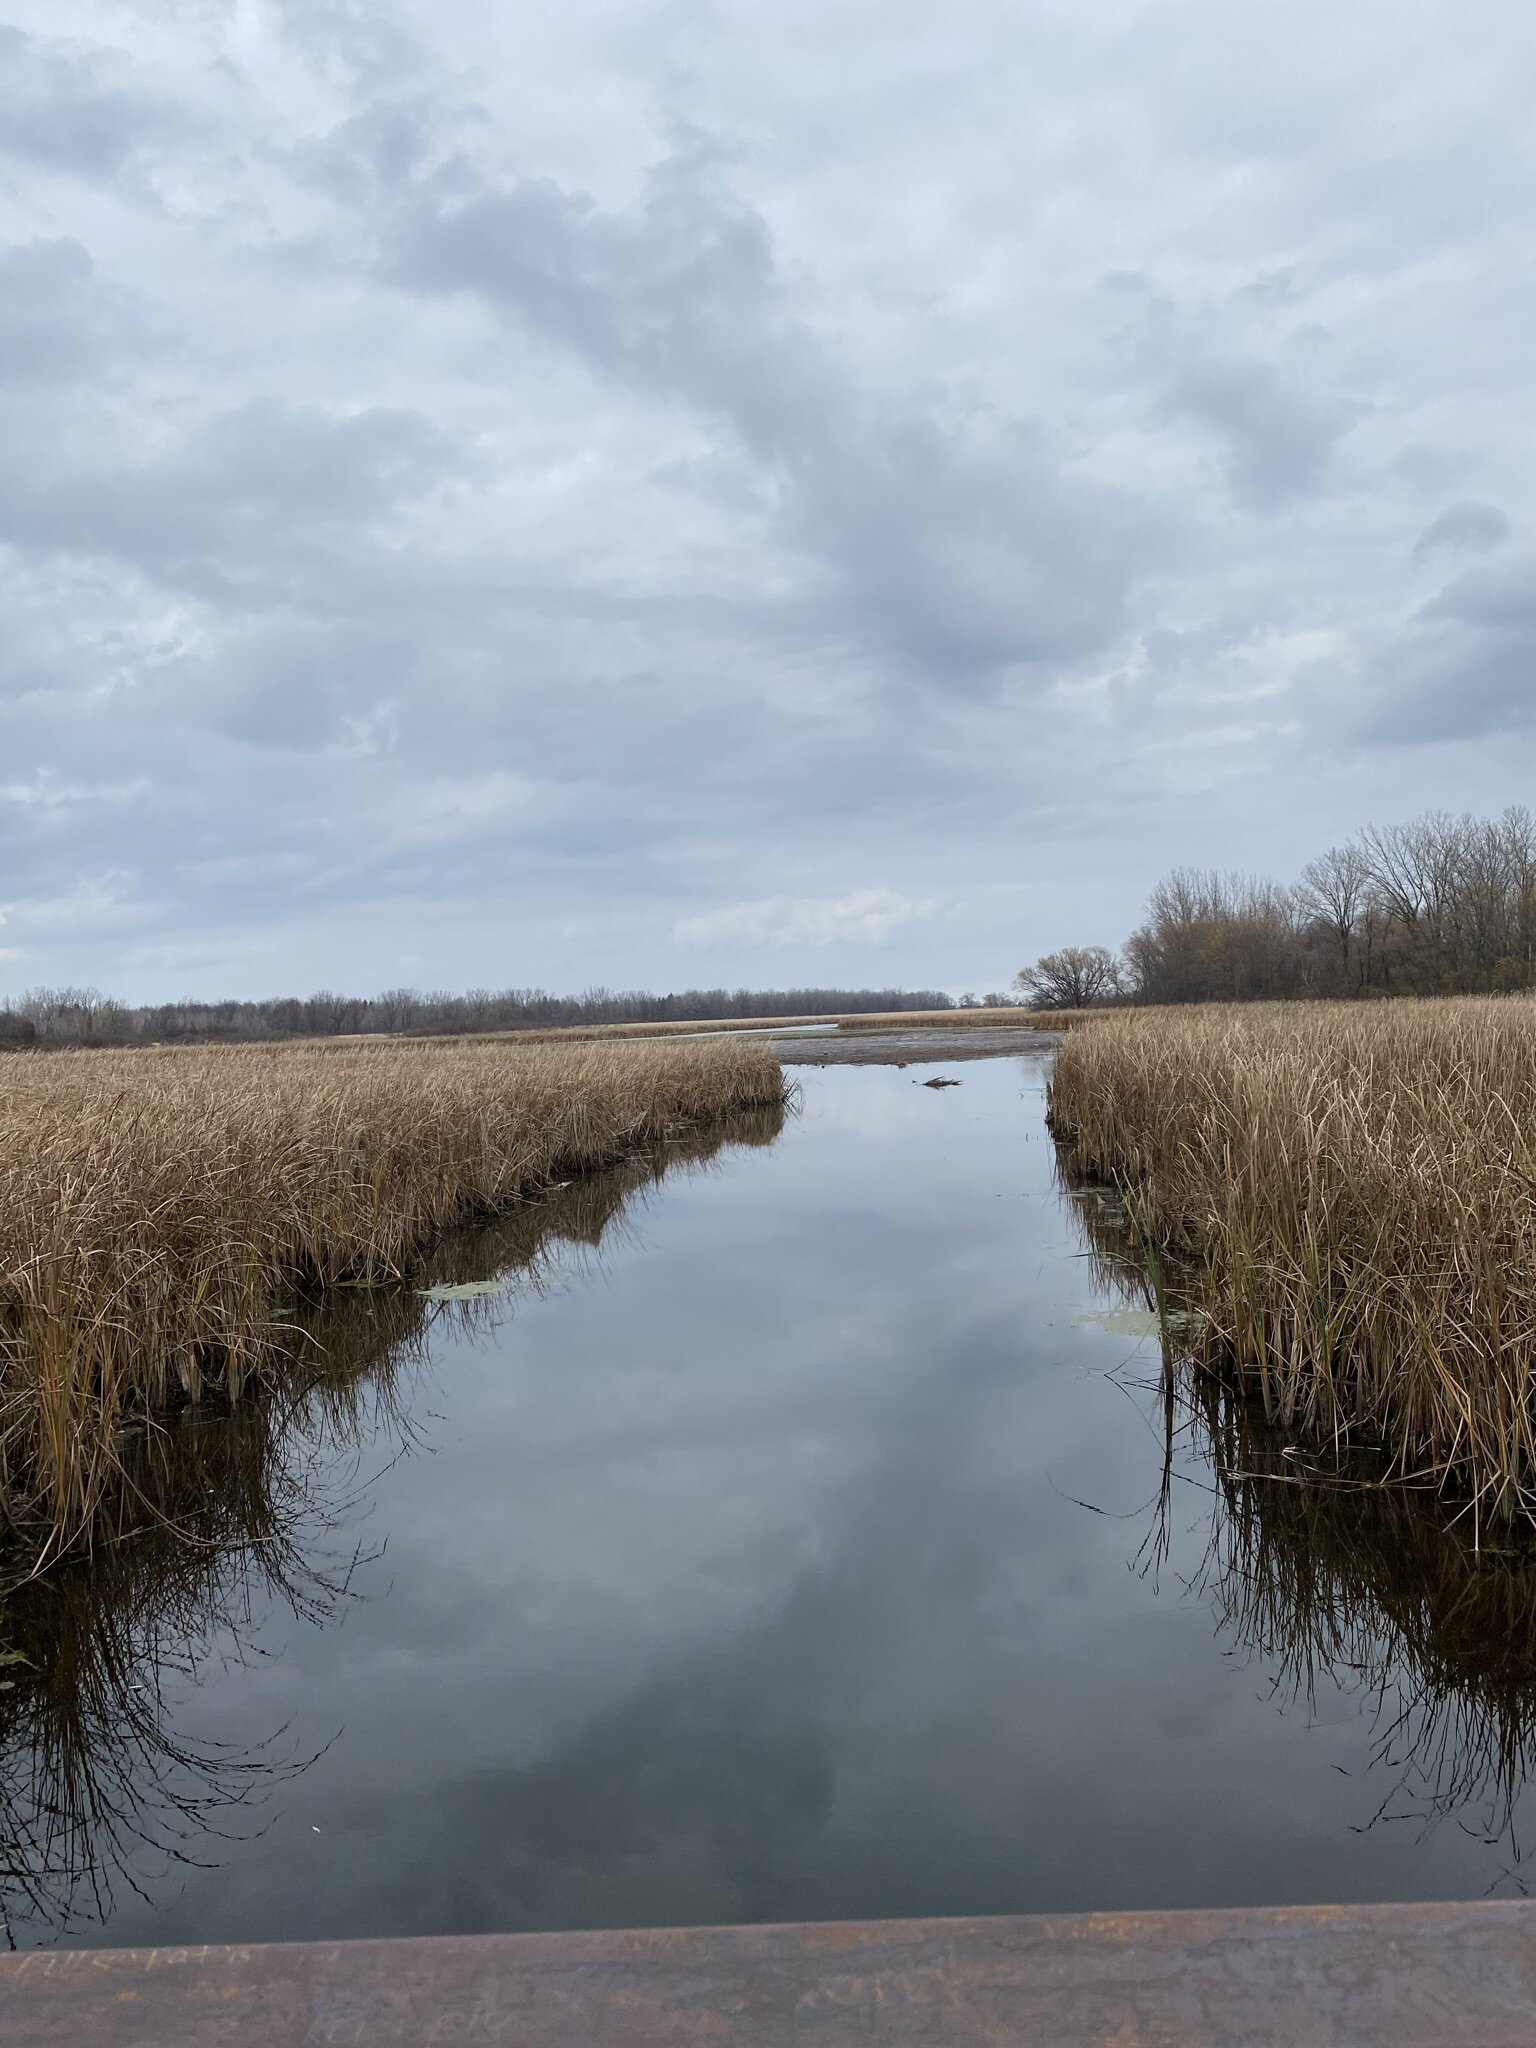
I finally took Auggie back to one that was a more populated and well-kept trail that would at least take us through some wetlands. 15 minutes into the walk, I see a hunter in full gear walking towards me. Ummm… “Are there a lot of hunters back in here?” I asked him as he got close enough. “Well,” he said, flipping his shotgun into his arm and scratching his head, “I think I’m probably one of the last ones.” I look down at Auggie, with coloring remarkably like a deer, and my own jacket which, although fairly bright, is still green. Yeah, no. Not a chance I’m willing to take. Hadn’t ever given a thought to needing reflective gear since we were only going to be in public parks. We turned about face and hoofed it back to the parking lot.

I grew up in the country. I know about hunting season. We wouldn’t let the dogs out to run at certain times of year because of the risk. But hunters in a well-traveled park with walkers and dogs? Huh. I looked it up online when I got home. I don’t think it’s legal to be hunting there, but there sure were a few folks doing it openly and a bunch of walkers who didn’t seem surprised so they must know something I don’t know. Still, I won’t be going back there any time soon.

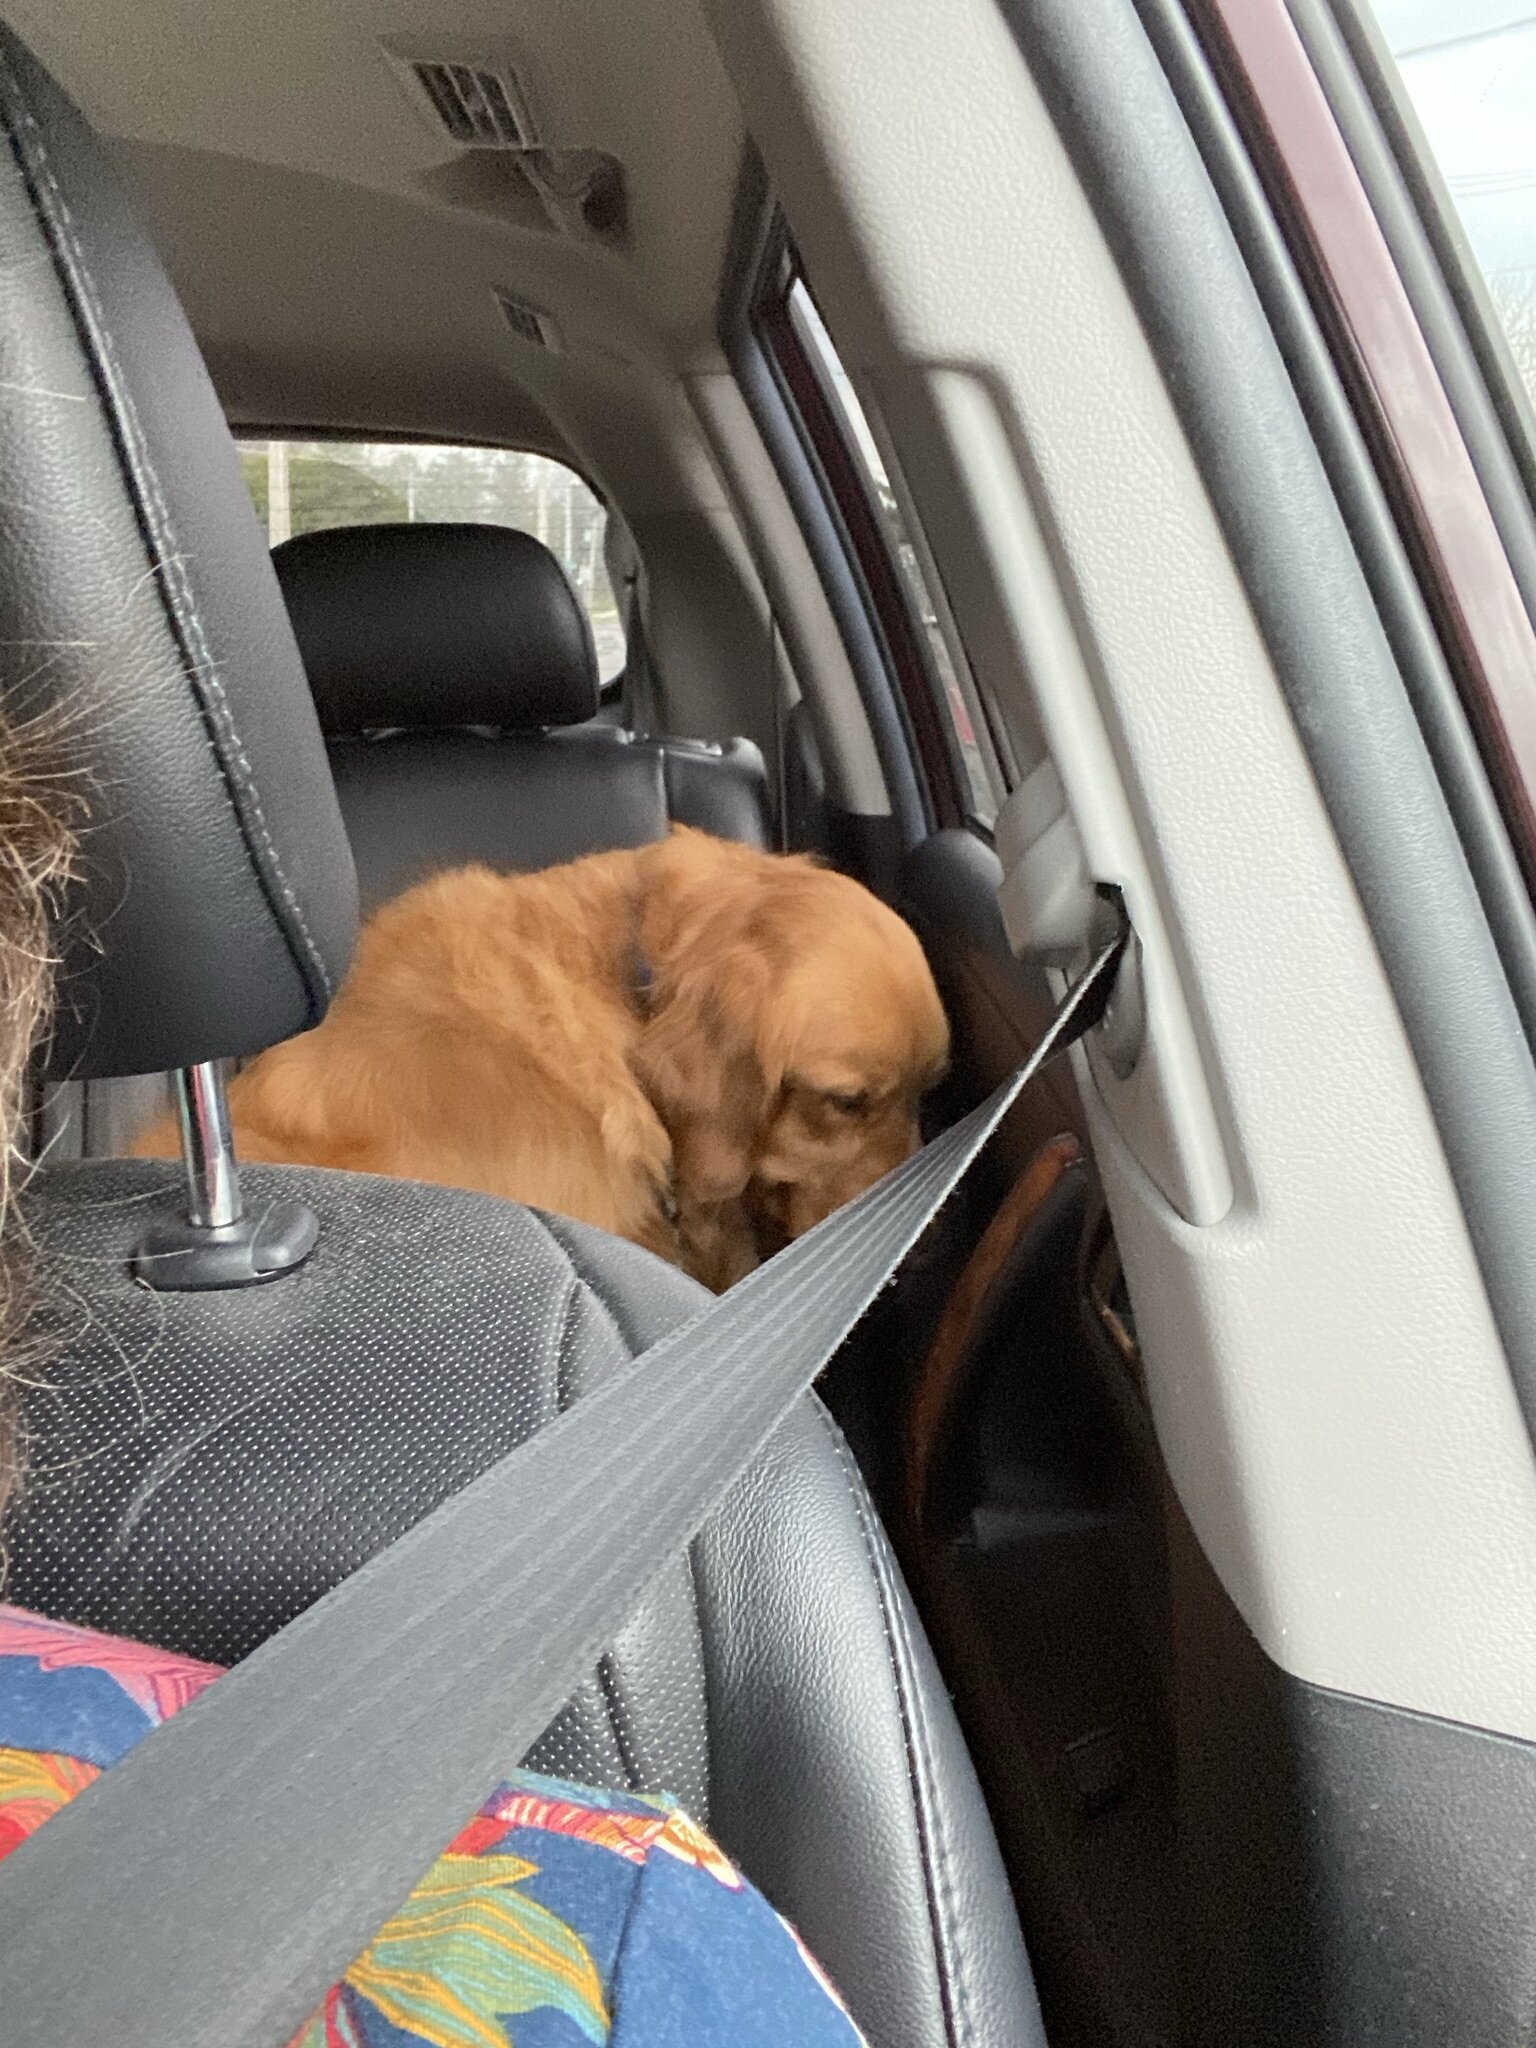
Fortunately, it was enough of a day for Auggie that he’s now conked out on his bed. Between the walking and all the great new smells (although he was none too keen on the bridge we had to walk over), he’s a sleepy boy now.

Mission accomplished.

(BTW, he rarely lays down in the backseat. He likes to sit up and lean his head against the door. Weird dog.)


IMG_1395.jpg

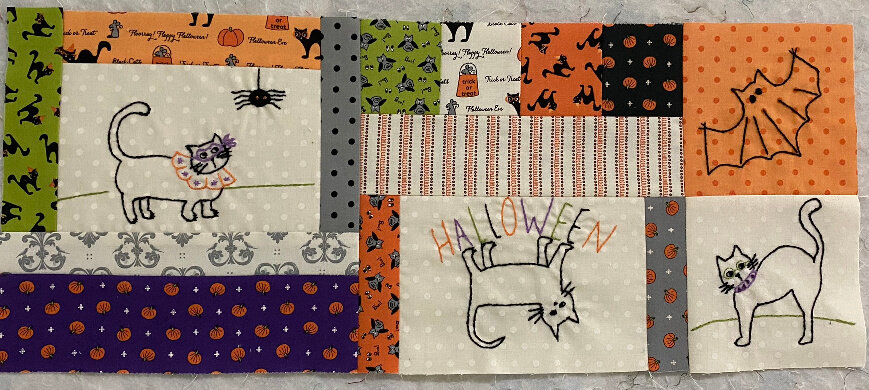
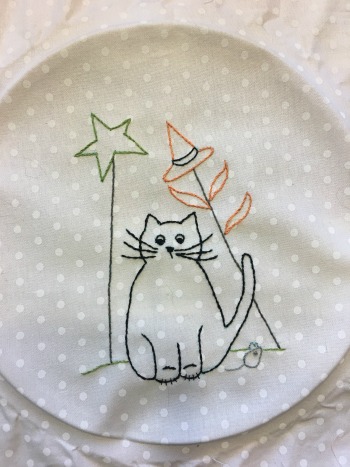
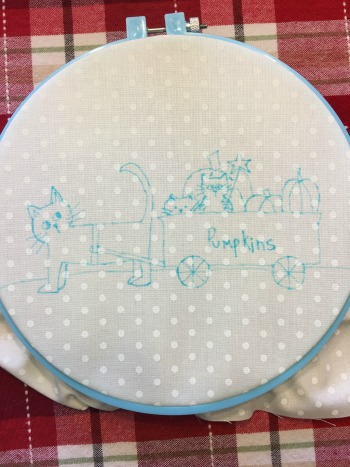
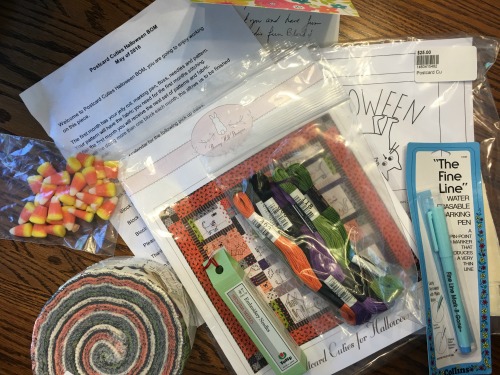
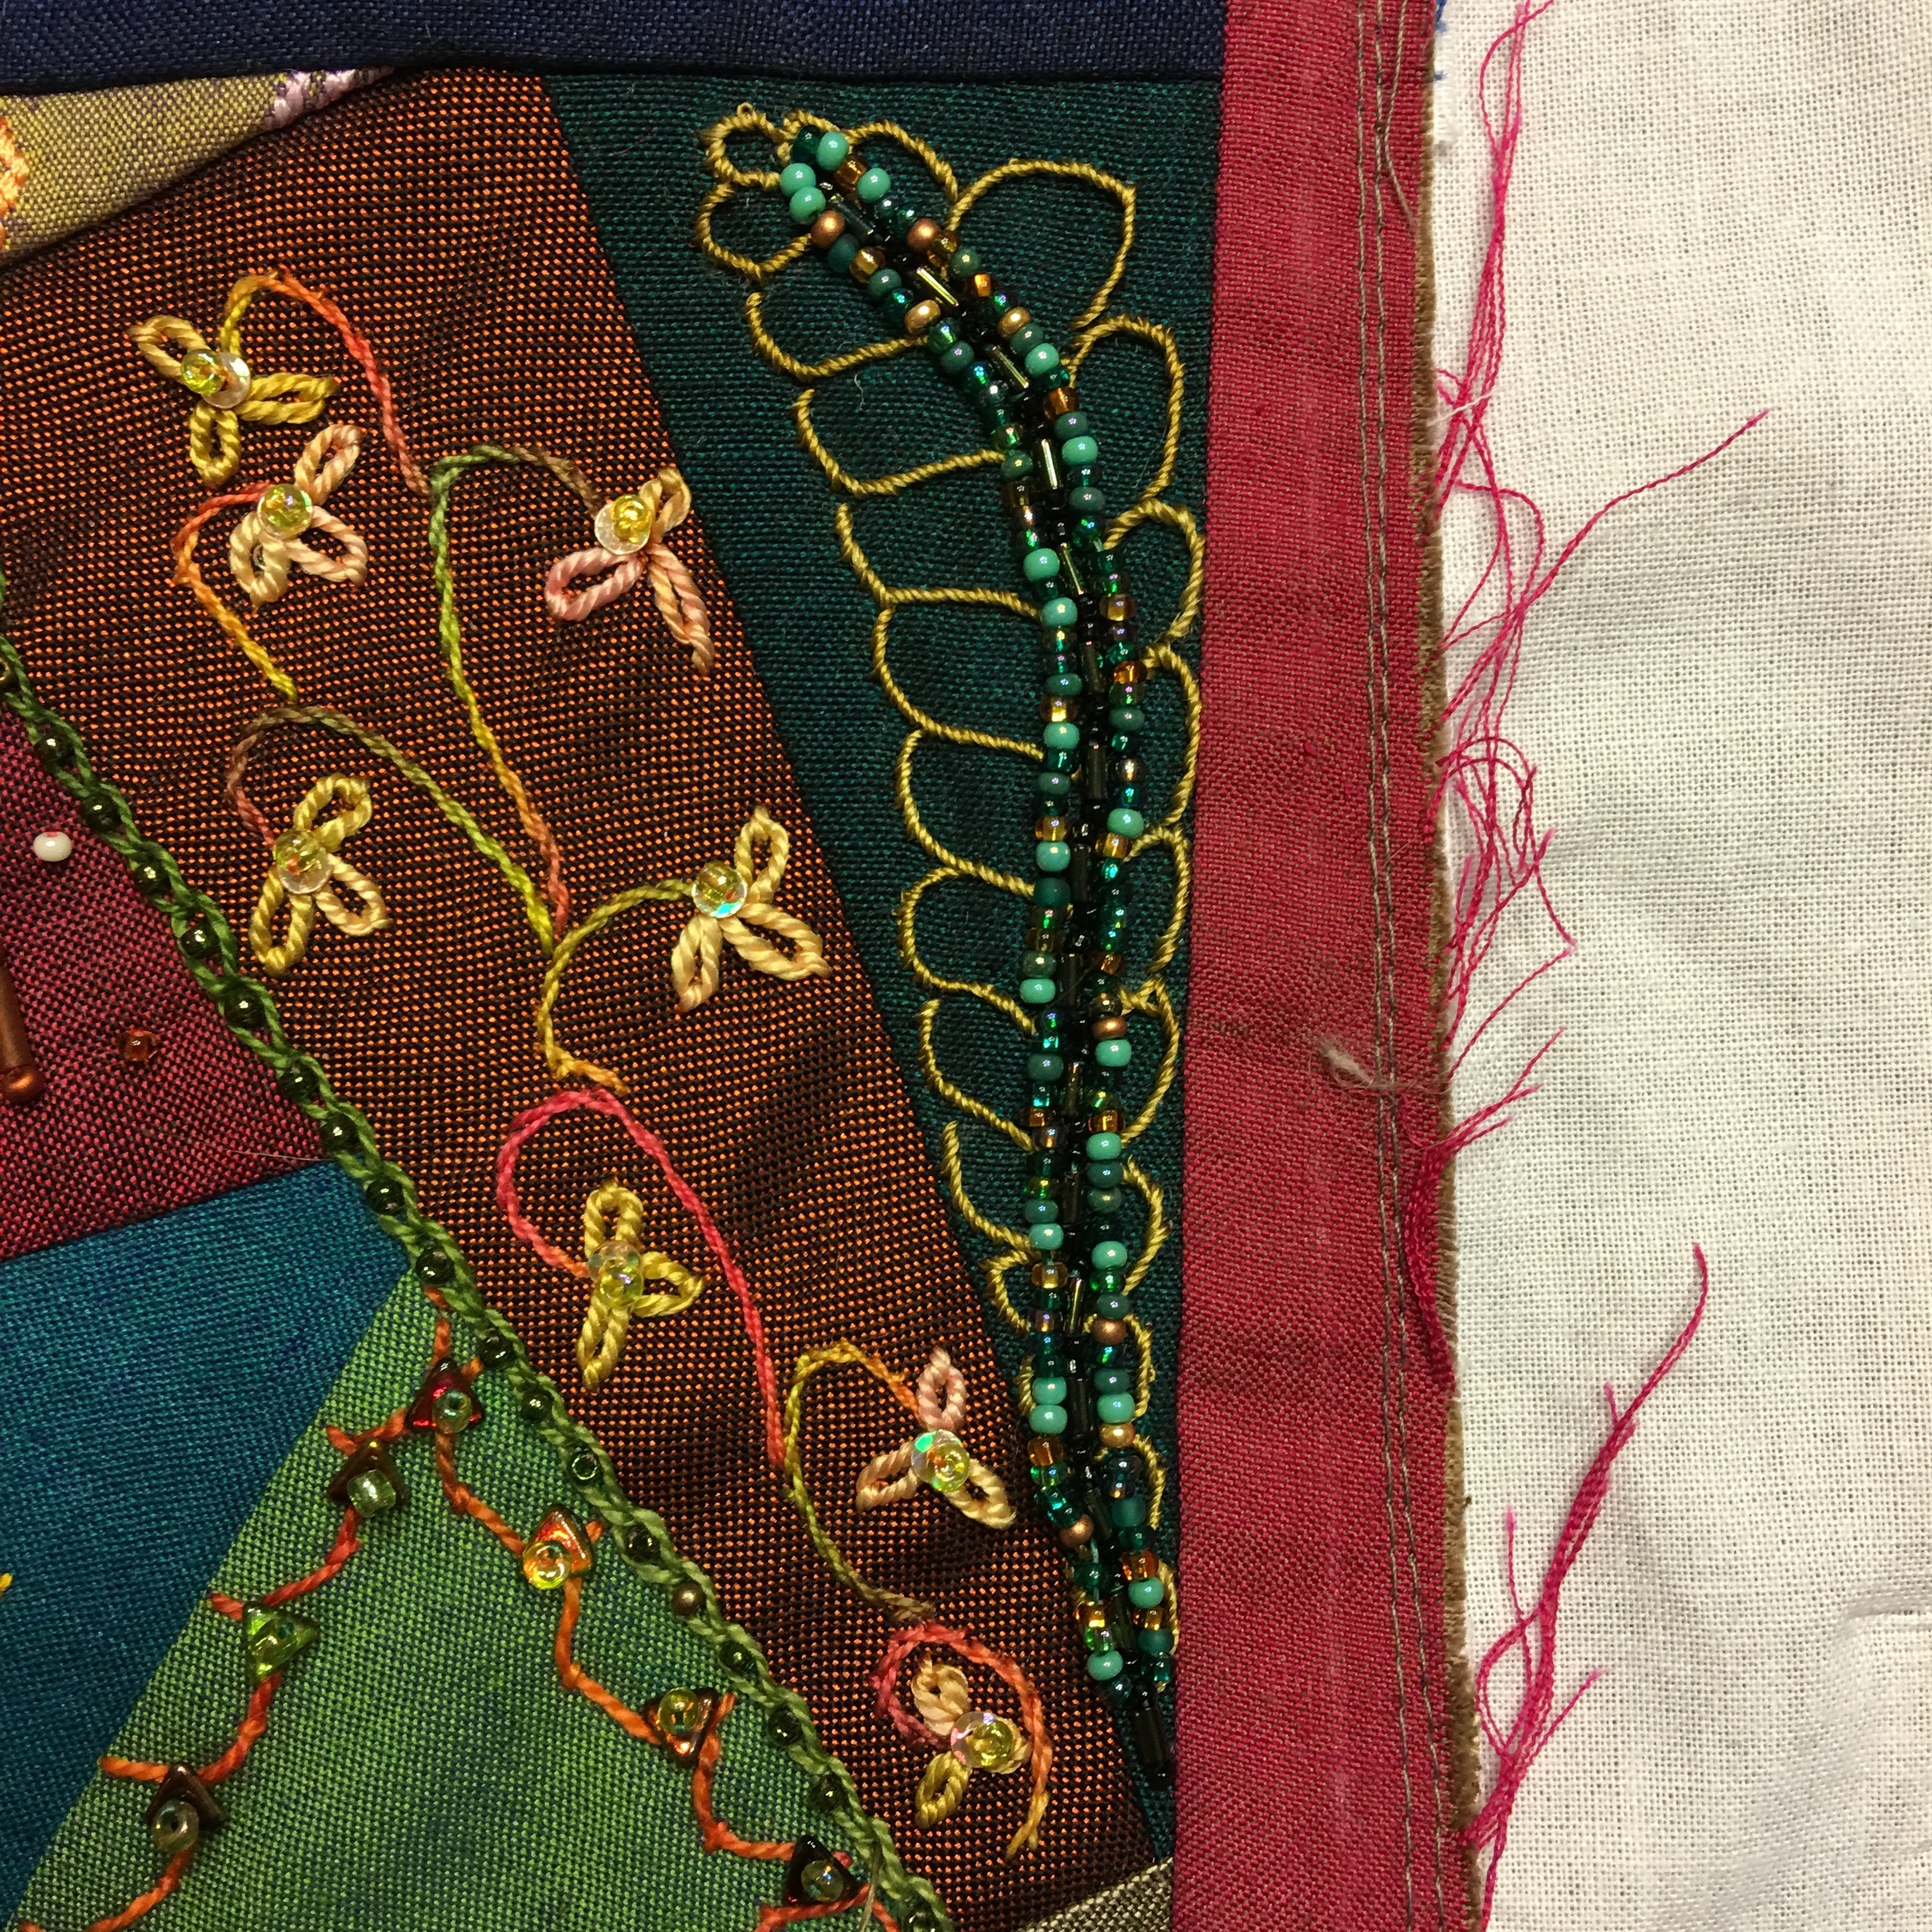
I had originally planned to spend most of the afternoon in my sewing room but by the time we got back from our adventures all over the shores of Lake Ontario, it was later than I’d intended. I only ended up with a little over an hour. It was long enough to clean off the cutting table (ahem), remind myself where I was in the Halloween project that no, didn’t get done in time for Halloween again, and get one more block done, which completes the top row. I lost a couple of points on the “spooky” banner in the upper right, but overall I’m pleased with the way it’s turning out so far.


IMG_1394.JPEG

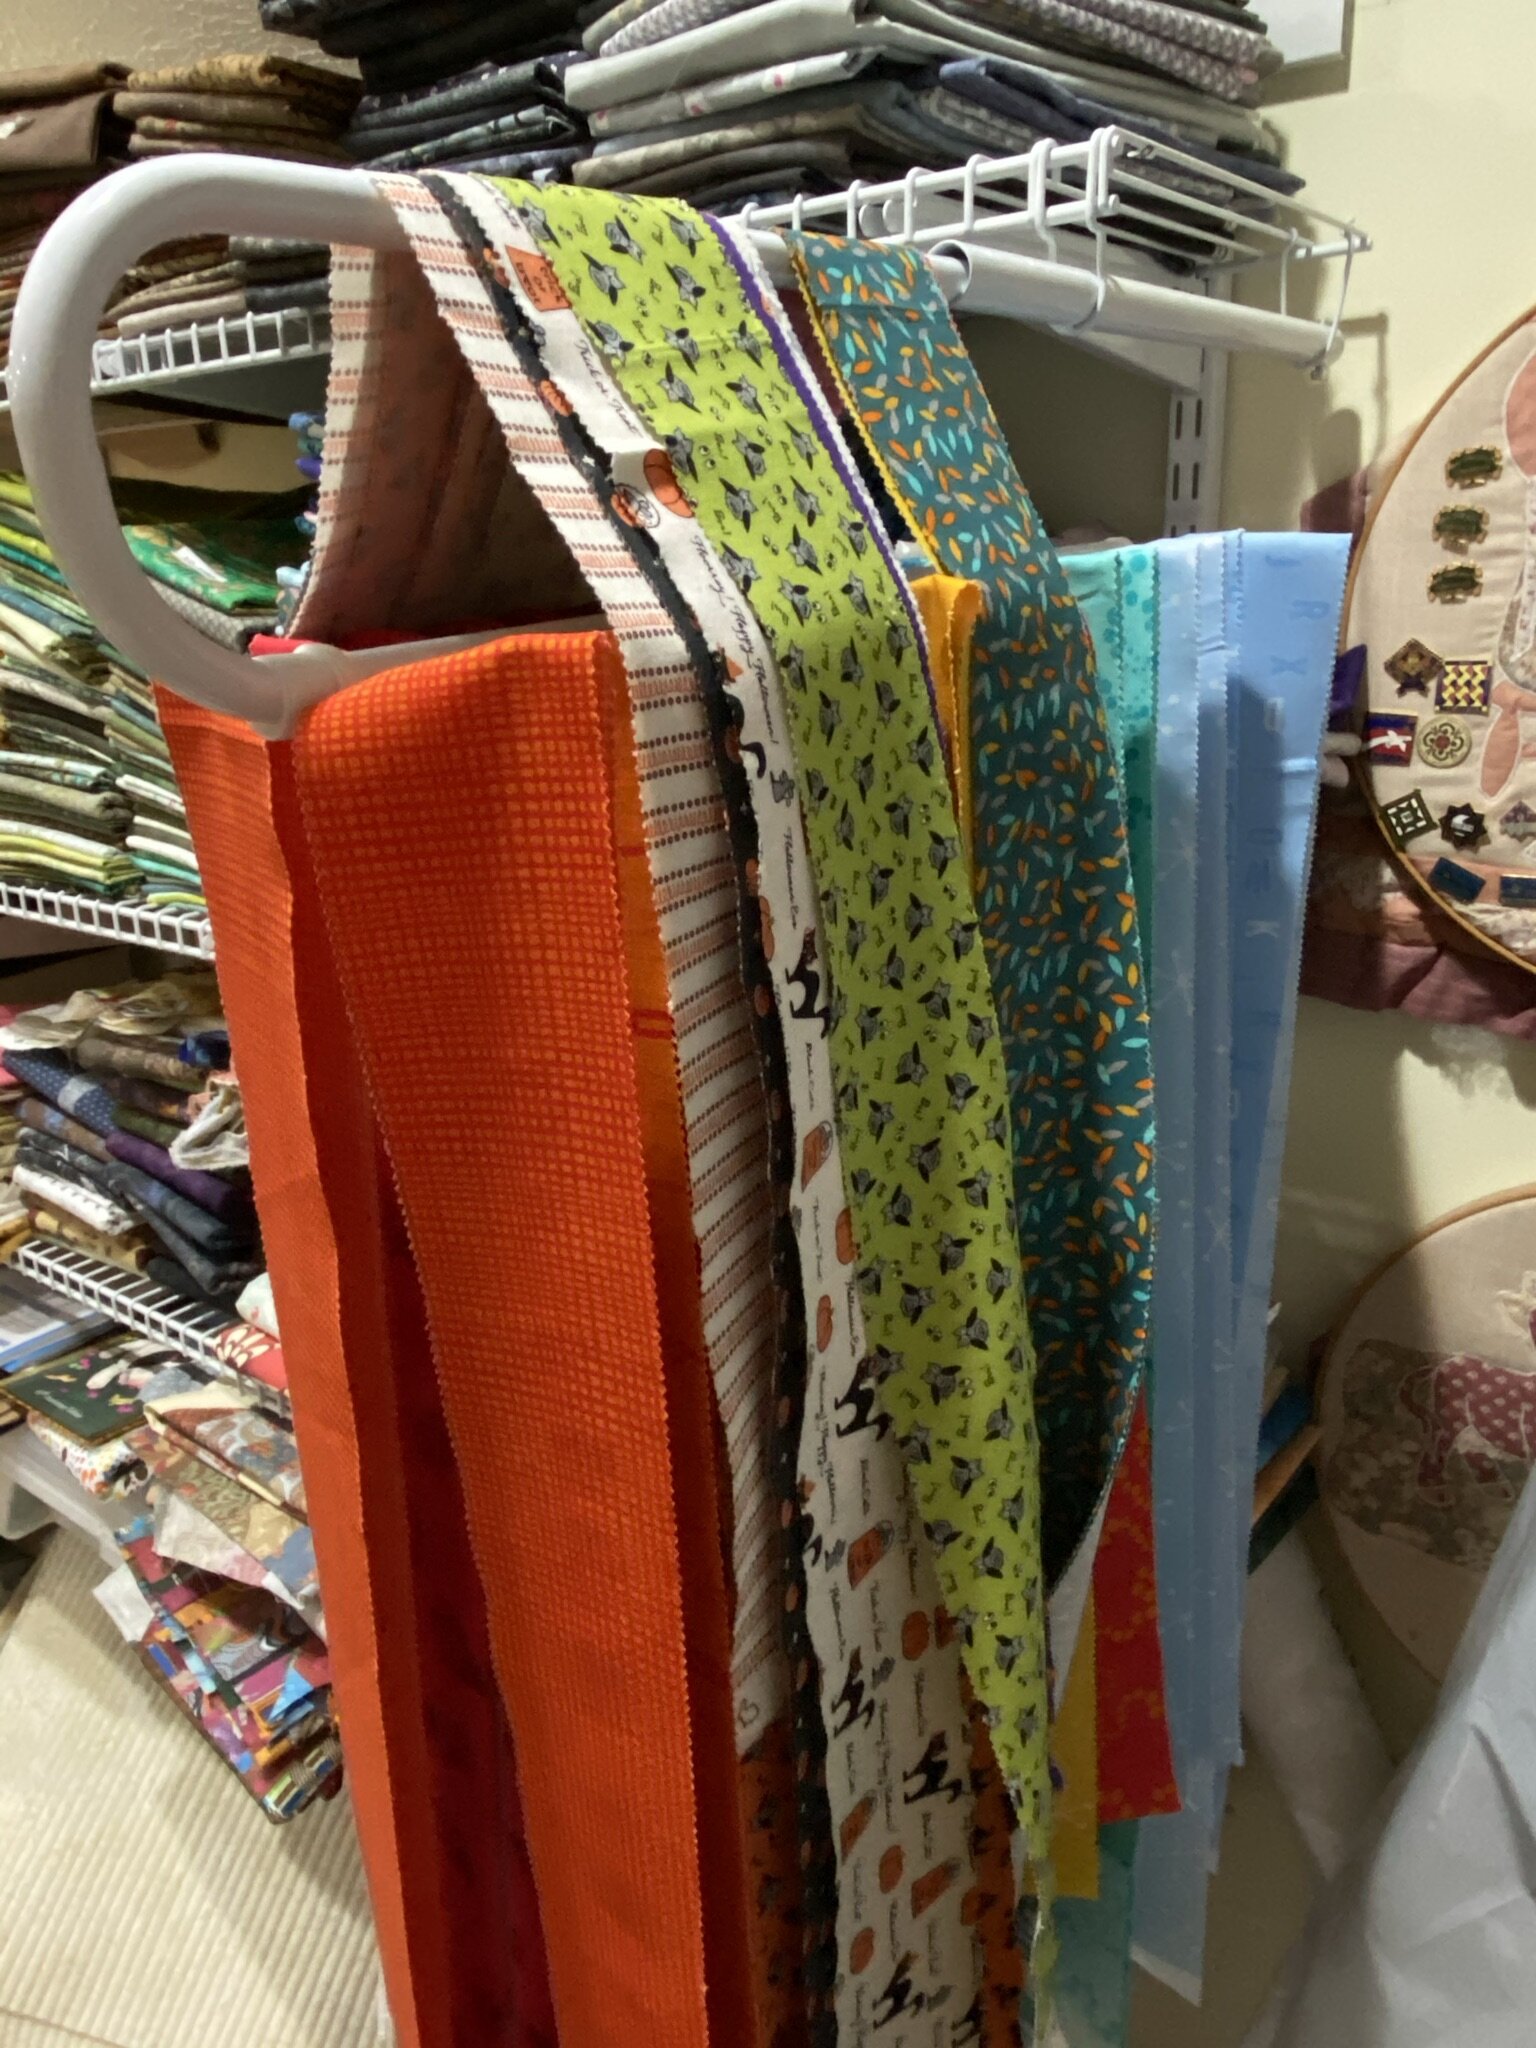
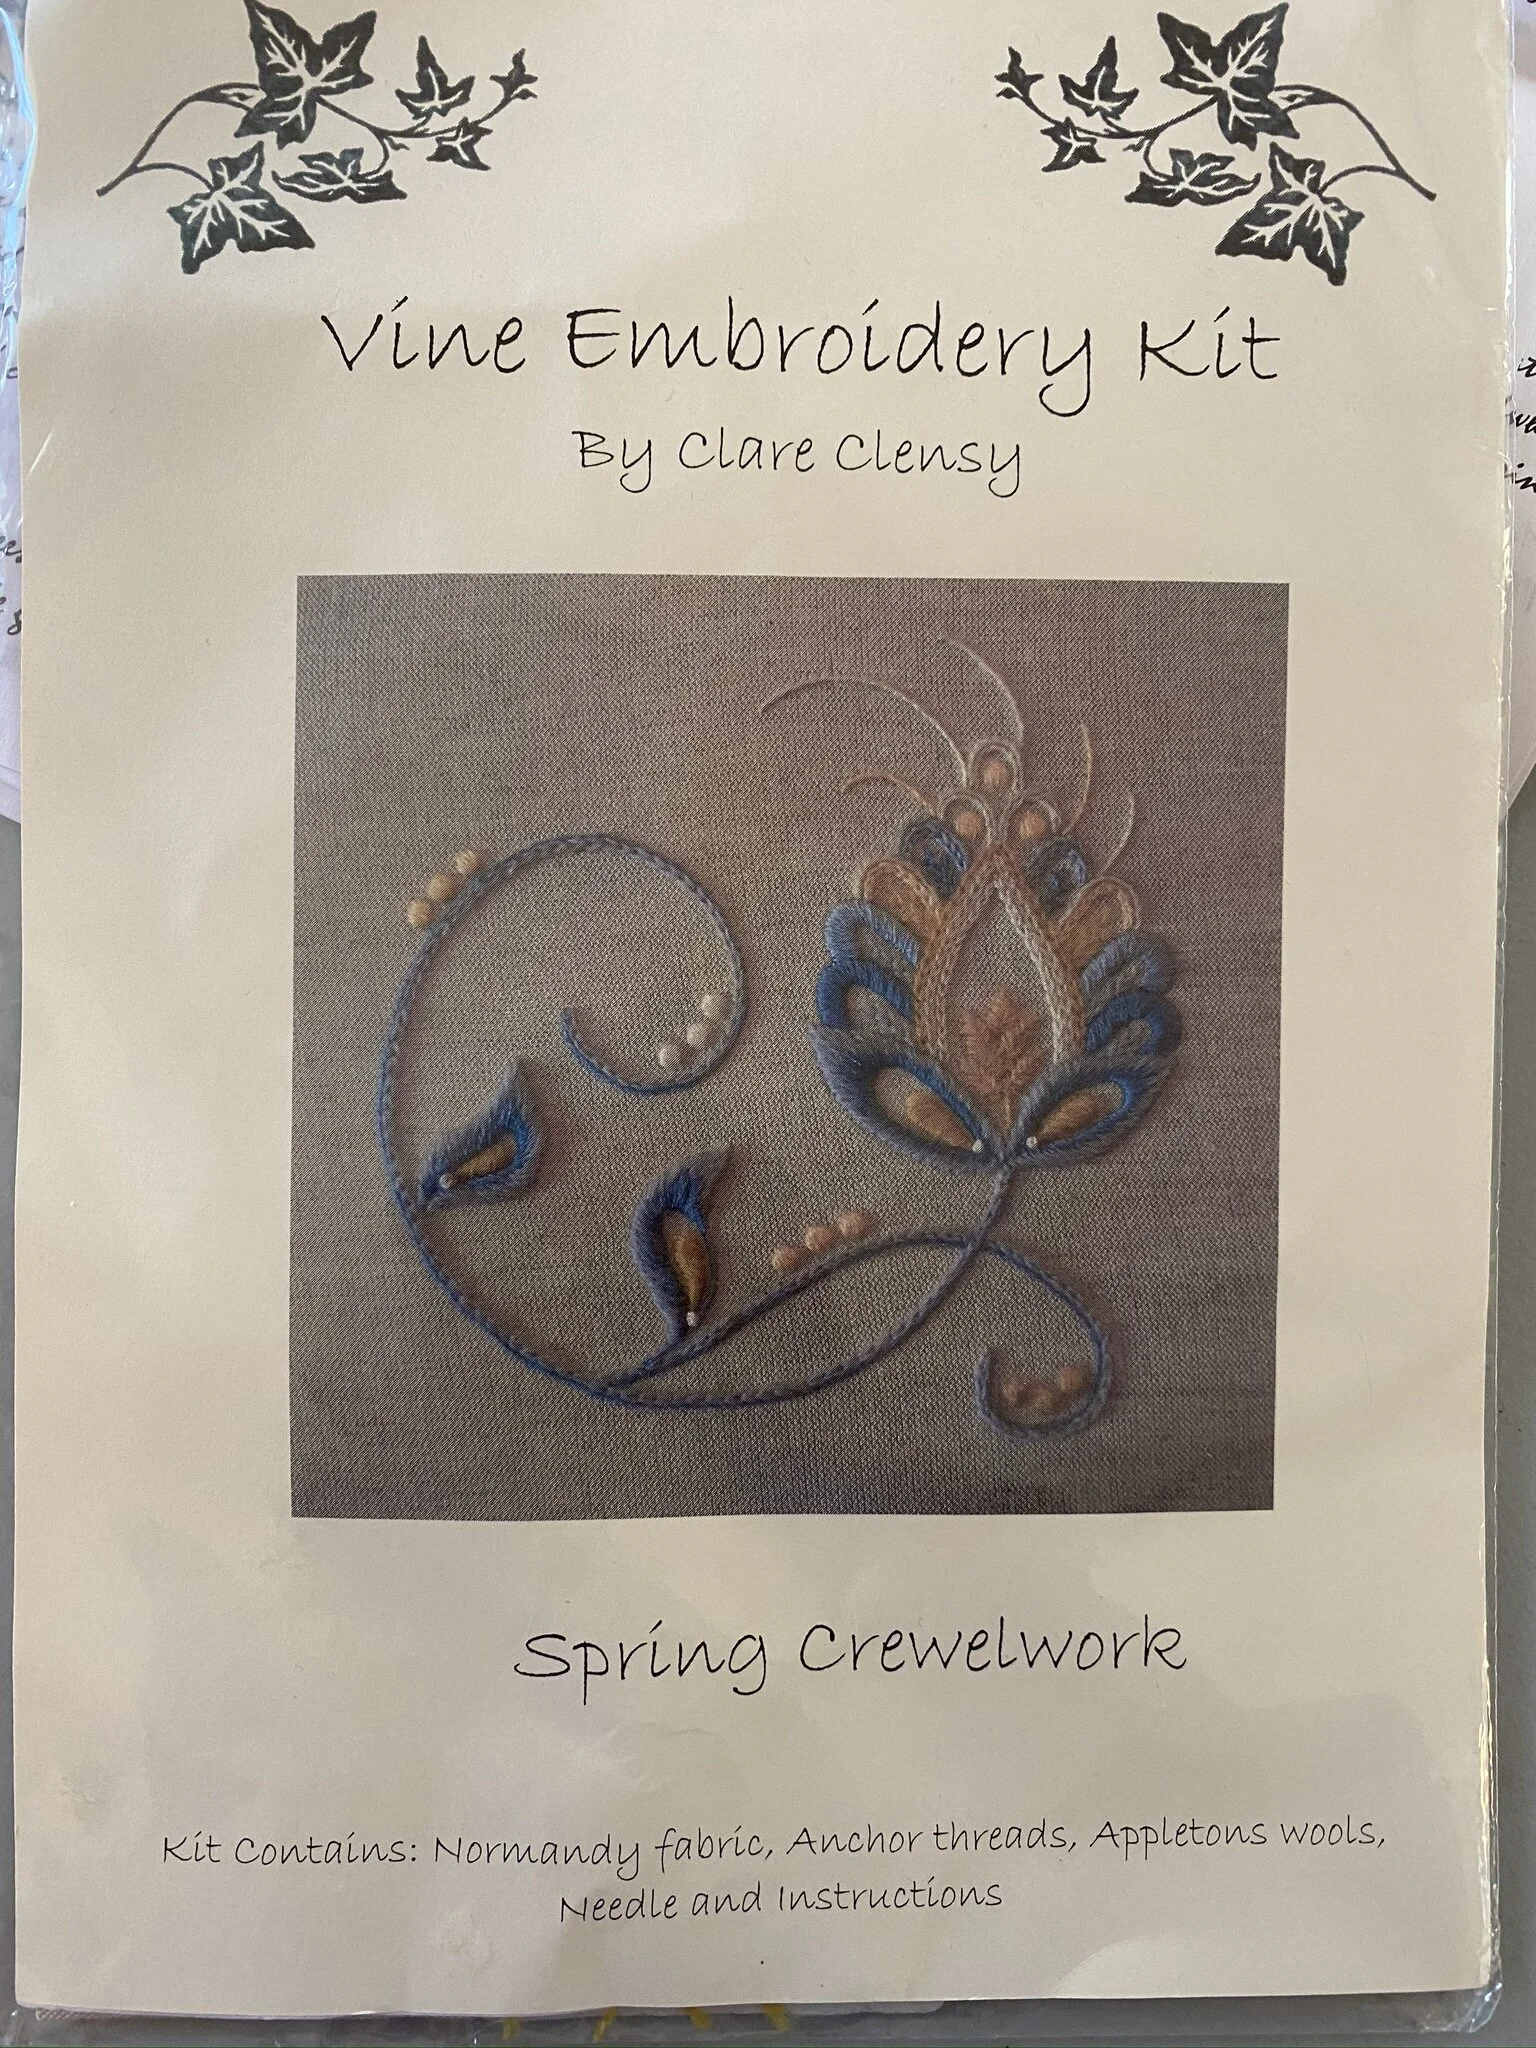
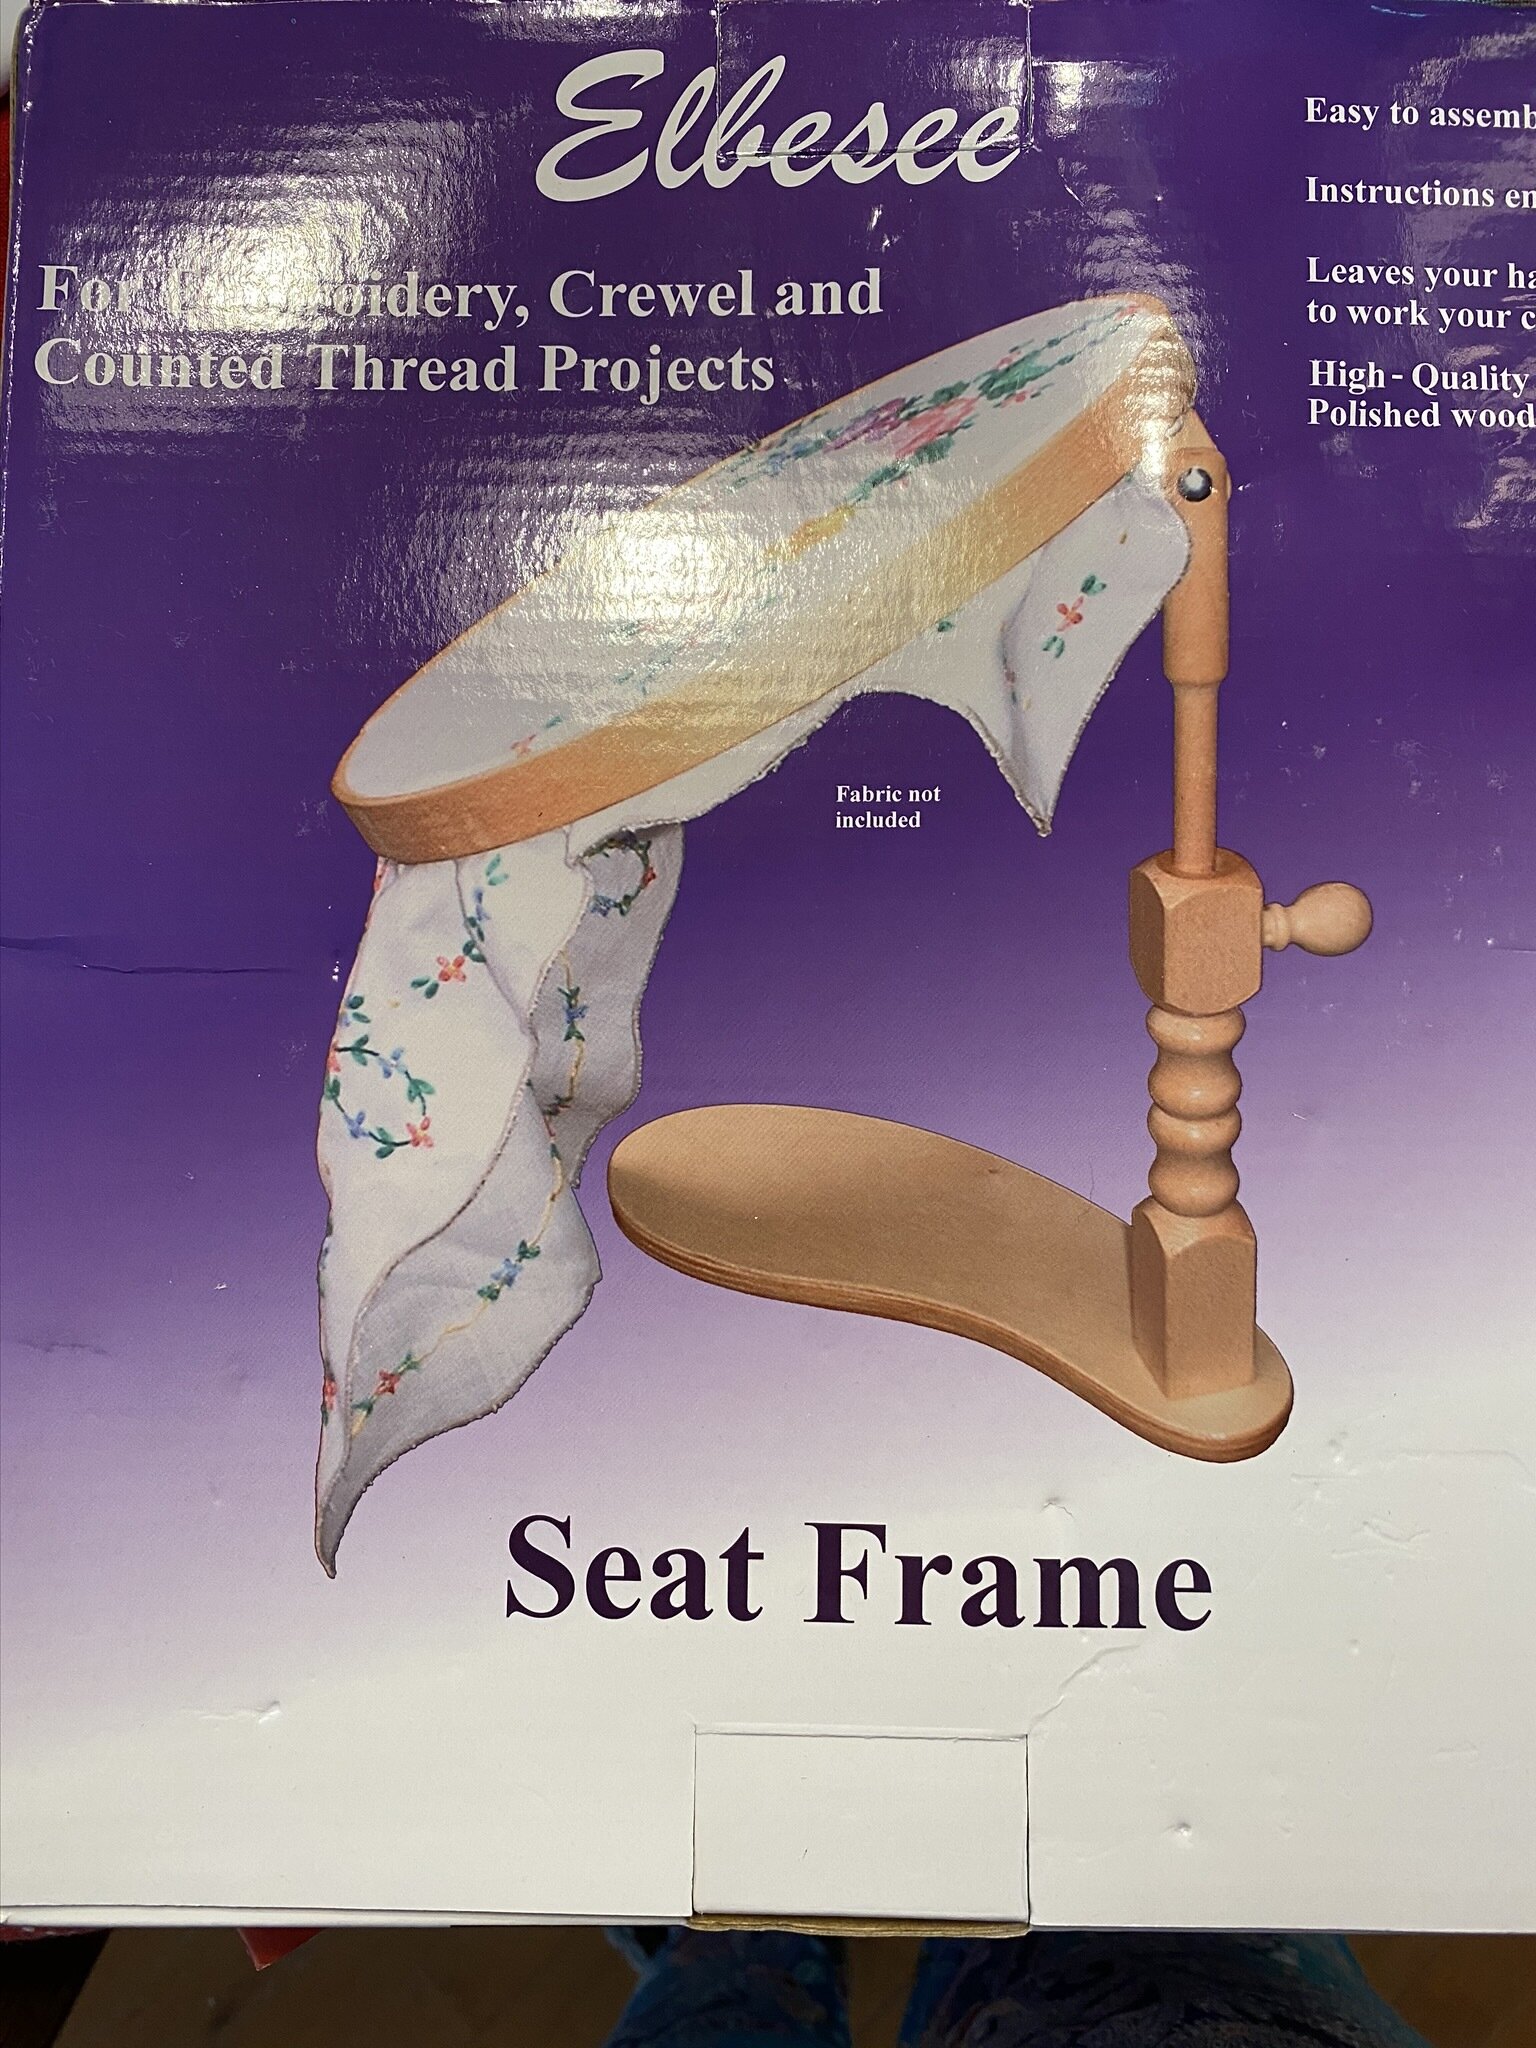
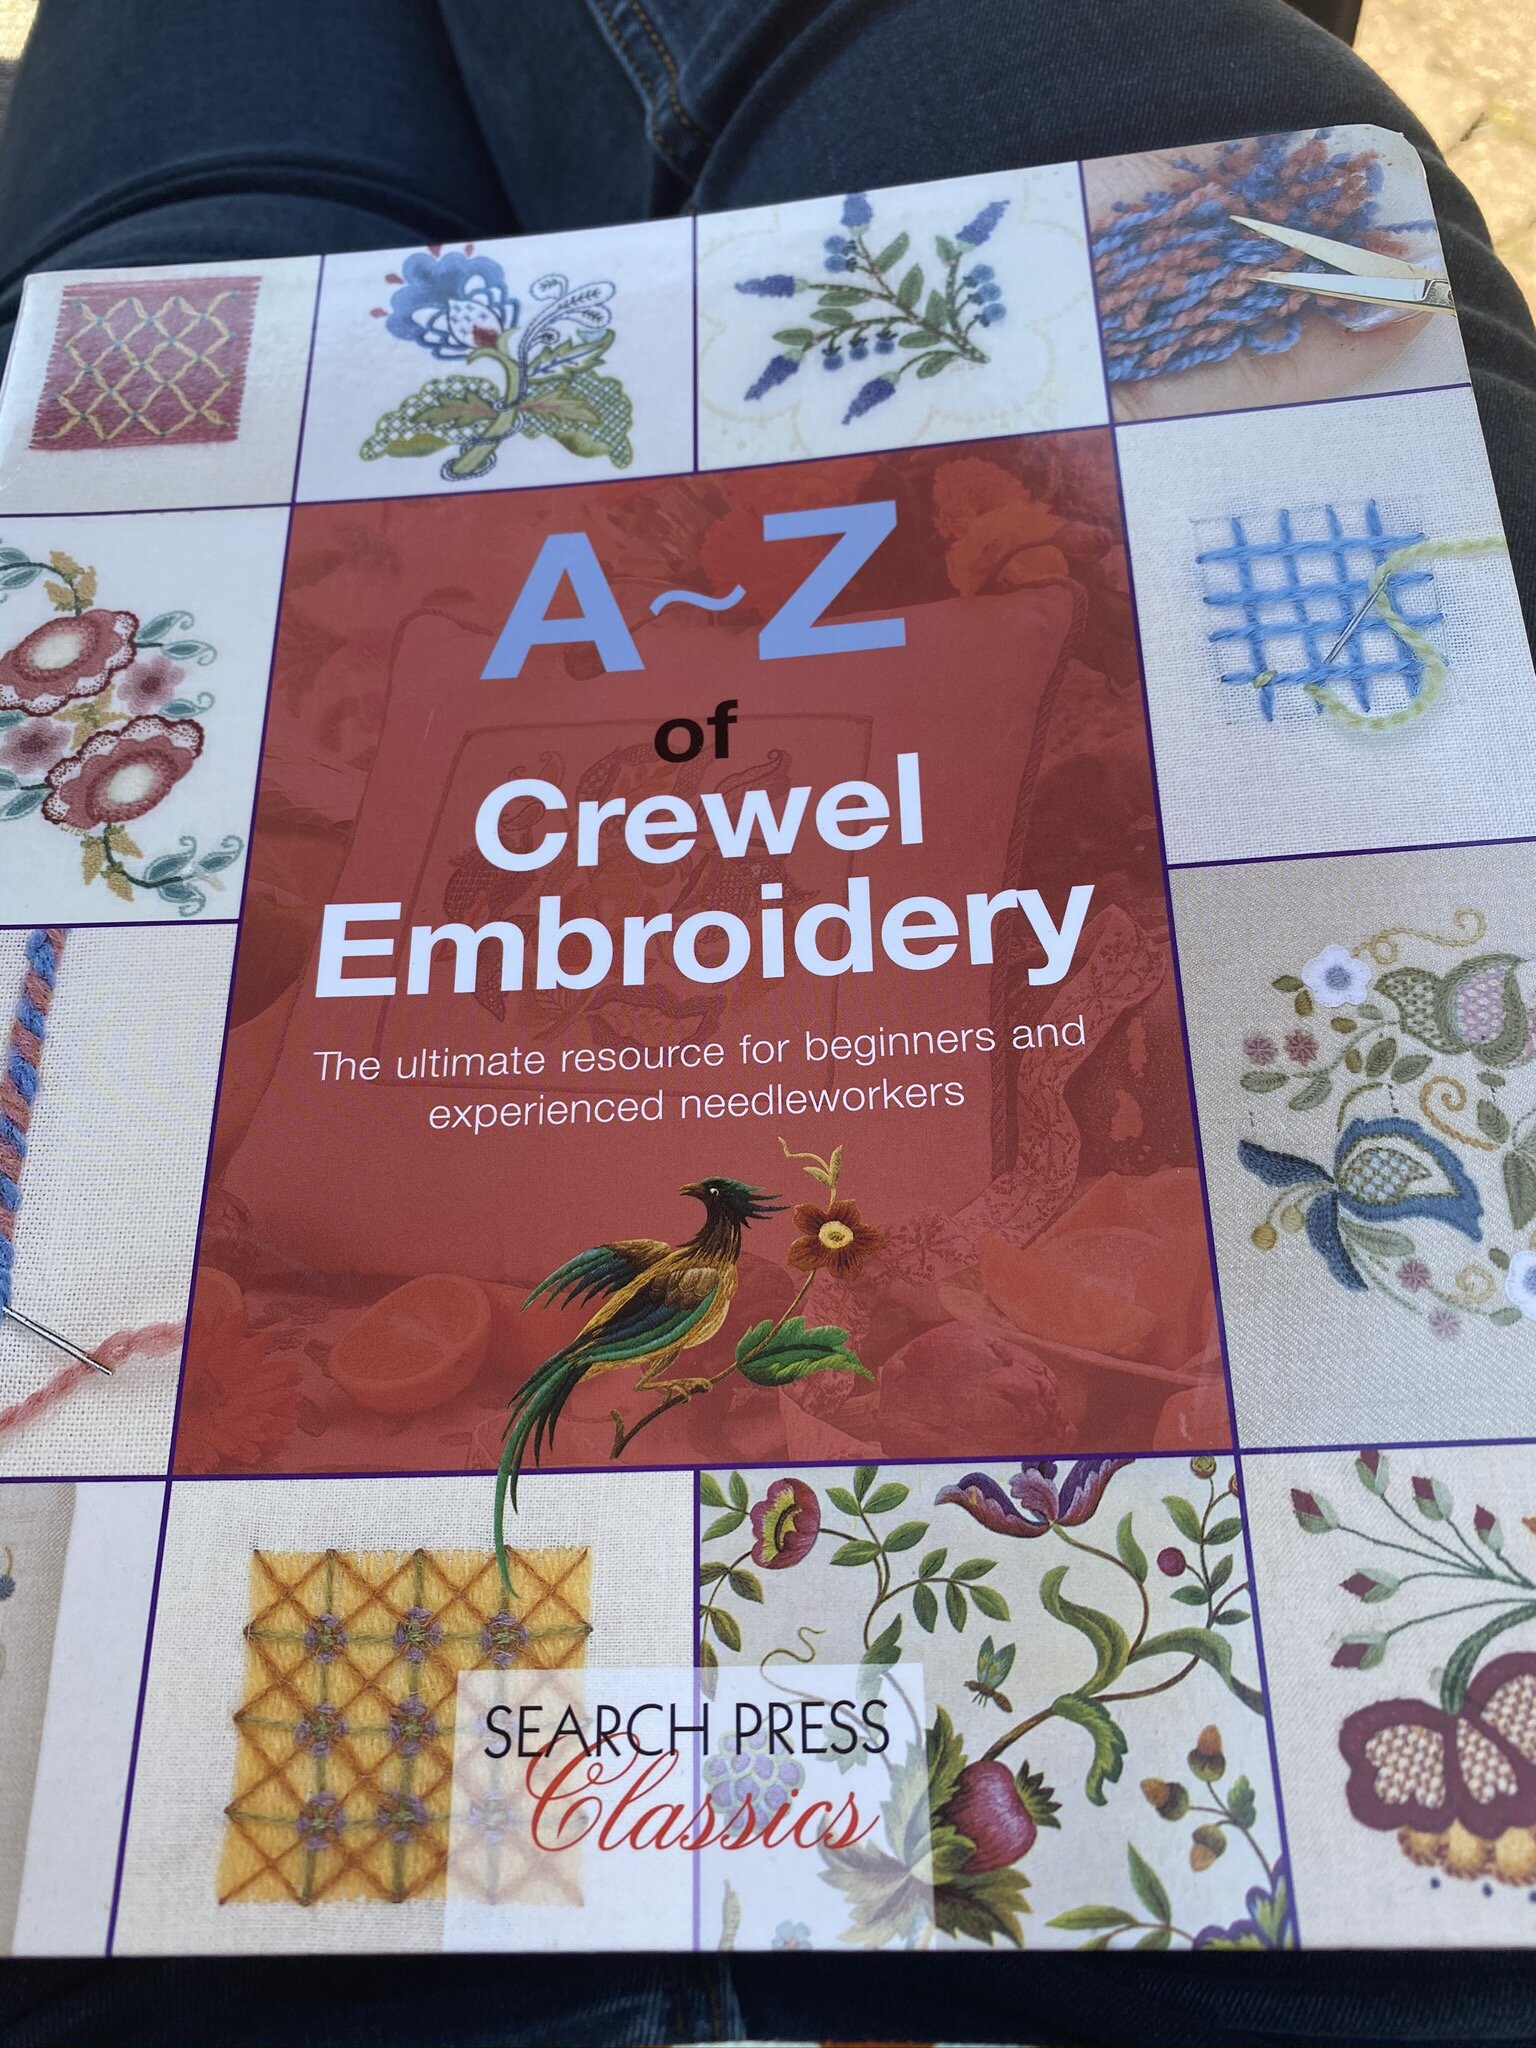
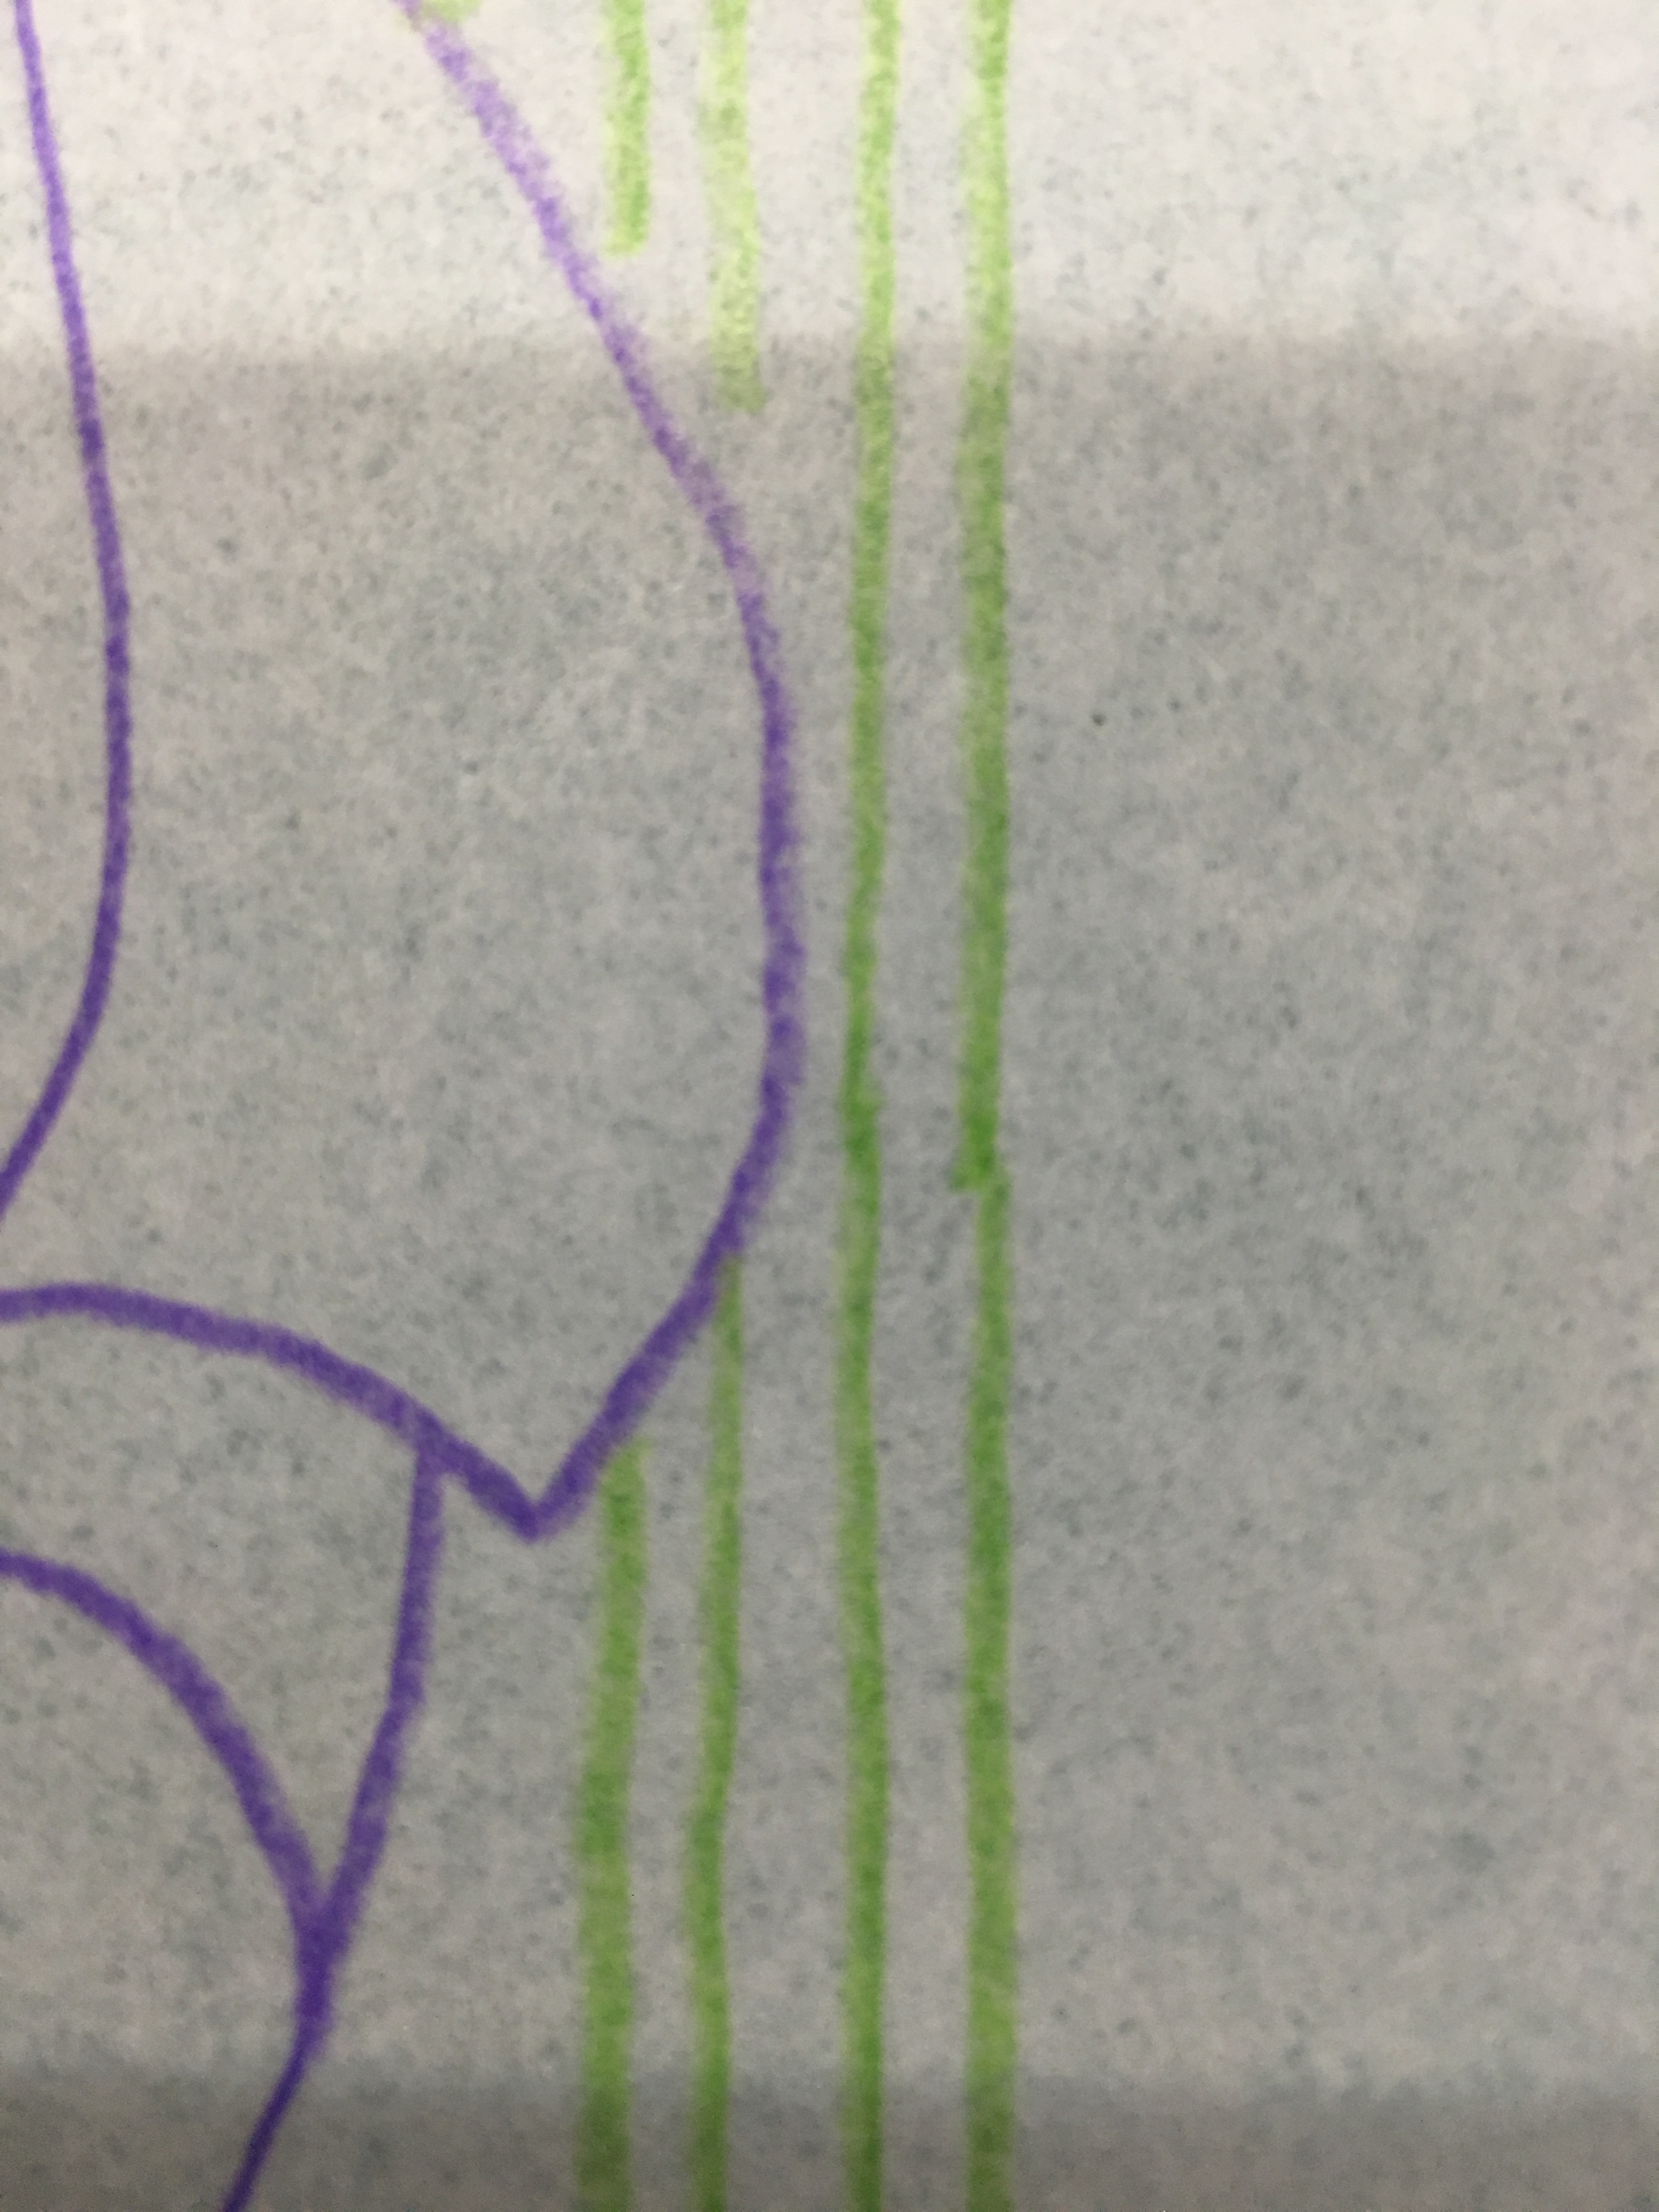
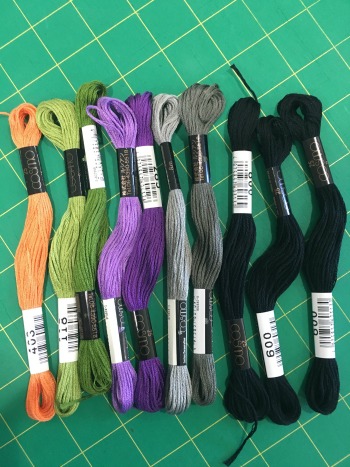
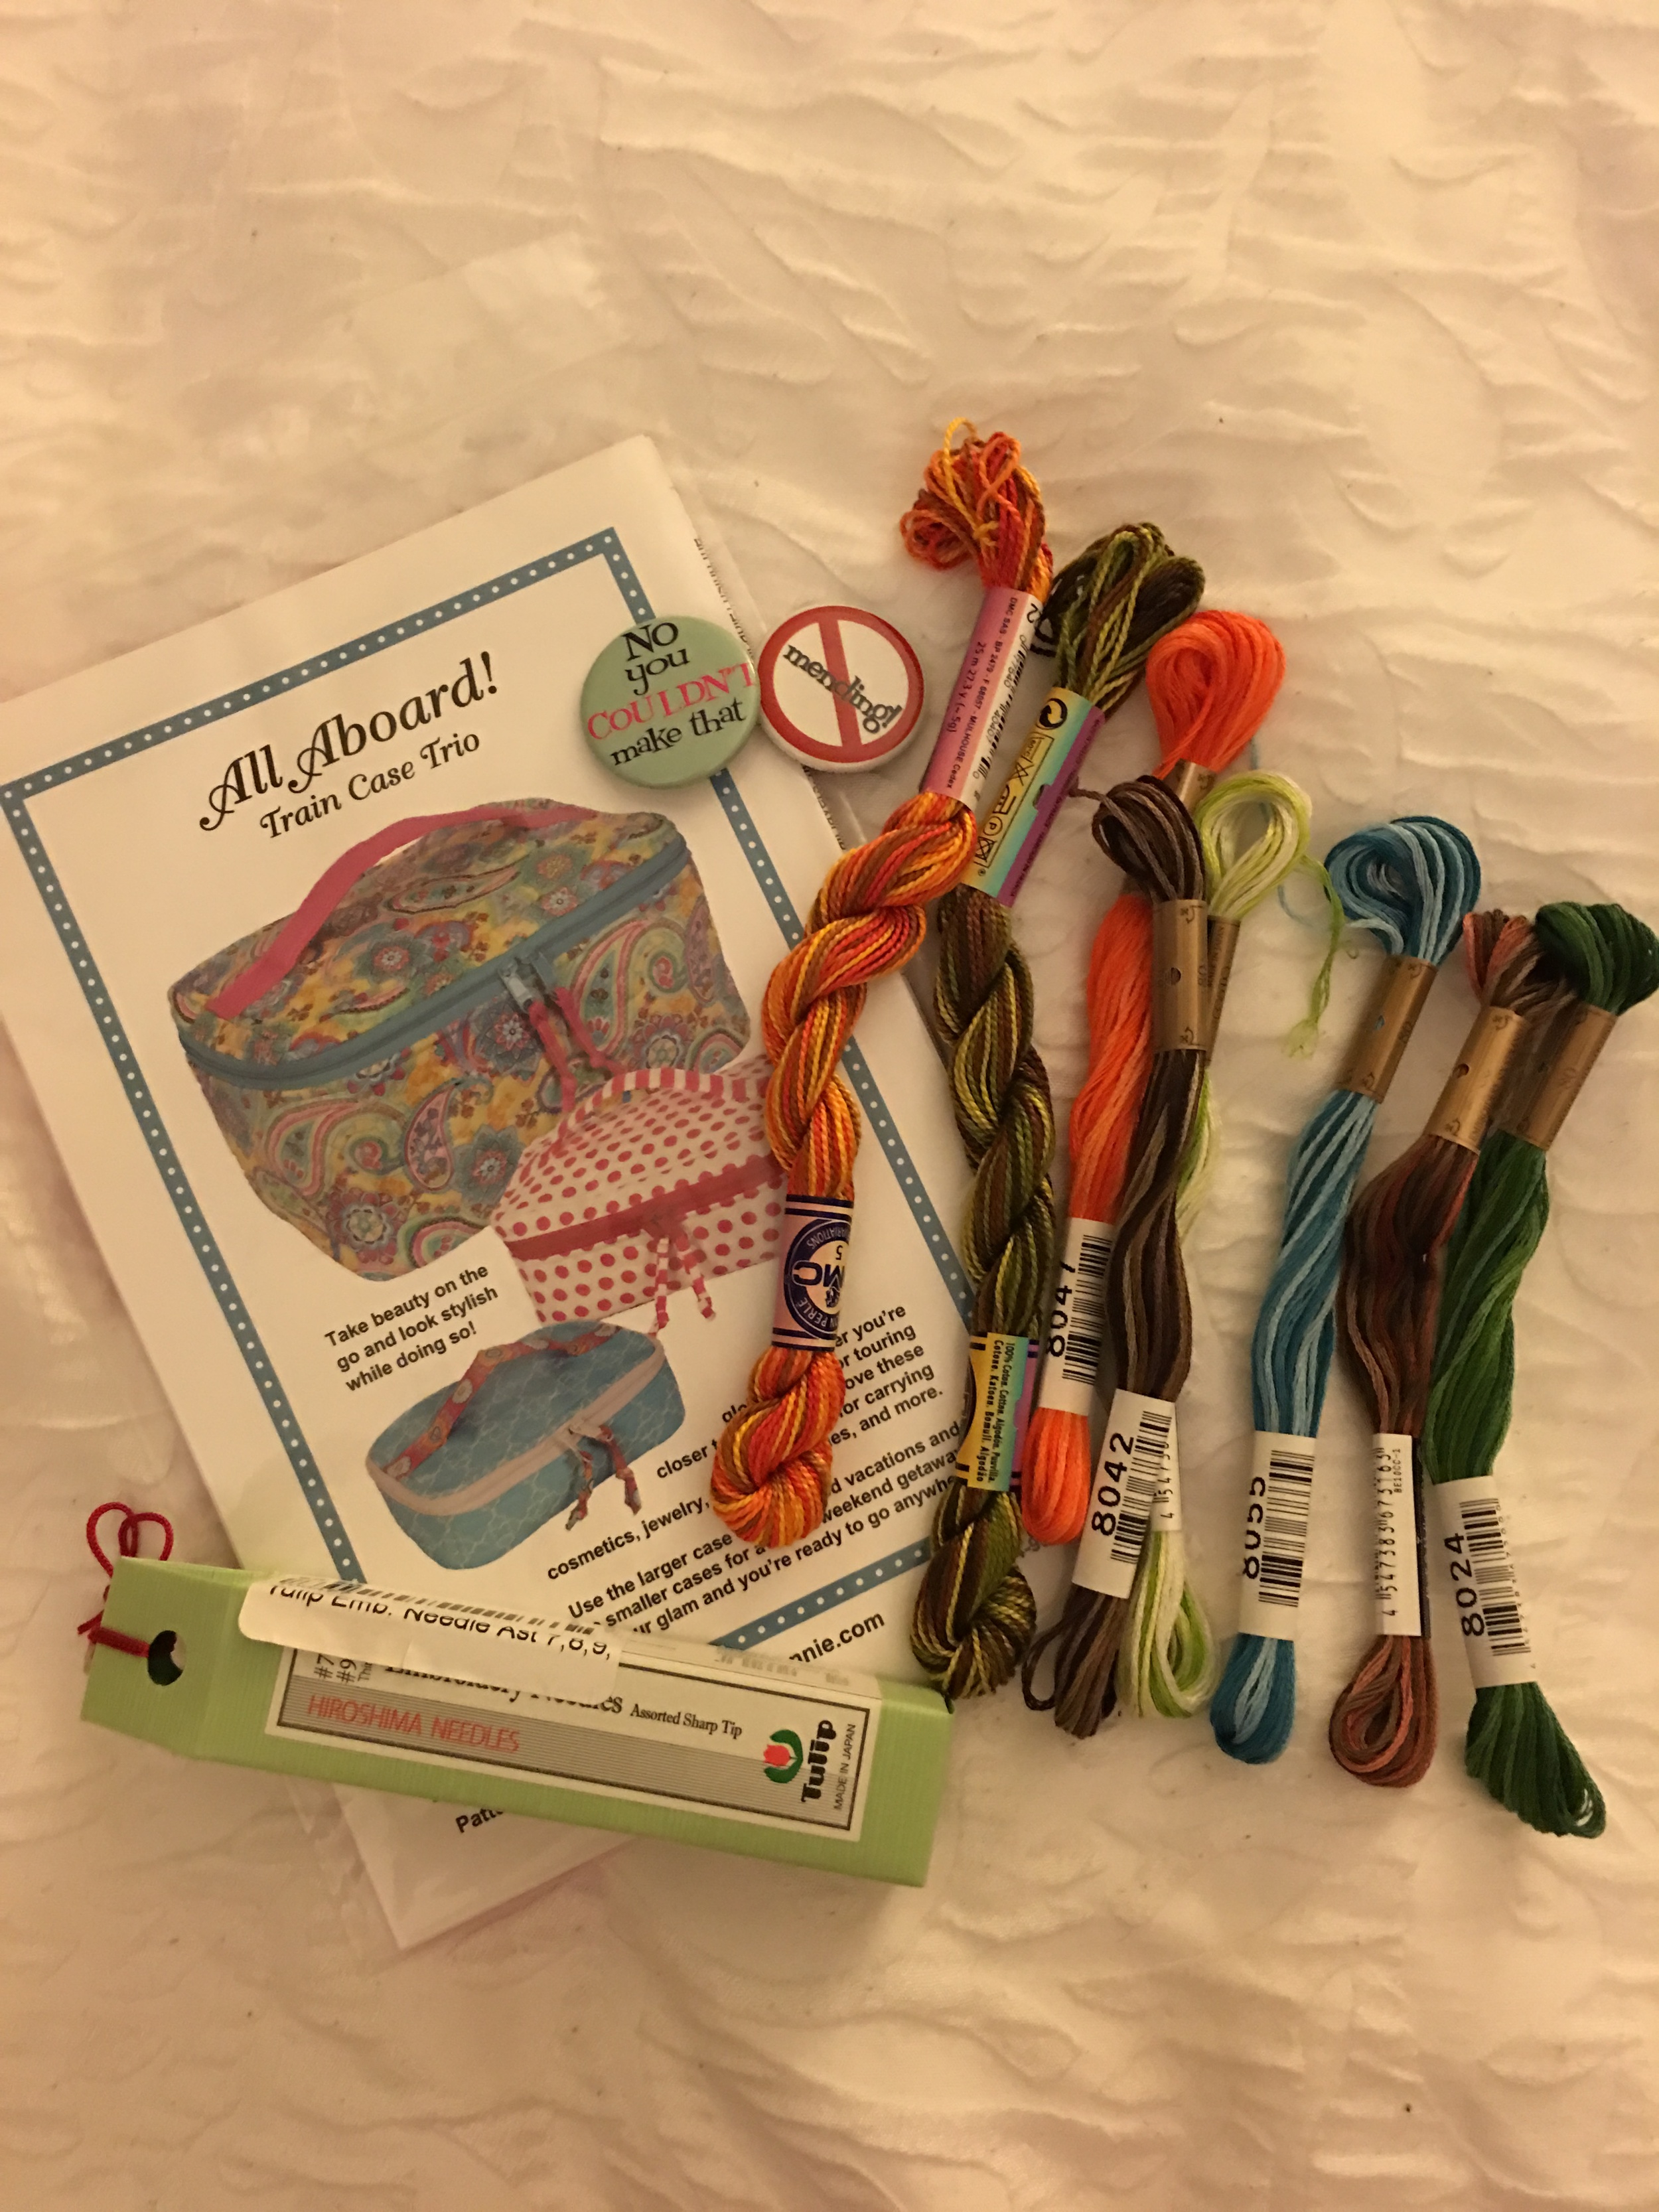
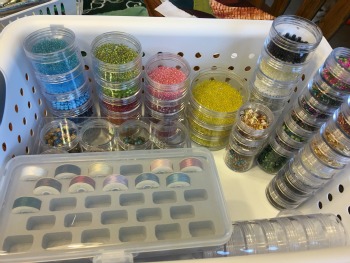
Meanwhile, I’m trying to remember what I intended to do with these. {{head scratches}}.


8IR.gif

In other news, my daughter has just been quarantined. She lives about 3 hours north of us so this Mama Bear is worrying and not able to do anything about it. Someone in her office tested positive a few days ago so they quarantined a few people right off the bat, and a few others subsequently tested positive, but my daughter and her office-mate didn’t get sent home until yesterday afternoon. Then her office-mate tested positive this morning. My daughter went right in today and had herself tested as well, and so far so good. Still, she’s definitely quarantined through Thanksgiving which is deeply disappointing, and I hate thinking of her alone in her apartment that day. If she stays healthy, her quarantine lifts the day after Thanksgiving so she’ll probably come home that weekend and we’ll do something late with her. But we’re taking it day by day. While I’m praying she stays COVID-free, it’s hard to imagine that she’ll be able to be with everyone else in her office down.

Yikes.

Lookie what's coming together!

IMG_1156.jpg

Can you believe it? This quilt has now officially been four years in the making. I got the first delivery in June of 2016. As I suspected when I started it back then, although I definitely hoped for better, it wasn’t going to get done by that first October.

After spending a significant amount of time today cleaning out my bedroom closet, relegating clothes I’m unlikely to need in this pandemic situation to the unused closet in my daughter’s room (I’m not doing much in person in the next several months so dress clothes are tops only), moving summer-colored clothes out and moving my cold-weather clothes in (although we’ll still have warm weather, I do a lot of layering so my fall wardrobe will do double-duty), and generally re-organizing and cleaning things up…I rewarded myself with some time in my sewing room.

It actually took me almost an hour to sort this BOTM out, put all the parts in order, and read through the piecing directions to make sure I understood everything. Then I tackled the first couple of blocks.

It’s very easy piecing, as you can tell. The tricky thing is that I’m cutting the pieces for each block individually and, as we always say, “random is hard.” It’s going to just keep getting harder, too, as I get into lower rows and am trying to make sure I don’t have the same fabric in any of the connecting pieces. So it’s pokey, but not difficult.

It is, however, fun to finally see how it all comes together.

I clearly got lazy partway through the embroidery. The first few blocks I’d carefully pressed and gotten the marks out as soon as I finished them and before putting them away in the project bin. Not so much everything after about block four. When I got done with what I wanted to sew today, I took out the next few blocks and hit them with a spray bottle of water to get rid of the water soluble pen. It may be too late for some of the darker marks at corners, but I have hopes. The water will also help with remaining embroidery hoop creases. Fortunately, I’m cutting them all down small enough that I’ll likely be cutting out all of the hoop marks.

So stay tuned…

IMG_1157.jpg

And by the way, since one of y’all talked me into it, I did buy a couple of Angela Walters’ Creative Grids Machine Quilting Tools. I looked on her blog and she very helpfully listed which she used the most, so I only bought two of her go-to’s, “Slim” and “Elvira.”

I’m still uncertain I’m going to be able to manage these. I’ll keep you posted once I get to the point of experimenting with them.

Tomorrow is supposed to be mostly rain, so I’m predicting some more sewing time in my future!

More of "not a whole lot going on" and a question about scraps

It’s another weekend after a very long week, so motivation is at low ebb. I had to put in a couple of hours of work this morning (Saturday) for some things I didn’t get done during the week because next week…yay!…my husband and I are going on vacation. We leave tomorrow for a week. We’re staying in-state due to the virus and all sorts of travel restrictions/mandated quarantines and such, but it’ll be good to have a change of scene.

IMG_0996.jpeg

In terms of creative work, I did take about an hour last night to work on my newest embroidery project.

I decided I wanted something just a bit more challenging, and I’ve been wanting to do some crewel work again. I love Jacobean-flavor designs, so I bought this kit. It’s a small project so it’s just enough to be interesting without being overwhelming. The “challenge” piece is to help me perfect my stitching, really. there aren’t any new stitches for me in this. Just a more complex combination of them.


IMG_0999.jpeg

Also, after trying to do good French knots on my last project which was in a hand-held frame, I decided I really needed to figure out a way to have both hands available. So after reading some recommendations and such, I ordered this from Amazon.

It has three different hoops you can use with it, plus I ordered the clamp accessory you can get to use other frames. It’s nice and sturdy with several adjustable points.

The trick is knowing how to position the darn thing.

I used it for the first time last night and kept getting myself into all sorts of awkward positions as I was working my way around the design. Like I was playing Twister or something.

It wasn’t until I’d finally decided I was too tired to do anymore last night and was putting things away that I realized an entirely different way I could’ve positioned myself with it and probably would’ve had far greater success. Oh well, that’ll wait until after vacation.


IMG_1039.jpeg

I’d actually taken my first stitch in it last weekend, but with just that one stitch I managed to get myself a pretty serious tangle in the back. I was WAY too tired last weekend to have even been pretending, so I set it aside, tangle and all.

So… all that’s to explain why I only got this much actually embroidered last night.

Watch me burning up the track.

It took several minutes to get that tangle taken care of, several minutes of futzing with the new frame to figure out how I was going to sit, and then away I went. Watch my dust. (It was very slow going.)


I’d planned on making myself some more masks today as I’m not sure I actually have enough cloth ones to get me through a week away. However, I discovered I am well and truly out of elastic and don’t like any of the other methods. So I’ll have to use the disposable paper ones once I’m out of my cloth ones. I already have elastic on order so, by the time I get home next week, I can make myself a few more. I just thought I remembered having a couple of mask’s worth left. Nada.

Instead, I decided maybe I’d cut some more scraps into usable sizes. Well, motivation left me on that one too, so here I am writing a blog post instead. But I have been doing some blog-surfing to decide what scrap sizes I want to cut routinely. I’ve been doing 2 1/2” strips for a long time—whenever I cut fabric for a quilt, if I had less than a half-yard left, I’d slice it into 10”, 5”, or 2 1/2” strips/squares. Now I have a whole lot of “real” scraps from making masks—fat quarters with big holes in them. I’ve been doing 2 1/2” squares, and a few tumblers with my tumbler die when the piece is a little bigger. But I really want to get myself into a system.

In my growing AccuQuilt collection, I have a 5” die, a 2 1/2” square die, and a 2 1/2” strip die. Those are easy sizes to cut, and I do still remember how to use a ruler, LOL.

ScrapTherapy uses 2”, 3 1/2”, and 5”.

Bonnie Hunter does strips in 1 1/2”, 2”, 2 1/2”, 3”, and 3 1/2”, then cuts those down when she needs squares or rectangles. (She seems to vary from these sizes but those are her standards.)

In my current scrap stash, I have 2 1/2” strips, some 2 1/2” squares, 5” squares, 10” squares, and some small number of 1 1/2” strips.

If you’re someone who routinely cuts scraps into usable sizes, what sizes have you found most helpful to have in a stash? I don’t want to get overly complicated, but I would like to get in habits so I need to be more systematic.

Help?

Weekend Check-in

IMG_0901.jpeg

I didn’t realize that I hadn’t posted once I finished the Halloween embroidery. Yes, this project is now finally on to the next step—piecing! I really need to get on to that. Halloween is right around the corner.

If I recall, most of the fabric is in 2 1/2” strips—it’s all in the project bin but I haven’t taken it out and looked at anything other than the embroidery for awhile. I should probably target that project for next weekend. It would be nice to have the Halloween project actually done in time for Halloween…five years later….


IMG_0928.JPEG

I’ve been more in the mood for embroidery lately than for quilting. I think that’s because I haven’t been sleeping well lately so I’ve been pretty fried after work every day. As long as I’m doing embroidery, I don’t feel quite as guilty binge-watching guilty-pleasure-TV. “Look, I know I’m on the third episode in a row of Dateline: Secrets Uncovered, but look at how much stitching I’ve done!”

The night I finished the Halloween embroidery, I immediately started searching for new embroidery designs in some of my favorite places. You may recall my new little niece? She’s four months old now and I’ve still not gotten to cuddle her. Blame my auntie-withdrawals but I ended up buying several designs I want to work up for her nursery as Christmas gifts. They’re all from BumpkinHill Designs. They’re stinkin’ adorbs. Before I started in on those, though, I wanted to do more of a practice piece that would be just for me.

The design is another BumpkinHill one. We all know how I feel about pudgy birds. And tea. Plus I’d get to use all sorts of pretty colors (no more limited color palette for years on end!) and a slightly wider variety of stitches. I’m using some embroidery fabric and some lightweight stabilizer I had in my stash. I’ve lost the AC plug for my lightbox (no idea) so I had to use the old window-and-painter’s-tape trick for the transfer. My lines probably aren’t as true to the pattern as they should be.

It’s a fun design to work. However, I’m not keen on how my fabric and stabilizer are behaving. It’s a little too lightweight to hold up to the stitching. The design calls for three strands, which I’ve used in a lot of places, but I switched to two strands for a few elements because the fabric just wasn’t behaving. And the French knots? Puh-lease. They’re either pulling through the back or I overcompensate by making them too big. I’ve ripped out multiple FKs and finally decided to wait until I have everything else done, then tackle them again (perhaps after a glass of wine). I’ve done FKs before with success—but these are killing me. I’m definitely checking out other fabric and stabilizer options for when I do my niece’s project for realsies.


As an example of how focused I am on embroidery these days, I’ve made a few new book purchases.

I love the A-Z books—they have excellent diagrams. I already owned another of their embroidery books—on motifs. Tatiana Popova is a talented designer of crewel embroidery designs in a style I adore; I’m working my way up to doing something of hers, or one of the ones I’ve been drooling over on Mary Corbett’s blog.


IMG_0943.JPEG

And just because I’m a gadget girl, here’s a review for you. As I dove back into my embroidery for the first time in years, I also began to hanker after a neater-looking floss holder. I use Artbins and have a shelf that contains all my supplies, but the DMC floss (and floss like it) container just had skeins tossed in it, organized by color, but I had to dig through everything to see what I had. I prefer my floss to be on bobbins when I’m using it—much less likely to end up in a tangled mess. So I ordered a bag of bobbins from Amazon and ended up choosing one that came with a doo-hickey for winding bobbins.

Once I managed to get it hooked on to the side of my Artbin divider securely, it actually worked like a charm. I take the paper off the floss skein and put the resulting “loop” over my right arm so I can quickly unwind it with a few flourishes of my arm (very graceful and dancer-esque, I assure you); then I use my left hand to hold the tension while my right hand then starts winding the little doo-hickey. It would go very quickly except I don’t have a fine-point permanent marker so I have to use my label-maker to label the DMC color number on the bobbin, which takes extra time as I have to cut the tape down to size. (You can see a labeled bobbin in the lower right.)

I really wasn’t in the mood for any of the sewing projects I have in my head that I need to work on, so I ended up standing and winding bobbins for about a half hour. There was something strangely satisfying about it.

Maybe this week I’ll sleep better and be more in the mood for quilting. Not sure what’s blocking me, but it’s definitely not felt like my jam the last couple of weeks.

Making It Monday--Sundry Edition

I finally got him done.

It's ridiculous when you only have five minutes' worth of work left to do on something but you keep putting off doing it. 

Pshaw.

Whatever. It's done.

What else did I make? I guess I made a proposal. I spent most of my long Easter weekend (I had Friday and today off) working on school stuff. I once again give tremendous thanks to my D.Min. advisor who took time out of her Easter weekend to review my thesis proposal another time or two in the final throes of trying to get it prepared for the review committee. I'm not sure if I actually made their deadline for this month's meeting or not, so it may not actually get reviewed until their May meeting. Still n' all, May is a very busy month for me so I'm just as happy to get it done now. Fingers crossed that, whenever it goes to committee, it passes!

Let me take a moment, though, to list all the things I made this weekend using my Instant Pot! It's time for you to be dropping broad hints about Mother's Day or Father's Day gifts you'd like--or your birthday--or, just plain go shopping yourself. Let me just say it here, if I haven't said it enough times before. I LOVE MY INSTANT POT!

This weekend, I used my IP to:

  • Make split pea soup (using my favorite recipe here and great smoked hamhocks from an Amish grocery store)
  • Make "baked" potatoes for Easter dinner (30 mins all in)
  • Steam green beans for Easter dinner (5 mins all in)
  • Make Chocolate Lava cake for Easter dinner dessert (using this really easy and incredibly tasty recipe)
  • Make hardboiled eggs for the week (doing them in the IP makes them super easy to peel, regardless of how fresh they are)


  • Make my weekly batch of yogurt, and this week's batch is the best one I've made yet. I got the perfect consistency, and I switched to vanilla bean paste, which has a much better flavor than vanilla extract. There's a bunch of instructions for making yogurt in your IP on the internet--it's super, super easy. 

If you're new to IPs, let me suggest the following accessories:

  • If you want to make yogurt, it's worth buying a yogurt strainer. I tried the cheesecloth thing and I tried the coffee filter thing and it was messy and a pain in the.... Well, anyway. Since I make it every week, I decided to go ahead and pony up for actual strainers and I'm thrilled. So much easier! I do a gallon of milk's worth of yogurt every week so I bought two strainers. The amount of yogurt fills both strainers to the brim.
  • Get two inserts. Really. This way you can rotate stuff through more quickly. I bought my second insert about two weeks after I started using my IP because I discovered just how much I could get done in a weekend to prep for my week ahead.
  • These steamer baskets work really well. (There are a lot of them; I linked to the ones I actually use and can speak with authority about.) I use these when I do potatoes, eggs, vegetables, and so forth.
  • I took advice from the Facebook IP group early on and got a second silicone ring because the ring does take on the smells of whatever you're cooking. There was a lot of fear voiced in FB about whether those smells would then have an impact on cooking something else. I have to say, though, that in the six months or so I've been using my IP, I've never used the second ring. In my experience, I've had no problems with tastes transferring; washing the ring seems to be good enough. If you're interested, though, here's a link. They also have color-coded ones for "sweet" and "savory."
  • Speaking of that Facebook group, here's the main one I'm part of, and you'll notice a few other #Twilters hanging out there too. There are many other electric pressure cooker and IP-specific groups on Facebook as well. It's a great place to get new ideas and recipes!

(This post contains Amazon affiliate links. Thanks for the support!)

Making It Monday

IMG_2142.JPG

Thanks to a couple of sick days and a major power outage in the same week, Block 5 is now done.

This one went really smoothly. The only issue was that one of the third little kitty's french-knot eyeballs started hanging on by a thread as I stitched the rest of the block. Although that has an appropriately-Halloween-y feel to it, it was a bit more gruesome than this project requires.

So I had to stab him right through the middle of his eye with a sharp needle to tack it back down again.

Gruesome.

Woohoo Wednesday! (Something involving thread and fabric, finally!)

Too bad I didn't get this done in time for "Making It Monday" post, but maybe I'll have more progress to show next week.

I finally got my embroidery out again! Yes, I'm still plugging away at the Postcard Cuties Halloween Block of the Month embroidery kit that I should've had done by last Halloween. But there are more Halloweens where that one came from.

Month 4/Block 4 done. 

I'd actually gotten it mostly done several (ahem--weeks? Months?) ago. I only had a few little bits to finish up, so I got it done on one lunch break yesterday. It's hung out in its hoop for awhile so it'll take some serious pressing to get it back into shape. But it's done!

Month 5 is going to take a little longer, however...

A Little New Year Organization

I passed these up the first time they came on sale but when they came on sale again the week after Christmas I decided--despite really not wanting to spend any more money at that point--they'd solve a lot of other little annoying difficulties I was having, so I bit: the ArtBin cubes for their Super Satchel series. (Still on sale if you're interested!)

I'd had a couple of the ArtBin Super Satchel bins for awhile, but this fall realized they'd work better for embroidery storage than what I'd tried before. (I talk about this in episode 202 In Which I Organize Thread.) Once I had a few more bins--also bought on sale or with coupons from Joanns--I realized I didn't really have a good place to keep them all in a way that would be easy-access when I only wanted one bin at a time. Enter the storage cubes. I put them on a wish list but held out on ordering them until last week, and then got them put together this morning.

They work great. You can adjust the little sliders for the cubes to whatever size you need--as you can see, I've got three different sizes at the moment. The sliders mean that you can pull one bin out at a time--which is much better than stacking them on a shelf as I'd been trying to do before, meaning I'd have to pull three off to get at the fourth one down. Love this solution! And you can see that I even still have room to grow! Empty slots, and the middle-sized bin on the lower shelf is actually empty. Note that ArtBin has several different types of bins--it's specifically the Super Satchel series that fits in these cubes. I have another ArtBin that's too pudgy so it has to live somewhere else.

The cubes are not that hard to put together although the instructions could use some improvement. Still, if you've done this kind of furniture before it's a pretty familiar process. They also come with wooden dowels to put between the two cabinets so you can stack them two-high and it's pretty secure. (They don't recommend doing more than two as it would have a tippy-factor.)

I haven't gotten anything done over my vacation in the way of quilting or embroidery, but I'm spending much of the rest of today getting myself set up to have an embroidery project ready to go for TV time at night and maybe even finishing a sewing project or two. My last day off must have some creative work involved!

Some embroidery, then a general health and well-being report

After all, we need to be healthy enough to quilt, right? (Not much time for the quilting at the moment, but doing well on the being healthy!)

First--a  couple of quick embroidery-related updates.

In cleaning my sewing area today (it had gotten stacked during my travels), I took my new lightbox out of its packaging and realized the one I bought is bigger than the one I'd borrowed from BFF/BQF Kate. Apparently she had the 8x12" or whatever it was; I have the 11x17". You don't think about how big that is until you see it laying on your cutting table. I'm going to have to figure out a safe place to store this thing and I'm also thinking "padded lightbox holder" might be something I have to add to my "things to make when I find time" list. Still, it's nice to have the bigger one as I can envision myself doing some larger embroidery projects.

I did also get a little embroidery done last night, and hope to get more done today. I'm very much behind on this embroidery BOM (I got August's block in the mail yesterday and I'm still working on May's!) but I'm not worried. They go fast so if I can just get myself back in the habit of regular embroidery in the evenings, I should be able to catch up before the end.


Okay, now for health and wellness. My goals this week were:

1. Get my calendar organized around current assignments. Done as much as possible. Still waiting on that syllabus.

2. Set myself up a good habit of consistent journal-writing around my thesis topic. Pretty good--I've done some journaling most days. Still need to work out a better study schedule.

3. Prep my groceries to make it easier to eat healthy this week. That really is helpful. I've been eating a lot more fruit and vegetables because they're so much easier to grab-n-go. 

4. Get back into the habits of my gratitude journal and habit journal. I finally started getting back into this midweek. I also started playing around with a vision board app to keep my goals in front of me. I'm not sure how helpful it'll be or how much I'll use it long term but it's provided some entertainment for now, anyway.

5. Get back into habits of moving. 

I've begun using WW's FitBreak app (see below for more about Weight Watchers), although my personal jury is still out on it. It gives you short little one-minute exercises you can do throughout the day, ranging from stretches to office-chair-calisthenics to weight-lifting (using household objects). For the most part, I like the way it's done. However, it has no notification system to reach out and grab me saying, "Hey--time for a FitBreak!" That seems a big miss. I've tried to link it to other reminders but still, I have a goal for a certain number of FitBreaks during the day and I keep missing it because, frankly, I forget about it for hours at a time. (By the way, you don't need to be a member of WW to use the app and it's available on several platforms.)

Meanwhile, I've also been in the pool doing aqua aerobics and aqua yoga again. Ahhh. Plus I've been getting back into my "moving 5 minutes every hour"--I'm probably at about 60% with that but 60% is better-n-nuttin! Unfortunately, taking time for the FitBreaks and pool exercise means my steps are lower, so I'm dropping down the FitBit friends leaderboard. Don't have time for everything!

6. Make a decision about re-joining Weight Watchers and going to meetings. 

I have, indeed, rejoined Weight Watchers. That means I'm back to tracking and planning meals. Now that I've had the new points system explained to me, I'm feeling friendlier towards it than I did when I first ran into it last winter. It does make logical sense--and that's all I require of a system: It needs to appeal to my logic. 

7. Get some personal and household appointment-type-reminders into LifeTopix. Much better at this. I finally dealt with some houseplant issues (!) and got the dogs set up with the groomer--both things I've been wanting to do for weeks but until I got it written down in LifeTopix it didn't happen.

I've also been working on paying attention to time in the evening and getting off electronics around 9p so I can get to bed between 10 and 10:30 so I can be up and perky earlier in the morning than is my habit. I'm back to reading magazines or doing embroidery in the evenings. Much more renewing than hours of mindless iPad games...

Goals for next week:

  • Continue to build up the "favorite meals" and "recipes" database in my WW app so it's as easily as possible to track and plan.
  • Get more regular with walking/FitBreaks through the day.
  • Be more consistent on bedtimes.
  • Do embroidery most evenings.

By the way--it's birthday week. I'll be turning 51 on the 26th. My daughter and MIL cooked up a girls-night-out party for me on Wednesday and we're doing one of those painting-and-wine things. Should be a hoot. Next weekend my husband and I are heading to Buffalo for the weekend as a small getaway and a chance to see my son for a bit. That's my favorite kind of birthday--just hanging out with family and friends. Yay!

Needle recommendation

You may recall that I've recently discovered Tulip embroidery needles from Japan. They really are my favorite needles now. It's hard to describe, but you really can feel the difference in how they slide through the fabric. Love love love them.

I was reminded of them when I was following links and found the YouTube video below. I've only seen these needles in one LQS but got some at a vendor at the AQS Syracuse show and you can buy them online. 

I'm not commissioned by Tulip to do this--I just love these needles and wanted to recommend them to my hand-quilter and embroidery buddies. (I may not be doing much needlework myself lately but I can live vicariously through enabling the rest of you!)

Pre-Long-Weekend Progress and Plans

Ooh. I love alliteration.

I do find it helpful to state boldly--sometimes rashly and foolishly--all those things I seriously think I could actually get done over a weekend. And then at the end of the weekend, I generaly look back and say with some sheepishness, "Well, at least I got this one little thing done. That's something."

Here in the U.S. it's the 4th of July weekend. For many of us, that means we have Monday off. I also had slightly-early-dismissal today (Friday). Even though it was only about 90 minutes early, it still feels like a nice way to get a head-start on the weekend.

We'd originally planned to have people over Monday but as it turns out, we're going to be meeting my son for breakfast and then maybe going to Genesee Country Museum for their festivities (including a swearing in ceremony of new citizens--always a highlight). Since we're not actually having people over and I don't have to prep for a party, that means woo! Sewing time the rest of the weekend!

2016-06-26 19.27.47.jpg

First: I plan on finishing the Catch-All Caddy.

It's been in this state since last weekend. That does actually represent good progress made last weekend, but obviously it wouldn't catch or caddy much in its current state.


Also: I plan on getting the binding done on the Jacob's Ladder. 

Miles. I have miles to go. But our family is in the midst of a Stargate Atlantis binge so I've been to working on this all week while watching the Atlantis crew fight off the Wraith. Here's to hoping we watch enough TV the rest of the weekend that I've got it done by Monday!


Finally: I'd really like to get started on putting together the first blocks of my embroidery BOM. 

I want to finish the little Christmas snowman guy I'm working on before starting the embroidery on this one, and I will get back to him once I get the binding done. (He's a "handwork in front of the TV" project.) But I need sewing room time to get the blocks for the BOM together and prepped for embroidery so I'd like to do that this weekend when I have more hours in the day available to me. 

By the way, I've also started thinking through my other new Halloween embroidery project. So that's a possible other endeavor this weekend, depending on time. 

Thanks to Trisha who turned me onto Urban Threads (see the Quilting for the Rest of Us Facebook page for that conversation), I bought a really wonderful Art Nouveau Witch design. Love Art Nouveau. This Halloween design is seriously classy and SO right up my alley. I've pulled out my tracing paper and colored pencils and am starting to think through thread choices. I printed a picture of an Alfonse Mucha painting to use for color inspiration. (Mucha's a fave.) I might toss into the weekend schedule a trip to an LQS that I recall having some great Art Nouveau/Art Deco/William Morris fabrics to see if I can find some borders I could use on her and blend that with color inspiration from the Mucha painting. I did find some pretty nifty possible border fabric from Fat Quarter Shop but really don't need/want an entire half a yard of it, so I want to see what I can get at an LQS first. Unfortunately, said LQS is about 45 minutes away so it would take a big chunk of sewing time out of Saturday, so we'll see what I feel like when I get up tomorrow morning.

So, let's see what happens this weekend, shall we?

Pretty Mail (AKA: Like I Really Have Time for This)

BOM bag.jpg

Yesterday I got the first couple of installments of the embroidery Block of the Month (BOM) that I signed up for at The Quilt Block, Inc., when I was in Exton, PA, in April. Woot!

I ended up getting month 1 and 2 at the same time due to some delays around getting my payment info to them, etc., which is part of the fun-tricky part of doing a LQS BOM from a distance. Still, we worked it out, and it's all good. It was a kick getting a box filled with goodies!


The BOM is "Postcard Cuties for Halloween," from Bunny Hill Designs. My package included all sorts of great stuff to get me rolling!

Even candy corn for a mid-project sugar fix!


There's a jelly roll of fabrics to work with--Moda's Spooky Delights by Bunny Hill Designs.

As you can see if you use the link for the whole project above, ultimately this finishes to a 38" x 36" finished wallhanging. To date, I've never made a Halloween quilted decor item of any kind, although I do have a few patterns I've collected over the years. As I told my daughter yesterday when she was admiring my pretty mail with me, this isn't my usual style. But even if I don't love it when it's done, it would only be hanging up for, at most, a couple of weeks a year. (More likely, the way I usually forget to decorate until the last moment, a couple of days a year.) 

I do the cutting for each block as I work on them, and it looks like I can choose which fabric I want to use each time, so that'll be fun too. The only thing I'm a little worried about is whether I'd end up with two fabrics sitting next to each other in the finished wallhanging (which would bug me no end) so I may end up, for simplicity's sake, just following her picture. That's not normally like me, either, but much of the time I'll be working on this I'll be deeply enmeshed in work travel and schoolwork again and won't want to unduly stress myself out for what's supposed to be a fun project.

I know my limits.


The package also included some Tulip embroidery needles. This is a Japanese brand made in Hiroshima. According to the packaging, they're made in such a way as to make them slide more easily through the fabric. I bought some Tulip needles when I was at the shop but I made the mistake of opening the package and dumping them into my usual magnetic needle case with all the rest, so I have no idea now which is which to compare. I'll keep these needles separate with this project to make it easier for me to get a feel for them.


And then there's the embroidery thread--everything I'll need for the project. This is Cosmo embroidery floss, another product from Japan. I noticed that it's also sold on the Bunny Hill Designs website so she must be a fan of this floss; hence, it's use in her project. 

I'm not familiar with Cosmo, but since it's from Japan, and since Bunny Hill Designs is Australian, I'm thinking maybe Cosmo is more common in Australia...? Any of my Australian/New Zealander buddies want to comment on that? I'm looking forward to using it to compare it with DMC and the other threads I'm used to working with. 

EDITOR'S NOTE: Error here--sorry. I had Bunny Hill Designs and Lynette Anderson Designs mixed up in my head. Bunny Hill is not in Australia, Lynnette Anderson is. So Australian/New Zealanders would have no more reason to be familiar with Cosmo thread than I do!


And just to be extra nice, they included a water soluble marking pen. I already use this type and really like it, so I'm glad to have another!


Month 1 will be fun--I get to start out embroidering bats. Woot! I need to make five bat blocks altogether, but it's a really simple design so I don't think it'll take too long. I will have to practice my satin stitch a little more--I've not gotten that one really smooth yet and it's used for the bats' eyes. The bats are scattered throughout the finished wallhanging on that orange dot fabric included with the package. The official first block includes a cat and spider (on the off-white background). It's got a little more going on, especially in the satin stitch department. If I'm not good at that satin stitch now, I will be by the time this puppy is finished!


Month 2 is another cat block with some lettering. That one is simple enough that again, it should go pretty quickly. (I know, I know: "Famous last words.")

Month 3 comes in July, but I do have a few other projects I really ought to get done before starting on this so I may end up with Month 3 arriving before I've managed to get both 1 and 2 done. I'm determined not to fall too far behind, though!

I'm thinking I may have found the ultimate use for the Annie Unrein toiletries bag--I feel like it would be the perfect project bag for this BOM. It would easily hold all the supplies, so it's just a matter of what size hoop I'll need for the blocks. I'll keep you posted...

Just a little embroidery fun

My guild had a sew day today and although I didn't feel like I could be gone an entire day, I put together a quick embroidery project I've wanted to get at for awhile and stopped by for about an hour or so. It was long enough to get my social fix with my quilty peeps and it was good motivation to finally get these little puppies underway.

I have two identical little kits that I picked up at one of my LQS a few months back. It's from Lynette Anderson's Sweet Christmas Ornaments patterns. There are 12 designs in all and you can choose to make a wallhanging out of them or use them individually as ornaments. I think I bought these right after Christmas and they only had a few of this one design displayed. It's possible they'd started out with the whole set but sold out of most of them before Christmas. I didn't mind picking up two of the same: I thought they'd make nice last-minute gifts and/or I'll keep one/give one, or something. Undecided. The kit came with the design, fabric strips and squares to trim to size, and a wooden hat button. I'm using my own floss. 

I got both of them sewn together and traced before heading to the sew day, then I got partway through the embroidery on one of them while I was there. It's been so long since I've touched my embroidery that I had to re-start my stem stitch three times because I totally blanked on how to get myself going. Once I worked that out, though, it was a relaxing hour just hanging out with my friends and doing some simple stitching. 


Back...and not-so-much "better than ever"

It's been two months and sixteen days since my last post. Ahem.

I've returned to the Land of the Living Quilter. Or, rather, perhaps I shouldn't be quite so optimistic yet. I've returned to the Land of the Want-to-Be-Living-Quilter and the rest remains to be seen. The key points here are:

  • I'm officially done with school for the semester. My next class isn't until August, although I still have plenty of school-related work to keep me busy. (You should see the stack of books I want to get through before August, ahem.) Still, no weekly assignments or papers to be turned in for awhile, so things can get more relaxed and predictable.
  • I'm done with most of my travel until our summer events in July. I have a mid-length vacation planned with my husband in May (a few extra days around Memorial Day weekend), and a speaking engagement in June, but that one is within an easy drive and won't take a whole weekend. And although I still have some evening conference calls, it's not nearly the volume we had earlier in the year. So I feel like I'll be able to have a life outside of work and school for awhile!

But it wasn't all "work and no play makes Jane a dull girl." Although I haven't had the time or energy since my retreat in February to do much in the way of quilting (none) or embroidery (two evenings, about 20 mins each, as I recall), I did succumb to "quilting/embroidery preparation," so to speak.

2016-04-14 16.49.57.jpg

As I was driving home from a set of meetings in Exton, PA, I saw a quilt shop in a plaza on my right. There may have been a squealing of tires. Welcome to The Quilt Block, Inc. (Their Facebook page is a little more active until they finish getting their website put together.). This was a wonderful store! I was the only customer there at the time so I had a nice long chat with one of the owners, Cynthia (with thanks to a reader who was able to identify her for me so I could update this post accordingly). She mentioned, by the way, that since she'd opened in 2006, 10 other quilt shops in the area had closed. I was surprised to hear that since there's a very fine national quilt show in the area--I would think that would equal a solid fan base locally. I guess not in this case, although it may also be that property values are so high in the areas surrounding Philadelphia that the overhead shuts them down before they can even really get started. In any case, if you live in the area or are vacationing around Philadelphia/Valley Forge, make sure you check out The Quilt Block and keep them in business!

Here's the goods. I'm not buying fabric very often at this stage except to finish projects, but if there's embroidery threads available, well...

And yes, you're seeing right, that's an Annie Unrein pattern. I love her stuff, even if I do whine every step of the way in making it. To be clear, her patterns and instructions are actually extremely well done. We just all know how I feel about this kind of sewing. But I keep going back to the well.

The green box is a bit of over-packaging for embroidery needles. The owner spoke highly of Tulip brand and I'd never tried them, so this is an assortment collection.

The two buttons were irresistible. The one with the red circle and slash has the word "mending" behind it. The other one says, "No you couldn't make that." At least, they gave me a giggle at the end of a long day. 

And yes, that picture was taken on a hotel room bed. I've seen a lot of those lately.

Cynthia, one of the owners

Cynthia, one of the owners

What's not shown here is that...and I really can't believe I did this...I signed up for the store's embroidery/quilt block of the month. Apparently I was having a really weak moment. I posted about this on my Facebook page so I won't say more here.

Except to say that I know I'll have completely forgotten about this by the time I get the first block in the mail in a couple of weeks. Will it be like Christmas, or will it be like "What the heck did I just do to myself?" Only the Shadow knows...

 
2016-04-18 22.54.27.jpg

One of the brief times I was home between travel, I saw on Mary Corbet's blog an announcement that my favorite Etsy shop for hand-dyed embroidery threads, ColourComplements, was having a sale. So I bit. Lovely. Lorraine does a beautiful job. 


And, in celebration of being done with school, I suddenly paid attention to my quilty email again and saw that Craftsy was having a sale. Mind you, while I do still own several Craftsy classes I haven't gotten to yet, I didn't have any left in the areas that I felt the need for new ideas. (Rationalization is a good thing.)

On the quilting front, most of what I need to do to finish up UFOs is machine quilting, so I decided to pick up a couple of classes that I'd been looking at. I now own Jaquie Gering's Creative Quilting with Your Walking Foot. It's been on my wish list for a l-o-n-g time and I've heard Frances of Off-Kilter Quilt and others speak highly of it. I also picked up a newer class, Quilting with Rulers on a Home Machine with Amy Johnson. Color me intrigued. I don't own any longarm rulers but if she convinces me it's the thing, I'd be happy to pick some up. 

And now you're going to laugh. And laugh. And laugh. Remember that Annie Unrein pattern I referenced above, and what I said about whining my way through projects like that? Well, she has a new class on Craftsy. Again, did I say I've had a few weak moments? This one, though, makes a certain amount of logical sense. Her new class is The Ultimate Travel Bag. We can all agree I do a lot of traveling, right? And I'm always on the lookout for that perfect carry-on, weekender, totebag...whatever. I haven't found it yet, but I live in hope. However, I need to finish the second bag from the Annie Unrein class I started last year before tackling this one. Still, there's no reason I can't start digging through my stash to see what fabrics I can use, right?

What I Want to Do Now

I'm going to talk more about this in my next podcast episode--and yes, there will be a next podcast episode soon!--so for the purposes of this blog I'm just going to get a few things down in writing for my own clarity.

In the realm of personal health

Being back in school has not been good for my health, sadly. So I've got a few goals now that I've got several weeks on end where the word "routine" can actually come back into my vocabulary.

  • Start paying close attention to what and when I'm eating
  • Get back into an exercise routine.
    • Includes, but not exclusively, canal walks with the Doofus as he's put on a couple of pounds this winter himself.


In the realm of life organization

  • Clean my office/sewing room. Things have gotten a bit stacked and muddled these last couple of months.
  • Clean my daughter's room--she left behind a bit of a heap when she moved, and I need access to her bookshelves for my academic overflow, as it were. So she's coming over this afternoon and we're doing a Clean Sweep. (Tanesha of CraftyGardenMom was recently talking about that show and I was also a HUGE fan and, like her, am very disappointed that it's not on Netflix or Amazon Prime!)
  • Get my dogs to the groomer. Yikes.
  • Finally finish several blog posts (Craftsy class reviews) that I started over the last couple of months but never actually got posted. (Is this "life organization" or is this "quilting/sewing? Hmmm.)

In the realm of embroidery

  • I just want to start doing it again, regardless of which project it is. Technically speaking, I have a few projects in the works but they're all just me playing around--no deadlines involved. So my crazy quilt blocks tend to take priority, but I also have my crewel embroidery project and one purchased embroidery pattern I'm poking away at when I'm in the mood.

In the realm of quilting/sewing

This is where I have the most specific goals, although I'm not pressuring myself on them.

That's it! My daughter just showed up and she's making me vegetarian avocado/tomato burritos (her own concoction, no recipe) for lunch. And then...the Clean Sweep is on.

(Transparency: Using Craftsy links in this post help support my podcast and blog. Thank you!)

And so I went on retreat... (I guess this is #SBSI)

I made an impulsive almost-last-minute decision to attend a quilt retreat this weekend sponsored by a sorta-kinda-LQS. I went on her first retreat two years ago--horribly sick, had to go home at night to sleep in my own bed, didn't get a lot done. Couldn't go last year as I'd only recently gotten home from my international jaunt. I'd put my name in for this year but waffled for months over whether I'd be able to go. Finally decided I really needed some friend-time and quilty-time so about 10 days before the retreat I contacted the LQS owner and was able to send in my deposit. I'm so glad I did.

image.jpg

My home away from home... It was a small enough retreat that several of us got rooms to ourselves. That's my "Quilt I Saved from Almost Certain Destruction" on the bed (episode 17 and this blog post). The armchair was convenient for getting some class reading done here and there as well.

 
image.jpg

Our weather. 

Unexpected, but pretty. (Drive 10 minutes in any direction and no snow. For some reason, our retreat center was right in a blizzard pocket.)


image.jpg

The way we ate. All freaking weekend. I don't even want to know how much I gained/ 

 
image.jpg

Oh...and did I mention the desserts? Yikes.


My friend surprised me with a little gift on the table space she'd set aside for me (I arrived a few hours after most others). Adorbs! 


The retreat started Thursday morning but I didn't go down until after work Thursday, which meant I got there right about dinner time. Thursday evening, therefore, after getting my stuff all set up, I decided to just go for a little embroidery Zen. I got one more patch on my crazy quilt block done. 

I wasn't keen on the way the feather turned out (my markings kept disappearing on me, urgh), so I used the Rule of Distraction. Put enough beady-bling on there and you don't notice anything else!

 
image.jpg

By Friday morning, I was ready to rock n' roll. This was a guild BOM from 2008. Got all the blocks finally pieced a couple of years ago. I'd put fabrics for the sashing, inner border and outer border in the bin with the blocks so at least I knew more or less what I'd intended to do back then. Now the top is done--woo!  

This is just for me so I'll probably just do an all-over FMQ on my DM. So we'll see how long it takes me to get it REALLY done.

 
image.jpg

Saturday's job was my second UFO of the weekend. This is a jelly roll quilt from Jelly Roll Sampler Quilts by Pam and Nicky Lintott (a gift from listener Carolyn of the U.K.--thanks!). Started it around 2012-ish. Finished the blocks in maybe 2014. Took it to an LQS Super Bowl Sale this weekend and amazingly found sashing and border fabrics pretty quick despite the crowds. That burgundy stripe between the two borders is a flange--first one I've done, and I love it. Just the right amount of accent for the burgundy in the blocks. I'll probably use that same fabric for the binding. Haven't decided if I'll do it myself, or maybe rent time on a long-arm to do it myself that way, or send it out. I'm giving myself another week or so to think about that. It's going to someone else so there's a little more at stake than with that other one.

 
image.jpg

As a small, fast project for a break between the two UFOs, I fused this kit. It's most likely from an Edyta Sitar BOM quilt* but I bought just this one block at an LQS so I don't actually know for sure: The block kits were in an unmarked basket; there were only three months' worth there; and no picture or information available about the completed quilt. I thought this one would make a great background for some fun embroidery and beadwork. All the pieces were pre-cut and pre-fused, so it was basically just putting together a puzzle. I mostly followed the picture on the package but I moved the bird from sitting on one of the leaves at the top to sitting on the basket--I thought that made him far more prominent and we all know how I feel about pudgy birds.  

*Later edit: I did some googling and yes, it's Edyta Sitar, Seasonal Silhouettes.

I also traced another embroidery design on some linen using a big picture window and the last remaining light of the afternoon, but didn't take a picture of it. Not terribly exciting anyway. 

Finally, I had some time left Saturday night and Sunday morning, so I made another little zipper pouch. This one is the Ditty Bag pattern from www.byannie.com. (The pattern has three sizes; I made the medium-sized one.) Wasn't too hard to do, other than the usual annoying fiddly bit sewing around that curve on either side. Zippers are going pretty easy for me these days. Yay. It's got some nice structure but if I use the pattern again, I won't bother with the binding on the inside--it was a pill and doesn't really add much. Finishing the seam with a zig-zag would be good enough. 

Oh, and I got a decent amount of class reading done. So there's that too.

All in all, a good time. And now, for the rest of #SBSI, now that my week's assignments are done, I'm going to hang out in front of the TV with my man and four-leggeds and do some more embroidery.

(By the way--I realize I didn't draw the name for the Quilty Resolution challenge yet--I'll take care of that manana!)

Craftsy Class Review: Bead Embroidery--Beyond the Basics with Myra Wood

Online Machine Embroidery Class

Fair warning: Adding beads to your embroidery is pretty addicting. I'm still working on embroidering my first crazy quilt block because after adding a little bit of beady-bling to the first section I embroidered, I'm suddenly off and running with those beads. Every section now has beads added, and I'm finding myself planning my embroidery designs based on where I'll be able to add the beads. Who knew? (Knitters and crocheters, check out the very end of this post for including beads in those crafts--you too can join in my addiction!)

My sudden increase in using beads meant that I was looking for as many ideas as I could get, so I quickly dove into Bead Embroidery: Beyond the Basics with Myra Wood.

Bead Embroidery: Beyond the Basics is a sequel class to Myra Wood's original Bead Embroidery class which I reviewed a few weeks ago. If you've never used beads before, you could certainly start with this Beyond the Basics class, but I'd recommend starting with her other class first as this one only has a short segment about the basic stitches. In fact, within a few minutes of watching the first lesson, I realized this class would be a "watch only" class for me. Beyond the Basics focuses on pure beadwork, rather than beads added to embroidery projects (as in her first class). This class is about how to do those beautiful, wonderful, over-the-top bead encrusted accessories such as amulets, cuffs, buttons, and boxes (etc.). Those are something I enjoy looking at and can appreciate, but it's not at all on my radar to do at this point. 

My quickly-growing bead stash

My quickly-growing bead stash

However, even if this style of beadwork isn't something I'm doing right now, I don't feel that watching the class was a waste of time. First of all, who knows? Someday I may decide I need a big ol' bead encrusted amulet necklace that's just the right finishing touch on a special outfit. Not something I see happening anytime soon, though. However, mostly, I did pick up some good information about color planning and design that's been useful as I've been doing the mostly-embroidery-with-beads-thrown-in work on my crazy quilt block. Besides, after watching this class, I could see myself adding beaded fringe to the finished crazy quilt since it'll likely be a wall-hanging and, if I do, lesson 7 will come in very handy.

So, dear readers, it's really up to you to decide what your goals are for learning bead embroidery. Do you mostly want to add beads as accents to your embroidery? If so, Bead Embroidery would be the class for you. If, however, in your viewpoint The Bead is the Thing, then you'll want to ratchet up to Bead Embroidery: Beyond the Basics for sure. 

In either case, Myra Wood is an excellent teacher. She takes you step-by-step through each stitch or technique and discusses how to fix it if things go awry. The information about products to use is very helpful, especially when it comes to making cuffs or things you need to be able to bend; she also gives extremely helpful tips about covering edges and gaps that may appear.

The invasion of the beads

The invasion of the beads

This is definitely a technique class rather than a project class. Although she makes several suggestions of projects (a bracelet/cuff, amulets, beaded boxes, fringe on lampshades and such) and gives some verbal direction as to how to do them, there aren't a lot of step-by-steps for them. The only class project that's covered in the downloadable class materials is the bracelet/cuff, and even that is definitely sketchy in the materials. It doesn't really give a pattern or dimensions, just a suggested design. If you choose to do any of the projects she talks about in the class you'll be listening to her verbal directions and figuring a lot of it out on your own.

As always, I highly recommend reading the discussion threads in the class itself. You'll pick up a lot of good information from her responses to other students' questions. Plus, there's some nice eye candy as people post pics of their works in progress. Also, do check out the student project section for the class (which you can do without buying the class)--great inspiration!

The Basics

  • Seven classes, from 18 to 22 minutes each.

  • The first lesson talks about materials and a little about overall design; lessons three and four cover additional design considerations such as focal points and dimension. 

  • Lesson two is about the four basic stitches used in this type of bead work.

  • Lesson 5 gives basic instructions about how to finish off projects such as a beaded cuff and buttons, as well as how to attend to the edges of the beadwork for any project.

  • Lesson 6 is how to do beaded embellishments and appliques, which a very helpful tip about using store bought applique patches as your foundation for the beadwork.

  • Lesson 7 is fringe and beaded accents.

I enjoyed Bead Embroidery: Beyond the Basics with Myra Wood even if I won't be doing this level of beadwork anytime soon. As I said above, there were a lot of good tips and design information in this class that have been useful to me as I've been doing my more embroidery-based beadwork. Certainly, if you're into doing some serious beadwork, I'd highly recommend this class!

P.S. For you knitters out there, did you know you could also play with beads? Check out Laura Nelkin's Knitting with Beads or Betsy Hershberg's Brilliant Knit Beads! Also, if you crochet, there's Amazing Crochet Textures with Drew Emborsky that includes beadwork.

(Disclosure: As a Craftsy affiliate, clicking on Craftsy links in this post help support my podcast and blog. Thank you!)