Announcing the Winners of the 2017 Quilty Resolutions Giveaway

Woot! Thank you all for leaving your wonderful--and often very thought-provoking--comments on the 2017 Quilty Resolutions Challenge and giveaway. I have thoroughly enjoyed reading everything you've said!

I'm pleased to announce the winners: Ozzypip! aka Philipa from Australia; Darrell; and Mary K, whose third time worked with bells on! I've emailed each of you so be sure to check your email and respond with your mailing addresses (if you haven't already--I'm writing this ahead of time as I'll be away on Saturday). 

I didn't keep a spreadsheet with entries this time around, so you're on your own recognizance. Remember what you've promised yourself to do and if you don't trust your memory, bookmark the page with your comment on it and check back in every few months to see how you're doing.

And so, until next time, go get your balanced quilty on!

2017 Quilty Resolutions Challenge and Giveaway

gg89959852.jpg

Happy New Year! 

I know I'm a little late this year but that's because I've actually been spending a lot of time thinking about this!

As those of you who have been around awhile know, I have been in the habit of running a Quilty Resolutions Challenge (with related giveaway) every year. Each year I challenge my listeners/readers to come up with a few quilty-or-fiber-arts related resolutions around a particular theme, and then I draw names at random from the submissions for a giveaway prize. 

The tricky part is the theme. Every year, it's basically come out of whatever my personal challenge is that year. So this year I've been trying to figure out how to relate my biggest focuses in my life to a quilty resolution challenge. And here it is. The theme is...

Balance

  • How can your quilty life bring more balance to your life?
  • Do you need to address some imbalance in your quilty life?

This year's quilty resolution challenge is focused on a single concept, but there are two ways you can approach it.

On the one hand, many of us say that quilting, or embroidery, or weaving/spinning, or crochet (or, I suppose, even knitting, pshaw), or whatever, can bring us a sense of balance when our life gets busy or stressful. But we keep putting off the quilting/embroidery/fiber work until we get everything else done...which means it rarely has the opportunity to bring us balance.

On the other hand, perhaps we're getting chased by the Productivity Monster and it's our quilty/fiber life that's causing us a sense of unbalance. Quilting becomes an obligation--yet another more baby quilt to make for one more co-worker's sister's niece's college roommate, sigh. Or it becomes keeping up with the Janes-es who seem to be turning out completed projects every day and making us feel like complete slackers. Or it becomes beating ourselves up when we've been practicing FMQ for months and still can barely do a decent swirl and feeling like we may as well just throw in the towel because we'll always stink at this...

Our creative life should bring us a sense of balance. It should offer us the opportunity to grab a little zen, or work through our stresses, sadness, and even joy. It shouldn't become one more stressful task on our already overburdened to-do list nor should it be allowed to languish until that rare occasion we have a few moments free.

And yes, I'm preaching to myself here. But as I always say--I know I'm unique, but I'm not THAT unique. If I'm dealing with these questions, chances are a few of you are too. 

So for 2017, my Quilty Resolution Challenge to you is to look at your creative/fiber life through the lens of balance, and make one single resolution that will allow you--in whatever way you need to--find more balance through or within your quilt/fiber life.

Leave a comment below naming your one single resolution about balance! (Then make sure you enter using the Rafflecopter widget.)

I'll draw three names at random. Each winner will receive a set of four fat quarters--I'll choose which one y'all get! (Again, make sure you enter using the Rafflecopter widget--that's how I'll be drawing names.)

Challenge ends on January 15th, 2017. 

Looking forward to reading your ONE resolution! And may we all find more balance in 2017!

2016 Quilty Resolution Challenge and Giveaway

Here it is! Listen to episode 193 In Which We Talk Quilty Resolutions and Fidget Quilts to hear about this year's...

2016 Quilty Resolution Challenge!

Remember, I always have very specific themes and/or questions I ask--it's not just your laundry list of quilty stuff you want to get done! You may also want to listen to episode 194 In Which We Recap 2015 and Look Ahead to 2016 Quilty Resolutions for a look back at my 2015 resolutions (and you listeners!) and I talk about my 2016 resolutions based on my challenge theme--you may get some ideas.

Once you know the theme, the form is below: fill it out to enter the challenge.

  • You may only complete this form once to enter, so be sure you fill out all three items. (The word of the year is optional.) Any incomplete forms will be disqualified.
  • Make sure you include your name and accurate, complete email address where indicated in the form. If I don't have your information, I wouldn't be able to tell you if you won!

(Life has gotten away from me and I've not had time to post what you'll win. But those of you who have entered my giveaways before know that it's always been good! So trust me... it'll be good!)

Complete your entry by midnight, Eastern time, on January 31st. I'll draw the winner on February 1st.

If the form does not appear below, just click here instead.


Craftsy Class Review: Zip It Up: Easy Techniques for Zippered Bags with Joan Hawley

It feels odd for me to be saying I just took a sewing class, but there it is. In my attempts to conquer my dislike of fiddly bits, I've just completed another bag-making class on Craftsy.

If I'd been able to go straight through this class in one fell swoop, it probably would've only taken a weekend. It only took me as long to finish the class as it did because I'm deep into coursework now, so I only take random chunks of time to sew when my brain fritzes out from all the reading. Consequently, the sewing I do needs to be as close to mindless as possible (as I have few functioning brain cells left by the time I put down the books).

Enter Zip It Up: Easy Techniques for Zippered Bags with Joan Hawley. I've been a fan of Joan Hawley's Lazy Girl Designs for awhile; I own a couple of her bag patterns although I've never actually gotten them made. The three bags featured in the class were cute as well as seemingly functional. When it comes to physical things like this, I'm a much better visual learner so when I can watch someone do something rather than trying to read a pattern, I'm happier. Joan's step-by-step instructions on the video as well as the written materials that come with the class were very easy to follow. 

First, there's the "Runaround Bag." I finished this one a few weeks ago and blogged about it here. I think the bag took me less than two hours to make, and that was only because I was closely consulting the video lessons all the way through to make sure I didn't go horribly awry. Plus, I did a little fussy-cutting, which always takes a little longer.

I was able to use the bag immediately after I made it, which was a plus in my book.


The second bag in the class is the Nikita Bag. This is a basic boxy pouch--there are a boatload of patterns for doing boxy pouches out there and I'm sure they're all probably fairly similar when it comes down to it. But once again I found Joan's way of putting it together very easy to follow. I got this one done in about an hour and a half, all in. Again, that was with a lot of referring back to the video. It would go a lot faster next time.

I absolutely loved the fact that I was finally able to use some of my Marcia Derse fabrics. I bought a couple of panels and several coordinating fat quarters years ago at the show in Houston--If I recall, it may have even been the first year her fabrics were introduced. (She had her own booth and I paid her in person for my fabrics, which always makes you feel a little more connected to those fabrics, doesn't it?) I'd never found the right project for them. It works really well for this.

This if my favorite bag of the three. I really like the design of this pouch and could see me making more, although at the moment I don't know exactly what I'll be using this one for. Wait until my next trip when I'm looking for all the best containers for the tchotchke that always has to come with me.

The third class project is the Bendy Bag. I'm not such a fan of this design--I'm finding it a bit hard to work the zipper once it's all put together. I know that part of that is user error--I needed a slightly wider space between the zipper teeth and my seam. I used the same needle position I had on the other bags, but in this particular design I could've used a little more breathing room. Still, that bend doesn't help.

I used a half-yard of fabric I'd bought while in Hawaii in 2008. I've got a couple of other half-yards of the same print in different colors. I'd had half a thought of using all three fabrics in a fast lap quilt as a souvenir of my trip, but the quilt never got made and I've got plenty of lap quilts now, so this is just as good a way to use it. It's the same fabric outside and lining.

So--all in, I had no difficulty whatsoever making any of these bags. I would have no concerns about deciding I wanted to make any one of them again, maybe two or three times even. (I have a lot of fat quarters I'd love to use up!) The one least likely to get made again is the Bendy Bag, but if it proves itself to be the perfect travel bag for cords or adapters or any of the other multitude of electronic gadgets that travel with me, I'd even be willing to give that one another go.

Joan Hawley is easy to follow and now that I've done her class and several of her bags, I'd be willing to revisit the thought of making one of her patterns that I own. On the flip side, having now done two and a half bag-making classes--and yes, I do plan on finishing Annie Unrein's!--I've also gotten more comfortable with the idea of branching out and making other bags. 

Mind you, I still don't enjoy doing it the way I enjoy doing art quilting, hand-dyeing, or embroidery. But I can do it, and that's all I was shooting for. I do still avoid patterns with too many fiddly bits, though. Still not a fan.

The Basics

  • 7 lessons, ranging from 18 to 30 minutes.
  • Lesson 1 reviews the three bags in the class, gives some advice on choosing zippers and fleece, then talks about presser feet and needle positions. (Do pay attention to the needle position thing, and write it on a post-it note. You reference those needle positions frequently throughout making the bags.)
  • Lessons 2 and 3 are the Runaround Bag; Lessons 4 and 5, the Nikita; and Lessons 6 and 7 are the Bendy Bag.
  • Each lesson not only gives instructions for the bag itself, but also offers some nice take-away tips that would be useful in other places. 
  • Class materials are full step-by-step instructions with plenty of photos for making the bags.

If you're a beginning sewist or a beginning bagmaker, I definitely recommend Zip It Up: Easy Techniques for Zippered Bags with Joan Hawley. Great entry-level stuff. If you're more experienced, you may still enjoy her tips and tricks, plus the bag designs. 

(Note: Using Craftsy links in this post helps support my podcast and blog. Thanks!)


June Craftsy Class Update

I didn't burn up the track in Craftsy classes, but I did get one of the biggies done! I'm actually writing this a little over a week before it'll post because I can guaran-dang-tee I won't be finishing any more Craftsy classes before the end of this month. I'm about to head out of town for a work trip and there's no time for watching classes in that circumstance.


Interior shot of my EIIP bag from Annie's class

Interior shot of my EIIP bag from Annie's class

New Completions

(+1)

Classes in Progress

(3)

Classes added this month--0

Classes To Be Completed

Current count: (12, down 1 from last month) 

Completed Classes

Current count: 60 (+1--and I hit a nice round number!0

Craftsy Class Review: Sew Sturdy Travel Organizers with Annie Unrein

Craftsy

Once again, I'm doing the class review before I've finished all the projects from the class. I'm doing that in this case because it took me nearly 6 months to get the first of the two projects done for this class. Given my current schedule, it's likely to be another 6 months before I get the second project done. So, here's my review of Annie Unrein's Sew Sturdy Travel Organizers class. 

If you're a blog follower, you've already seen my reveal of the first project, an organizing bag she calls the "Everything In It's Place Bag," or as I abbreviated it, the EIIP bag. If you follow me on Twitter or listen to my podcast, you've heard me whine. A lot. With great passion and commitment to my whining.

This isn't a particularly easy project, especially for those of us quilters who didn't come at quilting out of garment sewing. I've only had limited experience doing bags or any type of accessories, and much of that experience hasn't been particularly positive. I'm not a fan, as I have pointed out on many an occasion, of fiddly bits. 

And boy, did this bag have more than it's fair share of fiddly bits. Namely, vinyl. More about that later.

It also had zippers which were a bit tricky at first. I've done a small handful of zippers in the past, but this was the first time I'd used zippers-by-the-yard, which raises the quotient of fiddly-bit in the zipper equation. I'll say, though, that by the end of doing this bag which had a grand total of 12 zippers and 16 zipper pulls, zippers no longer give me pause. I can also see the beauty of using the zippers-by-the-yard that Annie sells on her website; I'll advise, however, that you wait to watch where she talks about using those zippers before making your first zipper, which actually comes in the lesson before.

That's on my one knock on this class. It's not Annie's fault that I don't enjoy making bags. And it's not Annie's fault that I still don't enjoy making bags after taking her class. She helped me become more comfortable with certain things, but becoming more comfortable with something doesn't necessarily mean I'll start loving to do it. In any case, the one thing I will knock the class on is that once in awhile things are a hair out of order. You make the first zipper in one lesson, and then in the next lesson she explains how to work with the zippers. I was watching and working my way through the lessons so when I got to the one making the first zipper and didn't know how to put a zipper pull on a zipper, I spent 20 minutes on YouTube trying to figure it out. Then I get to the next lesson, and there she is, talking about how to put on a zipper pull. There are a couple of places like that, so just do what I didn't do:

Watch all the lessons all the way through, before starting the first step in the first lesson. 

The only thing that I really struggled with was the vinyl. That was brutal. I spent a lot of time reading through the class discussions to see if others were having some of the same problems I was having and what the suggested remedies were; I found some helpful things there, so be sure to read the class discussions as well. (I talk about that in the previous blog post about this project.) Mostly, I was being stubborn and refusing to buy a Teflon foot when I wasn't committed to the idea of ever using vinyl again. That Teflon foot probably would've been helpful. I used Scotch Tape instead. It was okay.

Annie is clearly very experienced at teaching. I had no complaints about her style. Her instructions are very thorough as well. I kept the class material print-outs in front of me while watching the related steps on video--the two pair well. Her website is great--she has great bag designs and very helpful kits for making many of them, plus she sells all the bag-making supplies separately. More helpful, though, are her YouTube tutorials (also on her website). So if you're into making bags, she's the one to get to know: www.byannie.com. I do really like her supplies--I like how the finished bag feels, using her stabilizer and such. So if I am inclined to make bags in the future, I'll definitely be going back to her site. 

So, to try to objectify this and review the class as a class, my personal feelings about bag-making aside, I'd say two thumbs up. She really takes you through a complicated process by breaking it down into very small, pretty manageable tasks. She explains and demonstrates pretty much everything; there are a couple of steps that she talked about but didn't demonstrate, and it would've been helpful to have those on video as well, but they weren't deal-breakers. I do feel pretty confident that I'd be successful at the cosmetics bag as well, whenever my schedule allows me to work on that again. And that's more than I'd have said when I started the first step of the first bag, so that's a mark in the plus column. 

The Basics

  • 7 lessons, ranging from about 18 to 52 minutes, mostly in the 30-minute range
  • The first lesson offers a short introduction, but then gets right into making the Everything In Its Place Bag.
  • Lessons 1-4 are for the EIIP bag, lessons 5-7 are the cosmetics bag.
  • Class materials are extensive--very clear, step-by-step instructions for each bag. In fact, at the start I found her instructions a little confusing because they are so complete; I'm not used to that. Once I figured out her approach, I did find them really well done. 

Annie's bag designs in Annie Unrein's Sew Sturdy Travel Organizers class are great. Can't beat the functionality. So here's to my perseverance sticking with me to get the second of the two bags done sometime before I retire. 

(Using Craftsy links in this post helps support my podcast and blog. Thanks!)


May Craftsy Class Update

Craftsy Logo

I had a pretty good month in my Life with Craftsy. I finished four, but I did pick up a couple of new ones as well. Still, I finished more than I added, so I'm ahead!

New Completions

(+4)

Classes in Progress

(4)

Classes added this month

(+2)

  • Bead Embroidery with Myra Wood. Don't say I didn't warn ya. Since I finished two embroidery classes I figured I could allow myself to pick this one up while it was on sale over memorial Day weekend. And then I finished a third embroidery class, so this one moved to the top of the rotation after only a few days of owning it!
  • The Essential Guide to Lightroom with Skott Chandler. I now have Lightroom on my computer and since I've already learned so much doing Chandler's Photoshop class (see In Progress, above), I decided it was worth picking this one up as well. I'm not going to start it until I've completed the Photoshop class.

Classes To Be Completed

Current count: (13, down 2 from last month) 

Completed Classes

Current count: 59 (+4)

April 2015 Craftsy Class Update

Craftsy Logo

Oopsie. Missed April by a day. The week sort of got away from me.

It was a good month for Craftsy class completions, but not a great month. I'd have liked to get one more done. (Don't even say the words "travel organizer" to me!) But still, poking away. 

New Completions

(+2)

Classes in Progress

(6)

Note: I removed Fabric Patterning with Wax Resist at the moment as it's not going anywhere until I have a bit more time available. It'll reappear on "in progress" again soon, I hope.

Classes added this month

(+1)

Classes To Be Completed

Current count: (15, -1 from last month due to completing two but adding one)  

Completed Classes

Current count: 55 (+2)

Craftsy Class Review: Embroidering Texture and Dimension by Hand--with Sue Spargo

Oops. I wanted to get this review done in April. When did it suddenly become May? I think when part of April suddenly became winter again it threw my whole sense of the calendar off. 

If you've been listening to my podcast or following my blog at all in the last few weeks, you'll know that I've just completed a Craftsy class that probably had just as much impact upon me as Jane Dunnewold's The Art of Cloth Dyeing did a couple of years ago. This time it was Embroidering Texture and Dimension by Hand with Sue Spargo. I am off and running with this embroidering thing now! Woo--just watch me go!

I have been a fan of Sue Spargo's designs for years, starting back when I went through my first felted wool stage probably a decade ago or so. I enjoy Spargo's slightly more bright and fun primitive style. She can do the Americana/country thing (popular in the felted wool world), but she also does straight-up funky, which I love. I had bought her Creative Stitching book a year or two ago; it's pricey, but especially after doing this class* it's also become my go-to. Love that book. I'd tried teaching myself some embroidery from books before but there's absolutely no substitute for watching someone do it, so when I saw she had a class on Craftsy, I bit.

I decided to, for once, do the class project. It's been awhile since I've done that, as I usually use techniques on things I've already got going or had already planned to do. But as I looked at her design, I realized it would be a great way to use some of my stash of felted wool that was languishing. Plus, her "project" is more a lot of design suggestions that you can put together any way you want--which suits my "independent cuss" nature. When I started working with her suggestions for building a layered background, I ended up with something I really kind of dig. I went an entirely different colorway than she has (she used brights), based on the wool I already had in my collection. It took me so long to pull fabrics for this that I took some short-cuts on building the background--I fused, rather than needle-turn applique like she does, and later I learned why a standard applique technique would've been far preferable. But that's why we take classes, isn't it? Now I know.

She suggests 15 butterflies for the project, so 15 butterflies I did. I ended up ordering just a little more felted wool for the butterflies because I didn't have quite enough in a color range that really worked together. As a point of interest here, I bought my wool fabrics from Erin Rissberger of Quilting Acres on Etsy. She'd sent me some samples years ago when I interviewed her for the podcast (Episode 45)  and I just love her colors, so I was thrilled to be able to use them in this project.

The butterflies took a long time to put together too, as you layer those as well. I'd approach how I did all that layering very differently next time, so I really should've payed better attention to Sue's advice in the class (and in class discussion). Here's a tip: watch and read before doing! Another note--I also ended up buying her book Creative Texturing to help me make some decisions here. This book walks through the process of fabric selection and layering to create more visual interest on your projects. I'll be referencing that book a lot more in the future too.

Finally, I got to the embroidery. This class walks through several stitches, generally in order of complexity, which often means in order of difficulty. However, I did find stitches in later episodes that were actually easier for me to manage than ones in earlier episodes, so it's not entirely a progressive thing. 

Some stitches I took to like a duck to water. Others took a little more trial-and-error. One was my Waterloo--just couldn't quite get that Rosette Chain stitch down. I'll go back to it again after I've got more experience to see if I can't conquer that darn thing. (She does say it's the hardest one she teaches in the class, so there is that.)

 
And this ain't the half of it...

And this ain't the half of it...

Mostly, I had a ball taking Spargo's advice to heart--play with as many threads as possible! There is so much more to the world of embroidery than DMC embroidery floss and a #8 perle cotton, for as much as both of those are quite nice. Still a fan of the perle cotton, especially hand-dyed types. Yums.

I've used a huge variety of threads in this project so far, and still have more to try. Fair warning: It easily becomes a new addiction. It does also make learning embroidery slightly more complex because threads behave differently and require different needles, so every new stitch I tried was a test of trial-and-error before I finally found the right combination for what I wanted to do. But that's also just practice and experience--after just a few weeks of this I already have a better eye for what types of threads are likely going to give me more immediate (read: stress-free) success for certain stitches. 


I also got into adding beads to my embroidery based on one of her lessons. Another dangerous addiction.

So, can you tell I loved this class? It's definitely two thumbs up! If you're brand new to embroidery (like I was, for the most part), I advise making liberal use of the "30-second repeat" button and changing the speed of the video to go more slowly for certain stitches. (I had to watch the cast-on stitch technique a few times since I'm not a knitter.)

Sue Spargo is an excellent teacher, by the way. I really feel like this class gave me a very firm foundation in embroidery, even if I never took another class again. That being said, I'm now working on my second Craftsy embroidery class, already bought a third, and the fourth is sitting in my wishlist for later. I haven't finished the butterflies yet, so I'm currently using it as the project for these additional embroidery classes--meanwhile, I'm already mentally designing my next embroidery project.

The Basics

  • 7 lessons ranging from about 17 minutes to 30 minutes.
  • The first lesson is about creating the project you'll later be embroidering. I could've done with a little more information here, I think. I suspect the issue is that she's not giving directions for a specific pattern but, rather, making suggestions for things you may want to do; I think, since it was a new technique for me, I'd have preferred seeing her walk through a specific project first, and then talking about how to launch off from that to whatever you wanted to do yourself. In any case, I did figure it out and, of course, you don't have to do a specific class project at all, if you don't want to.
  • The second lesson talks about tools--needles and threads. I found this very helpful the first time, but even more helpful when I went back later after I'd done a lot of embroidery and watched it again. That time I had a better frame of reference for what she was talking about. The second lesson also gives the first couple of stitches--the Pekinese stitch (one of my faves!), and couching.
  • Lesson three is decorative edging stitches, including the fly stitch--which quickly became one of my go-to stitches, crested chain--another great one, and the aforementioned Waterloo stitch, the Rosette chain.
  • Lesson four is dimensional stitches and I had great fun here--bullion knots, drizzle stitches, bullion cast-on stitch, and double cast-on stitch (which I skipped because by then it had taken me so long to circumnavigate a butterfly with bullion knots I wasn't inclined to take on the even-longer-term double cast-on).
  • Lesson five is woven stitches--loved doing the circle with a gorgeous thread on this one.
  • Lesson six is beaded stitches. "Danger, Will Robinson, Danger!" I now have a storage container specifically for the beads that somehow magically appeared in my house after doing this lesson.
  • Lesson 7 is finishing touches, with another couple of slight more extensive stitches, plus a lot of really cool ideas for using embroidery in bindings. Can't wait to get my butterfly project finished so I can revisit this lesson.
  • The class materials are so-so; 6 pages, three of which are templates for the suggested project. There's an extensive supply list that felt overwhelming at first--and you don't actually need all of it to do the project, but you're likely to want all of it and more if you really get into this! The second page gives some hints and tips, which were partially useful.

A long review, I know. But I. Loved. This. Class. Remember, embroidery doesn't need to just be for embroidery projects and crazy quilts. It's easily done as an accent on any quilt or quilted project. I'll definitely be using a lot more of it in my art quilts. If you think you may even vaguely be thinking about adding embroidery to your quilting repertoire, you really need Embroidering Texture and Dimension by Hand with Sue Spargo.

*You don't need the book to do the class, but it was quite helpful to have on hand when I was practicing the stitches she demonstrated.

(Using Craftsy links and banners on this page helps support my podcast and blog. Thank you!)

2015 Quilty Resolutions: April Journal Quilt

Okay, Sandy here, once again cutting myself some slack.

I realized that the prayer flag I've been working on is all one big experiment, so I'm now counting it as April's journal quilt, even though it's not 8"x10" or even, arguably, a quilt. It has two layers, not three, and it's embroidered but not quilted.

Work with me, here.

I present to you my April Journal Quilt project: a prayer flag.

The front is a piece of cotton batting I had experimented on in my dye studio--it was originally a normal cotton batting-cream color; I dyed it black. You can see how mottled it came out. Kinda cool.

I then did some needle felting on it with some dyed wool rovings I'd had in my stash for about a year (not dyed by me). I had fun blending the colors. I've done a little needle-felting here and there but nothing really terribly extensive, so I'm still getting the knack of it. Not hard at all, of course, but now I probably should start actually reading up on it and really figure out what I'm doing.

I also wanted to play around with beading, and I'd picked up some really wonderful beads at a bead shop recently. Dropped a bundle in that bead shop, so you'll be seeing a lot of beads on future projects. That bird (which is likely a swallow given the tail feathers but I'm choosing to call it a peace dove) is one of my faves.

I started working on this prayer flag shortly after I'd received word that I'd been accepted into the D.Min. program (listen to episode 180 if you'd like to hear more about that). At the time I started working on this project, I hadn't really decided what my prayer flag would be about--but then I ran across this great quote from William Shakespeare and it just seemed to completely fit where I am in my life right now: "To unpathed waters, undreamed shores...." Now, to be clear, the quotation is from A Winter's Tale which is one of the few Shakespeare plays I haven't seen or read so I don't know the storyline; it's actually taken from a speech in which the speaker is advising others NOT to go off in unpathed waters but to stay on a more known course. But I choose to rip it heartlessly out of context and cast it in a much more positive light. I'm rather enjoying, for the moment, being in unpathed waters and heading towards undreamed shores.

So there, nyah. It's my prayer flag. I'll do what I want.

I finished it off with a little embroidery accent in the swirls (yummy variegated Razzle thread from Sue Spargo's website), and then put a black felt backing on it and did a blanket stitch around the outside. The stitching isn't nearly as visible in person as it is in this picture; it's largely buried in the felted sections--you really almost can't see it. This picture does demonstrate the great lighting I have in my sewing room, I guess. 

My April Journal Quilt/Prayer Flag is now hanging near my office desk to help me remember this positive attitude when the blood, sweat, and tears start.


2015 Quilty Resolutions: March Journal Quilt

It's been awhile since I've posted about a journal quilt, so let me recap: My 2015 Quilty Resolution was to do one journal quilt per month. In my definition, a journal quilt is a small project (approximately 8"x10") that allows me to experiment with a technique, a theme, a color scheme, or whatever. My main focus is on experimentation (my 2015 word of the year).

January's journal quilt was Sunset in Bagan, in which I was experimenting with netting. 


I had to cut myself some slack on defining February's journal quilt. That whole month was experimentation! I was playing around with a lot of different design experiments based on having taken the art quilt class as well as some other things that caught my creative eye, as it were. So I decided that, rather than getting all legalistic on my own butt about how I was defining "journal quilt," I'd focus on the "quilt project that involved experimentation" concept, and thus declared Neumes my February journal quilt, despite the fact that it's quite a bit bigger than 8"x10".

March was a very busy month, and I wasn't home much. But I was still experimenting. I did Cindy Walter's fabric painting class on Craftsy in March, and was just having all sorts of fun messing around with all the different types of fabric paints and inks I've amassed over the last couple of years. In her class, she showed a way to do an abstract paint design that brought back to mind my favorite way of coloring when I was in high school--basically just sketching random lines and shapes that connect together and then going to town with the color. I used to do a lot of this when I was a kid!

March Journal Quilt--just named "March Journal Quilt"

March Journal Quilt--just named "March Journal Quilt"

So, my nostalgic painting experiment became March's journal quilt. I'm pleased to announce it's finished! It measures out to 8 1/2" x 10" but that was happenstance--I was just using a spare piece of muslin I had on hand to do the painting and it happened to be almost journal quilt size--phew.

Please note that I did this without any concern for color scheme. My goal was simply to use every paint or ink I had on hand (except my Tsukeniko inks--those remain for another day). Thus: almost every one of the sections in this piece is a different paint. I had a couple of spaces more than I had paints on hand so I did repeat a couple, but probably not as many as look repeated in this photo; some were two different types of paint in basically the same color; another one or two were experimenting with a Pearl-X powder mixed into paint (the Pearl-X isn't showing up well on the photo); I started by mixing one of the purples and, when I was unhappy with the result, I went out and bought a pre-mixed purple that I liked much better so I also painted over the original yuckier one, and so forth. Still working on mixing colors--Joen Wolfrom is very helpful on that!

It took me until the end of April to finish this because (1) you have to let the paint dry and (2) you have to let it cure. All that can take 2-3 weeks, depending on how thick a layer of paint you have. Mine's pretty thick in some places. I sat down this past weekend to add the finishing touches: I used invisible thread to quilt along all the lines to make it look a little more like it was pieced or appliqued. For the most part, I was able to stay in the lines but don't look too closely at the yellow. (Besides, the yellow ended up having the stiffest hand when dried so the needle just poked holes right through it.) I just did a fast fused border using the remainder of my hand-dyed black fabric that I'd used for the backing. This will never go in a show so I didn't want to spend much time on binding.

I learned an absolute ton on this project. I've got a much better feel for what different types of paint are good for, things to consider when approaching a paint project, and so forth. 

April's journal quilt may end up being another "cutting myself some slack" project as I'm still doing a lot of experimenting but not specifically on a journal quilt project. I suppose I could say that my journal quilt resolution has already served its purpose: I wanted to do it to encourage myself to experiment. So far, in 2015 I've been doing very little other than experimenting!

Craftsy Class Review: Clever Cuts for Efficient Quilting with Debbie Caffrey

I don't have this ebook from Craftsy yet but it looks interesting, doesn't it? I think I'll grab it as soon as I'm done writing this blog post. 

So, in the name of finding more efficient ways to make progress on quilts as my time grows ever-more-limited, I once again looked to Debbie Caffrey. Well, to be clear, I bought this class primarily because I'd enjoyed her other one so much. Clever Cuts for Efficient Quilting, like her first class (Cut To It: Strategies for Smarter Quilting), is an excellent reference class that you'll want to keep referring back to for years to come!

Like Cut to It, this class doesn't have one specific project for you to do in order to practice techniques, but there are several patterns included in the class materials if you do want to put one of her cutting methods immediately to use. For me, however, I was just watching the lessons to see what was there so I'd know where to go for future reference. Hence, no pretty pictures to go with this review--sorry.

For my general thoughts on Debbie Caffrey as a teacher and the usefulness of the techniques she teaches, see my review of her first class. I can just keep saying "Ditto, ditto, ditto." I can't say it enough--these are both excellent classes to have. 

Do you need to do the other class before doing this one? Not really. However, I do think they build on each other to a degree, and she does reference the other class periodically in this one. However, you could easily do this class as a stand-alone and be just fine, I think.

This class includes a few more tips on organization, accurate cutting and piecing, and general ideas about when these techniques would be useful. She then discusses tube piecing, diamonds and set-in seams, lots of information about working with Tri-Rec rulers, and then some ideas and tips for piecing borders. 

The Basics

  • Seven lessons, ranging from 24 to 38 minutes
  • Lesson 1 is fundamentals of cutting and piecing, including tips for accuracy; lesson 2 focuses on organization, as well as tips for sewing, pressing, and cutting; lesson 3 is strip-tubing (I've done that before and it's fun, fun, fun!); and she demonstrates a fish block that would make a very cute baby or child's quilt; lesson 4 is all about diamonds and set-in seams, as well as a bit of drafting of templates; then lessons 5 and 6 focus on Tri-Recs in a variety of ways. Finally, lesson 7 gives several ideas and demonstrations of different types of borders; I really liked one of those and could see it on one of my UFOs, so I'll be referring back to that lesson again in the next few weeks.
  • She addresses left-handed cutting considerations, too, for all you lefties out there!

Once again, as with her other class, I highly recommend Clever Cuts for Efficient Quilting with Debbie Caffrey. If she does a third one, she'd have a hat trick! For now, it's just an excellent pair.

(Using Craftsy links on this post helps support my podcast and blog. Thank you so much!)

March 2015 Craftsy Class Update

If you're looking for my 5th Podcastaversary Giveaway, click here.

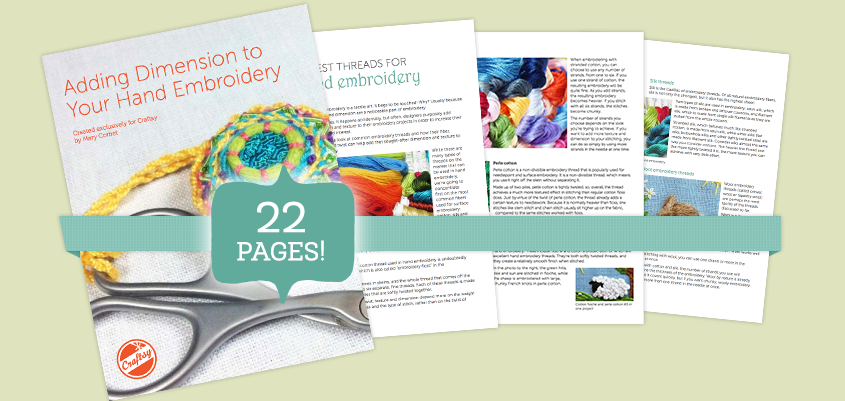
Hey, did you know that Craftsy now also has some downloadable ebooks? Check out this one on hand embroidery--it's free! Just click on the image to the left to find it.

This month wasn't stellar for me in terms of progress because I was gone for pretty much the last two weeks of the month--one week on vacation, the next week for work.  I did manage to get a couple of classes done, though--woo for me! Plus, while traveling, I did make some progress here and there on other classes. I'm so glad I now have embroidery to take with me on trips. I don't often get time to just sit and relax with a hand project (even on vacation!) but it was nice to have it with me for those spare moments that I did have that opportunity. That being said, the beginning of April is a little hairy as well, but by mid-month things settle down again and I should be happily ensconced back in my sewing room on a more regular basis.

New Completions

(+2)

Classes in Progress

(7--I know, it seems like a lot all at once, but it all depends on if I'm on the road or at home, doing class projects or just watching, etc. Note that they're "in progress," not "being finished as we speak.")

Classes added this month

(+4)

  • Clever Cuts for Efficient Quilting with Debbie Caffrey--got so much out of the first one of hers (see review here) that when this one went on sale, I went ahead and got it. It's technique more than project so I'm just watching the lessons for now and will apply techniques to future projects.
  • Stitch it with Wool: Crewel Embroidery with Kristin Nicholas--this has been on my wish list for a long time; I'd just decided to do Sue Spargo's class first. Again, when it went on sale, I figured I may as well pick it up to have it at the ready when I'm done with the other.
  • Love Your Vegetables with Anna Bullet--I'd just signed up for another CSA (Community Supported Agriculture--a delivery of fresh produce weekly from a local farm) for this summer earlier on the day I got the Craftsy sale announcement and decided this might help me find new ways to use some of the heaps of greens I tend to get. I didn't do a CSA last summer, but you can see posts from previous years here. (I was recently re-reading my posts to refresh my memory about recipes I'd developed and decided my favorite line from all of my CSA posts was this: "Basically I assess most foods on a how-are-they-as-a-goat-cheese-delivery-device scale." True dat.)
  • The Essential Guide to Photoshop with Skott Chandler--I use Photoshop all the time for work and play but have never really learned more than the basics and a couple of nifty tricks. So when I saw this new shop posted on Craftsy, I grabbed it. 

Classes To Be Completed

Current count: (16, +2 from last month since I'd finished a few as well)  

Completed Classes

Current count: 53 (+2)

Craftsy Class Review and some reveals! Fun Techniques with Fabric Paints with Cindy Walter

Online Quilting Class

Dyes are great. I love dyes. But using fabric paints as well just gives me more ways I can create really, really cool original fabrics.

So the #madquiltscientist has expanded her repertoire.

Now, here's a true confession moment: I've owned a lot of different types of fabric paints for awhile. I kept collecting them, swearing to myself that I'd immediately spend time figuring them out. And they were all neatly organized and sitting in labeled bins in my dye studio in the basement. Collecting dust.

Finally, last weekend, I got the fire lit under me to pull them out and start playing. I honestly can't remember what the catalyst was, but whatever it was, the bug hit fast and hard. I spent a couple hours on Saturday messing around with my PROfab opaque textile paints. They come with instructions but not much in the way of guidance beyond that and, as usual, I didn't bother to first go on YouTube or sit down with one of the many art quilt books I now own. I just pulled out the paints, grabbed a piece of the PFD fabric that's always sitting at the ready in my dye studio, and went to town. It wasn't bad, but I wasn't getting quite the results I was going for. Then I remembered--Doh! I owned a Craftsy class on this, didn't I?

Yep, several weeks ago I'd bought Fun Techniques with Fabric Paints with Cindy Walter. Woot woot! I spent several hours on Sunday just blasting my way through watching all the lessons, then descended back into my dye studio freshly armed with knowledge and a few new techniques to try. I had an absolute ball.

I switched to the Dye-na-Flow paints I also owned (ahem) and tried the same effects I'd been going for on Saturday, but to much better end results this time after watching Cindy Walter's techniques. 

I did a colorwash on a cotton PFD piece I had left over from a previous project, and then (again, testing out something she teaches in the class) salted it with Kosher salt, the largest salt crystal I had in my house, my husband having used up the last of our rock salt on the driveway in the most recent snowstorm. 

I also had a leftover piece of what I think is silk--although I bought it at a sewing guild's rummage sale and it was unmarked, and once you get me out of the world of cotton and wool, I'm a bit lost in the fabric-identification department. But it's shiny. And it feels like silk. So that makes it silk in my world. 

I also salted this one.

Part of what I love about paints versus dyes is they're not fiber-specific. I can use my dyes on silk but the colors come out a little different than they do when used on cotton. With paints? It makes nary a never-mind what you're painting. I could paint my dogs and it would still work just as well. (Whether the dogs enjoyed it would be another story.)

Then I did some colorwashes and, instead of salting, did some scrunching and folding to test out some other things that Walter teaches in the class. Being my first time out of the gate on this one, I learned a lot about how much I need to scrunch or fold to get the volume of lines I want. But still, as a test, it's all good. And these can still be overdyed or painted again or whatever, so it's just a start.

I've heat-set all of these, but they have to cure for a bit before I can run them through the wash and really finish the process, so you can still see some leftover salt-crunchy that's embedded in the fabric until I can give them a good wash, and lots of wrinkles that didn't want to come out with just using a dry iron. 

A little tired of being in the basement, I moved my operations to the kitchen table to do some more work with the thicker PROfab paints. I'll post pictures of that one later on when it's finished. I also (sigh) couldn't resist running out Monday evening to an art supply store in the city that carries a decent selection of fabric paints. I picked up a couple more Dye-na-flow colors, plus some Jacquard Textile Colors, Jacquard Neopaque, a handful of Jacquard Lumiere (and I already have a specific project in mind for those), and one Jacquard Pearl-Ex Pigment so I can add it to my other paints to turn anything I want into a Lumiere-style paint.

So much like Jane Dunnewold did to me a couple of years ago with hand-dyeing, Cindy Walters has now done to me with fabric paints. It's a logical addition to my arsenal of textile art and surface design. And I'm just having a blast. 

Ah, you want to hear about the class now, is that it? 

It's just boatloads of fun. If you need more detail than that: She does an excellent job giving tips about setting up a work space, the difference between the types of paints, how to dilute thicker paints for different effects, and a variety of techniques for using several types of paints. She also shows examples of how to use the painted fabrics (and garments too!), so there's a lot of visual inspiration alongside the practical information. 

I think this class most likely marks another turning point for me in my development with art quilting. I've owned Painted Pictorial Quilts with Annette Kennedy for a couple of years now--it's one of the first Craftsy classes I ever bought, but I always found it a bit intimidating to think about diving into that one. Now I feel so much more prepared--it's just gotten bumped up to the top of my "next class" list! I've also pulled out my art quilt books and am going over anything related to fabric paints, and spent a pleasant hour or so reviewing Mickey Lawler's SkyDyes, which my BFF/BQF gave me a few months ago. I enjoyed it then, but I'm enjoying it even more now!

The Basics

  • 7 classes, ranging from 14-45 minutes--most are around 25-30 minutes.
  • Lesson 1 gives an overview of fabric paints in general, and she talks about the difference between dyes and paints, and color theory as it relates to fabric paints. 
  • Lesson 2 goes into more detail about types of fabric paints, how to buy paints, and how to set up your work space.
  • Lesson 3 and 4 are about doing color-washes and variations; lesson 5 is about using thick paints (stamping, stenciling, and painting); lesson 6 gives direction for painting a miniature quilt in a couple of different ways (this is the project I'm currently working on, to be revealed later); and lesson 7 goes into mixed media--including 3D paints, ink pens and pencils, oil sticks, and using yarns and embroidery for embellishments. 

Do you even need to ask? Two thumbs up for Fun Techniques with Fabric Paints with Cindy Walter.  Way, way, way up with a bit of dancing around involved to boot. 

(Using Craftsy links in this post helps support this podcast and blog. Thank you so much!)

Craftsy Class Review: Secrets to Cooking Fish: Eight Essential Techniques with Joel Gamoran

As I've referenced in other posts, my husband and I periodically talk about how we really should eat more fish. I'm a bit iffy on fish in general; I have a few types of fish and a few ways it can be prepared that I can almost say I enjoy. He likes fish better than I do, but it's still not something he really looks forward to. I have been wanting to learn more about different ways to prepare fish (in the ever-diminishing hope I'd ever find something I really, truly loved), so I was thrilled when I saw that Craftsy now has a second class on fish. I had already done Fire up the Fish with David Bonom and enjoyed it (here's my review of that one). So, here's my review of Secrets to Cooking Fish: Eight Essential Techniques with Chef Joel Gamoran.

Joel Gamoran is executive chef at Sur La Table. You can tell he's used to teaching classes--he's very easy to watch: he's dynamic without being over the top, and makes you feel immediately comfortable. One very nice twist to this class is that he brings in a student for each lesson; the student serves as a visual "stand-in" for you as the viewer, of course. It's nice to see someone slicing and chopping as slowly as I might, and giving him the occasional uncertain look. I enjoyed how that made this class feel a bit different from other cooking classes I've done on Craftsy. 

Because he's associated with Sur La Table, there is a certain amount of product placement in this class. And I did almost "bite," so to speak, because my fish spatula is a very cheap one that's not at all flexible when I try to get fish out of the pan, so I tend to end up with crumbly bits on the plate rather than a pretty filet. Still, I decided I'd wait to treat myself to a decent fish spatula for if I ever start cooking fish on a more regular schedule than Once in a Blue Moon.

Each lesson introduces different ways of cooking fish by going through a recipe for that technique. There were only a couple of the recipes that I thought my husband and I would be able to agree on, so I ended up making the Sole with Browned Butter, Lemon and Almonds recipe, although I substituted tilapia for sole. In the grand scheme of fish, I will say I enjoyed this fish more than most, and it was certainly a very easy recipe to throw together on a weeknight. Next time I make it, though, I think I'm going to throw a little Panko crumb on that fish as my husband and I both like our fish to have a bit of a crispier outside. 

On the other hand, by the time it's soaking in that very tasty butter/lemon sauce, you've probably negated the vast majority of the health factor to eating fish in the first place. But that's beside the point.

I did really enjoy the class, despite my half-hearted feelings about the main course. I feel like I understand a little more about fish and what types of fish work best with what kinds of preparations, and I really appreciated his discussion of sustainability in the second lesson; great information there. There was a decent amount of information in regards to blending flavors and what kinds of sauces, salsas, or side dishes work well, although I always wish for more along those lines.

Still n' all, I do really recommend this class. For this non-fish-aficionado (see what I did there?), it was a good class. For someone who actually likes fish, it would be a great class!

The Basics

  • 8 classes; absent the 2 1/2 minute introduction of lesson 1, the other 7 range from 14 minutes to 26 minutes.
  • Lesson 2 is an excellent overview of types of fish, what to look for when buying fish, and sustainability; it also has a no-cook recipe included.
  • Lessons 3-8 go through grilling, roasting, poaching, sauteing and pan-frying, steaming, and curing and smoking. The recipes range in complexity but none are very difficult--they're all quite achievable by the average home cook. Some excellent tips for testing for doneness and how to slice and serve certain fish dishes are also useful.

I can't allow my two-thumbs-sideways attitude about fish to color my review of Secrets to Cooking Fish: Eight Essential Techniques with Chef Joel Gamoran, so I'm giving the class two thumbs up. And if you act fast, it's on sale right now!

(Using Craftsy links in this post helps support this podcast and blog. Thank you so much!)

Craftsy Class Review: Cut to It: Strategies for Smarter Quilting with Debbie Caffrey

Craftsy

I got talked into this class. Really--they really had to twist my arm. (Stop that laughing. I can hear you.) I love Twitter, but sometimes those #Twilters, they can be real enablers. Still n' all, in this case, it was a tremendously useful enable!

I was reading tweets about Debbie Caffrey's Cut to It: Strategies for Smarter Quilting at a weak moment: I'd just decided I should make a gift for someone that will involve a ton (a TON) of cutting of the same units, over and over. I wasn't looking forward to it, so anything that sounded like it might help me be faster and more accurate at the same time seemed like it would be worth a try. 

I loved this class. It's not the kind of class that I can post pictures of projects I made because of it, nor have I really been able to put into use most of the techniques taught in the class...yet. I've not been doing that kind of quilting recently. However, watching her did convince me to finally pony up for something I've thought about for awhile--I used a Joann's coupon to buy a second large cutting mat for my cutting table. I keep one mat upside down so it's just a plain surface to make it easier to see ruler lines without the competing lines from the cutting mat beneath, just like she suggests in the class. And it really is nice to have both surfaces available to me. I can still flip either over as I need, but it's nice to have one of each to go back and forth.

I used a double-sided poster-hanging tape to hold both cutting mats steady in place. It just made me fall in love with my cutting table all over again. 

I have also started holding my ruler differently based on this class. I've always done the, well, let's call it the Spider Grip--that I was taught early on: fingertips splayed on the ruler (palm lifted up) with the pinky on the mat next to the ruler to hold it in place while cutting. It works well enough, but my hand gets tired after awhile. Debbie has a slightly different hold that works as well in terms of steadiness--if not better--and is more comfortable for long sessions of cutting.

Some of the techniques she's teaching made me almost want to do the "Doh!" forehead slap: Why didn't I think of that before? Such a simple, seemingly small change to how I approach my cutting, but how much more quick and potentially much more accurate it could be. Her charts and graphs in the downloadable materials, which she goes over in good detail in the lessons, may seem confusing at first but once you get the concept, they will make things go much more quickly in the future. 

I particularly liked the lessons on jelly rolls and fat quarters because I have a lot of them and she offers a lot of helpful tips for dealing with issues they can sometimes bring with them. I tweeted after watching some of those lessons that I wanted to run right into my sewing studio and start slicing away! I may not be much of a traditional quilter these days, but I loved the blocks from Lesson 4, especially when she laid three of them out side-by-side. I immediately thought, "Boy, I wouldn't mind using that for a holiday table runner." 

There aren't really projects related to the tips she teaches per se, but she does include a quilt pattern that does use the tips if you want to do it. However, it's not emphasized in the lessons--she references it here and there, but there's not really a step-by-step instructional piece just on that project. This is truly a technique class. 

She also shows both right-handed and left-handed positions for different techniques,how to use rulers in lieu of templates (something I'm going to start trying on my Jinny Beyer Block of the Month which is Template Central), working on the bias, trapezoids, and so forth. Lesson 6 is a really interesting look at how to figure out how many pieces you can slice one unit into for very different results. Fun stuff!

So, in other words, this was an incredibly useful class. It's one that, even though I watched it all the way through, I'm sure I'm going to keep going back and watching individual lessons or parts of lessons to refresh my memory before I start certain types of projects. Including that gift I mentioned. Yikes. 

The Basics

  • 7 lessons, ranging from 20 minutes to 34 minutes, mostly in the 30 minute range. (She doesn't mess around!)
  • Lesson 1 gets through the basic introduction stuff pretty quickly; she then dives right into some foundational guidelines for holding different types of rulers and the most efficient way to approach some standard cutting tasks--strips, cross-cutting, diamonds, chevrons, and so forth.
  • Lesson 2 is all about strips; lesson 3 is half-square triangles (HSTs), quarter-square triangles, and trapezoids; lesson 4 is fat quarters and templates; lesson 5 is squares into Delectable Mountain blocks of various types;  lesson 6 also addresses squaring up, and slicing simple blocks up to form more complex units; and lesson 7 is doing bias HSTs. 
  • Class materials include a 15-page reference for everything she talks about in class, plus another PDF with the quilt pattern. Even if you don't want to make the quilt, it's worth downloading this PDF as she does address the pattern specifically at one point to demonstrate how to calculate for cutting and you may want to be looking at it for reference as she does.

Debbie Caffrey's Cut to It: Strategies for Smarter Quilting was a great purchase. This is definitely reference material for some time to come. She has a second class available that I'm now eyeing: Clever Cuts for Efficient Quilting. I'll probably be picking that one up once I knock out another class or two that I already own.

(Using Craftsy links in this post helps support my podcast and blog. Thanks so much!)

February 2015 Craftsy Class update

Craftsy

Time for my monthly update! My son gave my husband AppleTV for Christmas. I use it more than my husband does. What do I use it for most, you ask? Why, streaming Craftsy class videos so I can watch while eating breakfast, of course!

New Completions

(+5)

*Normally I don't count it as completed until I've gotten that review posted on the blog, but it's been a pretty busy couple of weeks so I'm cutting myself a little slack. I will be getting those reviews out next week, though!

    Classes in Progress

    (3)

    Classes added this month

    (+5) With all the frigid cold and lack of sun, I was weak. However, I already knocked out two of them so it's not quite as bad as it seems.

    • Learn to Sew: Simple Bags with Nicole Vasbinder. Already done, already reviewed (link above).
    • Fun Techniques with Fabric Paints with Cindy Walter. Because, well, you know.
    • Cut to It: Strategies for Smarter Quilting with Debbie Caffrey. Kati of @katisquilting is the enabler on this one. However, I bought it and had watched it all the way through within a few days. She was right!
    • Secrets to Cooking Fish: Eight Essential Techniques with Joel Gamoran. I've been wanting to do another class on fish and have looked at both in-person and Craftsy for awhile. I did a different fish class on Craftsy, but I needed one for the rest of the year when my grill is buried under three feet of snow. Ahem. In any case, I was thrilled to see this one pop up in the new classes listing and, since it was on sale, I grabbed it immediately.
    • Sew Sturdy Travel Organizers with Annie Unrein. I blame listener Jamie for this one. She commented on my review of Nicole Vasbinder's class that I may want to check out Annie Unrein. As I liked the look of those travel organizers, and since this class was also on sale for a good price, I decided to go ahead and buy it. Let it be on Jamie's head...

    Classes To Be Completed

    Current count:  14 (broke even with last month)

    I've been a busy bee!

    I've been a busy bee!

    Completed Classes

    Current count: 51 (+5--woot woot!)

    Craftsy Class Review: Learn to Sew: Simple Bags with Nicole Vasbinder

    Craftsy

    So, if you've been listening to my podcast or following my blog for awhile, you'll know my intense dislike for fiddly bits and anything that even vaguely smacks of garment sewing. 

    I love seeing other people's completed fabric purses, totebags, and duffle bags. But let's just say that my own brief forays into the field haven't been stellar. I made one totebag years ago that I still use frequently but I can still see the places where seams didn't match up and I didn't quite box the bottom correctly. Still, it's pretty functional and nice fabric so I live with it. I had another attempt at a purse that ended up in the trash. My biggest issue? I'm not a garment-sewer, and a lot of purse/tote/duffle patterns are written with the assumption you are.

    Foldover tote completed

    Foldover tote completed

    While toodling through Craftsy classes a week or so ago to see what was new, I saw Learn to Sew: Simple Bags with Nicole Vasbinder. I thought, maybe that's the ticket. Maybe if I take a step back and put myself in garment-sewing school (just the basics, ma'am), I'd grow more comfortable and wouldn't find these kinds of projects as frustrating. 

    I completed the class in one weekend. It wasn't too painful, and I completed both projects in a reasonable length of time and with only a few curse words here and there (all while working on the dang boxed bottom of that pouch when my machine decided to throw a hissy). Enough background. Here's the review:

    Demonstrating the pockets on the front (1 pocked subdivided into 3 parts)

    Demonstrating the pockets on the front (1 pocked subdivided into 3 parts)

    This class would be great for someone who's never touched a machine before. It really does start out with how to sew, as per the name of the class, "Learn to Sew." The first lesson walks through parts of a sewing machine (in brief), how to thread machine and bobbin, and so forth. There are some neat graphics in the first lesson about how the sewing machine works. The second lesson is sewing seams--of course, this class is doing it "garment-style" so seams are generally wider than this quilter is used to. I was proud of myself that I only went to default-mode of 1/4" seams twice--for the most part, I remembered to do those gargantuan 1/2" seams she uses. 

    The third lesson had a little information about fabric in general, as well as some suggestions for picking fabric for the totebag. From there, it goes directly into the projects with some "teachable moments" interspersed. 

    Showing the interior pocket and lining

    Showing the interior pocket and lining

    True confessions: I watched most of the lessons on 2x speed, until I got to parts I felt I needed to watch more carefully. I did get frustrated a few times because the video doesn't always completely match the written instructions in the downloadable materials, and the instructions sometimes leave out key information about placement and so forth. I had to keep referencing the video over again to make sure I was doing things correctly. It's not a huge issue in this case, but I would have wished for more accuracy in having the written and verbal instructions match. I made notes on the written instructions just in case I ever go back to use them again and don't want to have to watch the whole lesson over.

    Zipper pouch completed

    Zipper pouch completed

    My suggestion is, if you're new to sewing or new to this kind of sewing, watch each whole lesson first, and then back up and start doing the steps with her. In some things it's confusing until she gets to later steps and finally explains how she's got things laid out or why she's doing something the way she's doing it. 

    I can't say this class has made me all gung-ho to run out and start churning out purses and bags. But I think it did increase my comfort level with the differences between garment-sewing and quilting to a degree. The totebag and zippered pouch are cute, but if I were to make either of them again there are several adjustments I'd make to them to have them work better for me. I'm just not committed enough to either design to poke at them like that. I already own a lot of patterns for totes and purses; I guess this is something I can just keep plugging away at when I get in the mood...once in a blue moon.

    Interior

    Interior

    The Basics

    • 7 lessons, ranging from 11 minutes to nearly 30 minutes
    • The first two lessons are introductions to the basics of your sewing machine and sewing in general. Lesson 3 includes some more of that introductory information, but then goes into the cutting of pieces for the tote.
    • Lessons 4 and 5 are the foldover tote, and lessons 6 and 7 are the zippered clutch. 
    • The class materials give some troubleshooting information about sewing on your machine, and then supply lists, instructions, and templates for the two projects. As noted above, I was disappointed that there were some discrepancies between the materials and the video lessons. Just have the materials in front of you while you're watching the lessons so you can make notes to yourself as you go.

    This is a tough one for me to rank because it's a topic that I come to having a bit of an attitude already. In the grand scheme of learning how to do garment/accessory sewing rather than quilting, I guess I can give Learn to Sew: Simple Bags with Nicole Vasbinder my usual thumbs up. But I'm still not an enthusiastic garment/accessory sewist. 

    Don't forget, Craftsy is having a Valentine's weekend sale--lots of great classes to check out. I'm working on another one I just picked up this weekend that's just chock-full of great information and much more in my wheelhouse...but more on that one in a later post!

    (Using Craftsy links in this post helps support my podcast and blog. Thanks so much!)