Update: Old Craftsy links on Blog/Podcast No Longer Work

Just a quick note: I received a notification that all of my old links to Craftsy Classes when they switched to Bluprint are now broken. They’ve actually been broken for quite some time. I just wasn’t paying attention.

I honestly don’t have the time to go back and fix them. Sorry about that—there are way too many of them and as you know, I’m having enough problems keeping up with today, let alone redoing work from 5 years ago!

If any of those classes interest you, they’re pretty much all still available through the current Craftsy streaming app, so just search there. Craftsy has also completely changed up their class system and payment structure and I haven’t kept up. I’m currently just watching old stuff and haven’t been paying too much attention to anything new, so I can no longer speak with authority about the platform. That being said, the fact I’m going back and watching my old classes speaks to the quality of a lot of those classes!

I do miss the glory days of Craftsy, but maybe it’s still as good as it used to be. I just haven’t been using it. If anyone is now doing the New Revised Standard Version of Craftsy (sorry, can’t resist the clergy joke) and would like to give a quick review in the comments, please feel free!

IMPORTANT: Craftsy website and my affiliate links

Dear readers,

You may have noticed that Craftsy updated its website this weekend. Since I am a Craftsy affiliate, what this means for this blog is this:

1. Any of my Craftsy links that have been clicked on in 2016 will automatically be redirected and will retain that redirection for three months.

2. Any of my Craftsy links that have not been clicked on in 2016 will no longer work after October 1st.

Which means that I'm supposed to go into my blog and update ALL of my links to the new website within three months of October 1st. 

Y'all know my schedule. Y'all have experienced that I'm not able to be a particularly regular blogger at the moment, let alone have the time to go in and update a bazillion links (and I probably do have something approximating a bazillion Craftsy links). 

If you'd like to do me a favor and at least buy me three months, go click as many of my Craftsy links as you can, LOL. Otherwise, I'll have to just accept the change and get to it when I get to it. Hopefully my faithful readers will be patient with the fact that a lot of links will no longer work for awhile and, frankly, may never work again as I don't see myself having the hours to spend to go through and update every last one of them. Sorry about that!

Meanwhile, do go check out the new Craftsy website if you haven't already!

Weekend Goals and Craftsy Sale

Once again, I have the pleasure of a largely unscheduled weekend in front of me. I'm treasuring these because they are about to end. Next weekend I'm home, but I leave the following Monday for my summer board meetings and national conferences (work). I get home the 27th, have a week at home, then head to Boston for my August classes. And we all know what happens after that--back to assignments, papers, reading, work travel, and no more free weekends for awhile. 

So my goal is to get the Annie Unrein Ultimate Travel Bag done this weekend--or at least enough done that I can do the finishing touches in the evenings next week. I'd really like to be able to take this with me on my work trip.

I've got the class for this one so fingers crossed.

Join me? Craftsy is having a 50% off sale on some of their top classes this weekend! 


And yes, I'm still plugging away at that binding. Still feel like I have miles to go. We're running out of episodes of Stargate: Atlantis...


(Using Craftsy links in this post helps support my podcast and blog. Thank you!)

Post-4SI Weekend Accomplishments

On the spur of the moment, we U.S. #Twilters declared this past weekend #4SI--in other words, the 4th of July Sew In. Most people were out and about with friends and family for the weekend so there wasn't a ton of activity online, but it was still, as always, fun to keep up with one another. 

So here's what I got done with some mammoth (for me) sewing sessions on Saturday and Sunday:

Catch-All Caddy--done! I'll post a separate blog entry about this one. It was a thing. Although it wasn't as much a thing as the Everything in Its Place Bag or the Cosmetics Bag. But still. A thing.


Designs stabilized and traced for Postcard Cuties Halloween embroidery BOM for months one and two--done! Just in time, too, as we got the email today that month three is on its way. (Yeah, I know, you can't see much in the pictures, but really--they're all done!)


Design traced for Nouveau Witch--partly done. I've got the linen background cut, pressed (which took some doing--it is linen, after all), and stabilized. I haven't gotten the tracing done yet. See above. By the time I got all that done my neck needed a break from looking down so I put off tracing the witch for another day. No pics yet since it's just, well, a piece of linen. 

And gravy: I did get the second snowman embroidered. Just need to get him fitted with his hat, sewn together, and stuffed. I'll post a pic of him when he's totally done. Not that he looks much different from the other guy.

Binding on Jacob's Ladder--not done yet. By the time I got done working on that caddy every day my shoulders, neck, and hands were whining at me so I didn't push it. I'm working on it this week, though. Although I got the BOM embroidery designs traced I'm not letting myself start embroidering them until I get that binding finished, dang it.

Basically--woo for me--I got everything done I wanted to get done! 

I don't have much going on this coming weekend, either, so I am already starting to think through what I might focus on accomplishing. I think I'm hearing Annie Unrein call my name again...

(Craftsy links help support my podcast and blog--thank you!)

Another finish! A New Travel Accessory

Probably not a surprise, given how much I travel, I've been hankering after some updated travel accessories of late. I've been using a jewelry roll that I bought from Etsy a few years back and I really liked it at first. But over the years my necklaces have shifted to bigger, clunkier, heavier things that refused to stay neatly corralled when it was rolled and were always trying to make a break for it out the ends. I began a search for a jewelry roll pattern with pockets that would keep everything more together and was so pleased to find such a thing in a jewelry roll pattern by ModKid/Patty Young Designs on Craftsy. Perfect!

The inside has one lined zipper pocket, four pockets on one panel (two tall, two shorter), and two tall pockets on the third panel. The button straps at the top are mostly for rings but I don't wear any other than my wedding/engagement rings and those puppies never come off. (Not even sure they could at this point; been wearing them nigh on 30 years). However, it's nice to be able to just slip the necklaces on without having to unhook them, and then button everything back down again.

(Photo gallery below will automatically forward, or use forward/back buttons on the sides. If viewing this in a feed reader or by email, the gallery may not appear; you may need to view it on my blog.)

 True confessions: I broke two needles doing the last topstitching as I hit some really thick seams (should've had a denim needle on hand, I guess), but other than that, and the fact that I had re-learn how to use my buttonhole feature on my machine, and I also had to learn how to do a different type of zipper pocket on this one...it all went pretty dang well!

Plus, I got to use up some cute fabric that hadn't found a purpose yet. Looking forward to this jewelry roll becoming a travel companion for the next several years

Finally! A finish that's been a long time a-comin'...

Remember oh-so-long ago when I started Annie Unrein's Travel Organizers class on Craftsy? Remember that I did actually finish the Everything in It's Place bag and post my class review back in the yesteryear? Remember how I mentioned in that review that it would probably "take me six months" to get the second bag done?

Ahem.

At least it's not a full year. Not quite. I'm about three weeks shy of a full calendar--which is, in this case, very similar to being a few cards short of a full deck.

Ah well, it's done. There was a bit of cussing, a couple of broken needles, some major surgery and a mulligan on a whole section of it, then finally just bagging any idea of something I'd be happy with other people seeing when I then messed up exactly the same part the second time and just moving on so I could get 'er done.

This puppy ain't making it to show n' tell at guild. It's definitely a note in the category of "I learned a lot, and mostly I learned I'm never making this stinkin' cosmetics bag pattern again." This is not an Annie-Unrein-Pattern problem. This is all in my execution. And this was a particularly challenging project for someone with my fairly newbie status when it comes to sewing accessories like this.

It actually mostly went swimmingly until the very end. I was extremely optimistic, indeed. And then the whole project went pear-shaped, to make the whole experience sound far too gentle and sweet, in the last couple of steps. The binding is my Waterloo, as it turns out. And Annie sure is fond of her binding--inside and out. I had similar problems with the EIIP bag binding, but this one took those problems and magnified them to the nth degree.

The first little snafu was with the webbing that goes in the handle. I'd had an early piece completely shred on me so I'd had to cut a second piece, which then meant the remainder was a bit too short for the piece it was to be used in. So I had to "franken-webbing" the unshredded part of the discarded webbing back to the longer piece. I tried zig-zagging it together. 

It felt strong enough, but as I was pulling it through the fabric casing the ends shredded again and the whole thing fell apart--which subsequently required about 10 minutes of fishing to get the short end back out of the middle of the fabric tube.

Fortunately, I happened to be on a Google Hangout sew-in hosted by the Stitch crew and got some good advice for options. The one that worked (I believe maybe originally from Nancy Zeiman?) was to wrap a piece of scrap fabric around it and then stitch the fabric to the webbing. Beautiful. Although, by the way, I learned that webbing--made from nylon which wasn't really on my radar--hardens into a tough plastic mess when you accidentally hit it with an iron. (Fortunately, I was able to clean up the iron.)

And then everything was fine for a few more steps (representing a few more hours). And then I got to the binding. Oh well. It's done.

Here's the outside, all hooked up. 

The fabric is a batik that had been given to me as a thank-you gift when I did a speaking engagement in ...where? Can you guess? Yep, Kansas, the Sunflower State. I've held onto it for a few years to try to find the right project for it. I thought it would be fitting to have a travel bag for work made from a gift received through work. And it still is--even if no one ever actually sees this thing. I won't be sending them pictures. 


And here's the inside in all its four-pocket glory.

Strangely, that pouch pocket on the bottom didn't really give me any problem at all. Nor did the vinyl pockets, since I've now got my handy-dandy Teflon foot (or, in the Janome world, the Ultra-Glide). Yep, if you're going to work with vinyl, that is well worth the purchase. My Ultra-Glide foot just skated right over that vinyl with no problem whatsoever. If only I'd just bitten the bullet and bought it when I was working on the EIIP bag. Life would've been much easier!

However, getting the binding on around that same darn pouch pocket was a real... ahem. This is a family blog. There will be none of that language here, young lady.

Now, the real question is--will I really use this when I travel? The jury is out on that. I'm going away with my husband on vacation next week and we're driving so, in that instance, yes, I'll take it for a spin. Luggage space isn't really an issue. 

However, for air travel? Probably not so much. Pam of Hip to Be a Square made this bag awhile back and told me she had problems traveling with it because the hook on the top is too small to hang on the clothing hooks on the back of hotel bathroom doors, which is what you're supposed to do with a toiletries/cosmetics bag like this. So that's kind of a pain.

Of bigger concern is the overall size. Here's a comparison photo with my usual L.L. Bean (well-worn) toiletries bag.

Compared to a bag that I already sometimes have difficulty finding room for in my suitcase, the Annie Unrein bag is a bit of a behemoth. I like to travel really light. In fact, when I'm only gone a couple of days I don't even bother with the L.L. Bean bag--I just use a zippered pouch or two and use as many hotel-provided toiletries as possible.

So the jury's out on how useful this new cosmetics bag will be. I strongly suspect I'll find some other use for it--like as another embroidery project bag or something like that. As long as it's something that doesn't have to appear in public, I'm good.

But it's done. And sometimes, done is even better than not-particularly-good, let alone perfect.

Craftsy Class Review: Creative Quilting with Your Walking Foot with Jacquie Gering

I'm back to the machine quilting classes again. I know, you've seen me take a lot of them. But I do always get some new ideas and a few tips and tricks to help make it a little easier!

Creative Quilting with Your Walking Foot with Jacquie Gering would make an excellent class for a beginner in machine quilting, with the caveat that she doesn't spend a whole lot of time on some of the basics. She does address machine features that are helpful, and she does talk about basting. I've been machine quilting for too long now to be able to judge how easy it would be to learn how to machine quilt from scratch with this class, but I think it would be possible. 

The designs themselves are quite straightforward, as you would expect with a walking foot. I was personally able to watch most of the classes on faster speeds as I was watching for things I didn't already know. I did pick up a few tips for being more successful at some of the walking foot quilting I have already done. It was useful, though, for getting some new ideas.

Since I'm working on the cosmetics bag for the Annie Unrein class, and I needed to quilt some of the components that go into the bag, I took the opportunity to nail two Craftsy classes with a single project.

I've used painter's tape in the past to mark lines so doing it here a la Jacquie Gering wasn't new for me. What was new was doing a second strip as a "registration" line. You use the first line (in this case, the one in the middle) to run the side of your walking foot along to keep your line straight--the registration line is handy as you begin to echo your first line to one side or the other; now you have a second line to eyeball too. That was a useful little tip.

For the first Annie Unrein bag I made (the Everything in Its Place bag), I quilted the units with a meander stitch. That worked really well for the bag but in hindsight I probably should've done a much tighter meander as I ran into problems occasionally along the edges as I was piecing--in some cases there were gaps between meanders on the edge and the fabric was pulling away from the batting a little as I pieced two units together. It wasn't a huge issue--just required some attention. But having had that experience, this time I decided that one of Jacquie Gering's suggestion of using the curvy decorative stitch on my machine might be just the ticket.

I like the way it looks. I hated how stinkin' long it took to do. Two quilted pieces, neither all that big, took me about 2 1/2 hours all in. Not only do you have to go slower when doing decorative stitches on a walking foot (as Gering says repeatedly in the class), I was using a 28 weight thread and if I got going too fast, it shredded. I finally turned the speed on my machine down to keep me from getting bored and hitting the pedal to the floor. I can't even begin to imagine using a stitch like that on a whole quilt. She must have far greater patience than I do.

Gering offers good ideas on choosing designs for various types of quilts and even though, again, because I've been doing this awhile I was already familiar with most of the designs, I did pick up some ideas for future quilts. Also, she's a very good, thorough teacher.

 This definitely a good class for anyone new to machine quilting to give a try. It's also good for experienced machine quilters if you've never thought of your walking foot for anything other than stitching in the ditch. Gering has a second Craftsy class on the same topic, Next Steps with Your Walking Foot, if you really get into it. I don't own that one so I can't speak to it, but I imagine it would be equally good.

The Basics

  • 8 lessons, ranging from 18 to 40 minutes (most are around 25 minutes). 
  • Lesson 1 discusses helpful features to have on your sewing machine for machine quilting, as well as a brief overview of how to prepare your quilt sandwich
  • Lesson 2 goes into the walking foot itself in detail. She also addresses straight line (matchstick), crosshatch and grid quilting.
  • Lesson 3  through 6 are different families of design: using decorative stitches, radiating designs, curves, spirals, echoes.
  • Lesson 7 is about quilting text--a slightly different technique than I've seen before and one I'd like to try
  • Lesson 8 is quilting strategies--supporting large quilts, etc., as well as the all-important "ripping out stitches." She does also include some discussion here about choosing quilting designs.

Creative Quilting with Your Walking Foot with Jacquie Gering--worth your while!

(Transparency: Using Craftsy links in this post helps support my podcast and blog. Thank you!) 


Craftsy Class Review: Slow-Cooker Savvy with Michele Scicolone

For awhile there, the only Craftsy classes I had time to do were the cooking ones. After all, a girl's gotta eat even in the midst of writing papers! That being said, this is another class I finished awhile back while snow was still on the ground.

Let me clarify, since we had snow on the ground well into April. I finished Slow-Cooker Savvy: Make Your Best Meals with Michele Scicolone in early February. Just the [normal] season for slow-cookers. Nothing like smelling your dinner cooking all day long when the snow is falling outside your window. (Although by mid-April even the smell of dinner couldn't make me feel any better about that snow. But I digress.)

This was a good class, and I tried several of the recipes out of it. I do have to give you fair warning, though: These are not your typical "dump it in, turn up the dial, walk away" recipes. Some of them take a fair amount of work either before the slow-cooker does its job or after. The Beef and Beer Stew, for example, took me about half an hour to get everything ready just to go in the slow-cooker. (That also didn't turn out to be my favorite recipe, but you may enjoy it.)

IMG_0001.JPG

I made her White Beans with Sage recipe, although I didn't have any sage so I did thyme and rosemary instead. I used them as a side dish with some other ingredients here and there over a period of days. I intend to use the techniques again with a variety of other beans as I like the idea of having beans on hand to use in other ways.


The Peking Chicken recipe was quite good. My husband even liked it, which is saying something since he approaches any slow-cooked meal with suspicion, plus I used the chicken thighs the recipe called for and he is not a fan of dark meat. This recipe is definitely a keeper. (That being said, I may do chicken breasts next time to cut him some slack.)


For me, the Beef and Beer Stew recipe, maybe not so much of a keeper. I've got other stew recipes I like better. Still, there are several other recipes in this class that I'm looking forward to trying, now that I have time to cook again. (Even the "dump and cook" recipes take too long when I'm on the road more than I'm home!) For example, there's a pulled pork recipe that's intriguing--I want to try it out to see if it beats my others. Hmmm. Maybe this weekend--more time for sewing if the slow-cooker is working for me!

Michele Scicolone is a polished instructor and has written twenty cookbooks--if you dig this class, you can pick up some of her cookbooks and have all sorts of slow-cooked recipes in your repertoire.

The first lesson talks about the varieties of slow-cookers on the market, and gives pros and cons to several of them. I already own three slow-cookers of varying sizes and after watching this lesson, I've started thinking about getting a fourth for some of the very handy features I don't have on any of the others. She also shares some cautions about using older slow-cookers, such as ones you might find at a garage sale. Michele goes through safety concerns and caring for your slow-cooker, as well as how to calibrate the temperature settings.

The rest of the classes walk through different types of meats, side dishes, and "fast slow-cooking" (frittata and creme caramel). In each, she not only talks about the one recipe used to show the technique but also shares substitutions and basic information about considerations you need to keep in mind for cooking that particular type of food using this method.

I don't tend to use my slow-cooker as much in the summer, for some reason, but I think this class may make me adjust my usual habits. After all, there are some great summer salads using beans, and a frittata would be a nice brunch dish. Something to consider, anyway!

The Basics

  • 7 lessons ranging from 16 to 30 minutes
  • Lesson 1 is an introduction and includes lots of fantastic information about slow-cookers
  • Lesson 2 is cooking a whole chicken (which includes good information about how volume affects cooking)
  • Lessons 3-5 are various types of meet: chicken pieces, beef, lamb, and pork
  • Lesson 6 is side dishes--mashed potatoes, beans, and polenta
  • Lesson 7 is "fast slow-cooking," including an egg dish (frittata) and a creme caramel. 
  • The class materials include a brief list of some of the slow-cookers she talks about in the class, as well as 12 recipes. 

I did find Slow-Cooker Savvy: Make Your Best Meals with Michele Scicolone very helpful. Recommended!

(Transparency: Using Craftsy links in this post help support my podcast and blog. Thank you!)

Craftsy Class Review: The New Chicken Dinner with Ian Knauer

Time to kick in with the Craftsy class reviews again! This one will make you hungry (unless you're a vegetarian like my daughter: sorry!). If you're a carnivore and are looking for better ways to cook chicken, you really need to check out The New Chicken Dinner with Ian Knauer. I finished this class a few months ago but it's one that I definitely keep going back to the well on. In fact, I just did the rotisserie-style roast chicken again last week (pictured below) and am likely to do it again in the next few days. It's probably become my favorite way to do a roast chicken now. 

For the most part, Knauer addresses fairly common techniques for chicken but he teaches different approaches that just have wonderful results. The rotisserie-style chicken (lesson 2) is really the best dang roast chicken I've ever had, and I've made a lot of roast chicken a lot of different ways! It's incredibly moist with a wonderful crispy skin.... Huh. I may make it for myself for dinner tonight even though no one else will be home. It's pretty easy to do and you can change up the flavors of his recipe really easily.

But let me move on. There's more to the class than an incredible roast chicken. (Although it's worth it just for that!)


Well, wait--let me just do one more picture to make you really get hungry: here's the rotisserie-style chicken cut up and covered with a pan sauce from the class recipe. Wowzer. 

I know I made another recipe from this class but I don't know that I took a picture of it. I remember thinking it was also really good. There are a handful of other recipes and techniques I also want to try. If I could only get that roast chicken out of my head. 

Knauer is an enjoyable teacher to watch--very straightforward, offering lots of great information about substitutions or variations on the techniques in each lesson. There are eight recipes in the class materials but, again, with variations there are dozens more possibilities. The ingredients are all quite normal ingredients, easy to find, and the flavor profiles run from fairly traditional American to Italian to Asian. However, again, the techniques are key: Although he uses an Asian recipe to teach poaching, for example, you can do any flavors you want. 

I highly recommend this class--it'll elevate your every-day chicken to make it feel new!

The Basics

  • 8 lessons, ranging from 9 minutes to about 20 minutes
  • Lesson 1 gives good information for what to look for in the supermarket and how to store chicken safely.
  • Lesson 2 is that really wonderful (have I already said that?) rotisserie-style roast chicken. It also includes information on compound butters and a pan sauce, as well as tips for trussing and carving.
  • Lesson 3 is deep-frying. He almost made me want to try it. (I avoid deep-frying for health reasons as well as to avoid a messy clean up!)
  • Lesson 4 is searing both bone-in and boneless chicken (this is the one I did but didn't photography--it was great!)
  • Lesson 5 is a salt-baking technique that I definitely am going to try at some point; it also includes how to salt-bake vegetables as well.
  • Lesson 6 is spatchcocking (or butterflying the whole chicken and grilling with bricks)
  • Lesson 7 is braising, using a recipe that creates a ragu for pasta
  • Lesson 7 is poaching and torching, with information about cooking rice.
    • Many of the lessons also include carving and plating suggestions.
  • The materials include eight recipes, as mentioned above.

The New Chicken Dinner with Ian Knauer is probably one of my top three favorite cooking classes from Craftsy now. (Artisan Bread Making with Peter Reinhart and Homemade Italian Pasta with Giuliano Hazan are two others, although ask me on different days and I'd probably name different ones!) In any case, I definitely, wholeheartedly, recommend this class!

(Transparency: Using Craftsy links in this post helps support my podcast and blog. Thank you!)

Back...and not-so-much "better than ever"

It's been two months and sixteen days since my last post. Ahem.

I've returned to the Land of the Living Quilter. Or, rather, perhaps I shouldn't be quite so optimistic yet. I've returned to the Land of the Want-to-Be-Living-Quilter and the rest remains to be seen. The key points here are:

  • I'm officially done with school for the semester. My next class isn't until August, although I still have plenty of school-related work to keep me busy. (You should see the stack of books I want to get through before August, ahem.) Still, no weekly assignments or papers to be turned in for awhile, so things can get more relaxed and predictable.
  • I'm done with most of my travel until our summer events in July. I have a mid-length vacation planned with my husband in May (a few extra days around Memorial Day weekend), and a speaking engagement in June, but that one is within an easy drive and won't take a whole weekend. And although I still have some evening conference calls, it's not nearly the volume we had earlier in the year. So I feel like I'll be able to have a life outside of work and school for awhile!

But it wasn't all "work and no play makes Jane a dull girl." Although I haven't had the time or energy since my retreat in February to do much in the way of quilting (none) or embroidery (two evenings, about 20 mins each, as I recall), I did succumb to "quilting/embroidery preparation," so to speak.

2016-04-14 16.49.57.jpg

As I was driving home from a set of meetings in Exton, PA, I saw a quilt shop in a plaza on my right. There may have been a squealing of tires. Welcome to The Quilt Block, Inc. (Their Facebook page is a little more active until they finish getting their website put together.). This was a wonderful store! I was the only customer there at the time so I had a nice long chat with one of the owners, Cynthia (with thanks to a reader who was able to identify her for me so I could update this post accordingly). She mentioned, by the way, that since she'd opened in 2006, 10 other quilt shops in the area had closed. I was surprised to hear that since there's a very fine national quilt show in the area--I would think that would equal a solid fan base locally. I guess not in this case, although it may also be that property values are so high in the areas surrounding Philadelphia that the overhead shuts them down before they can even really get started. In any case, if you live in the area or are vacationing around Philadelphia/Valley Forge, make sure you check out The Quilt Block and keep them in business!

Here's the goods. I'm not buying fabric very often at this stage except to finish projects, but if there's embroidery threads available, well...

And yes, you're seeing right, that's an Annie Unrein pattern. I love her stuff, even if I do whine every step of the way in making it. To be clear, her patterns and instructions are actually extremely well done. We just all know how I feel about this kind of sewing. But I keep going back to the well.

The green box is a bit of over-packaging for embroidery needles. The owner spoke highly of Tulip brand and I'd never tried them, so this is an assortment collection.

The two buttons were irresistible. The one with the red circle and slash has the word "mending" behind it. The other one says, "No you couldn't make that." At least, they gave me a giggle at the end of a long day. 

And yes, that picture was taken on a hotel room bed. I've seen a lot of those lately.

Cynthia, one of the owners

Cynthia, one of the owners

What's not shown here is that...and I really can't believe I did this...I signed up for the store's embroidery/quilt block of the month. Apparently I was having a really weak moment. I posted about this on my Facebook page so I won't say more here.

Except to say that I know I'll have completely forgotten about this by the time I get the first block in the mail in a couple of weeks. Will it be like Christmas, or will it be like "What the heck did I just do to myself?" Only the Shadow knows...

 
2016-04-18 22.54.27.jpg

One of the brief times I was home between travel, I saw on Mary Corbet's blog an announcement that my favorite Etsy shop for hand-dyed embroidery threads, ColourComplements, was having a sale. So I bit. Lovely. Lorraine does a beautiful job. 


And, in celebration of being done with school, I suddenly paid attention to my quilty email again and saw that Craftsy was having a sale. Mind you, while I do still own several Craftsy classes I haven't gotten to yet, I didn't have any left in the areas that I felt the need for new ideas. (Rationalization is a good thing.)

On the quilting front, most of what I need to do to finish up UFOs is machine quilting, so I decided to pick up a couple of classes that I'd been looking at. I now own Jaquie Gering's Creative Quilting with Your Walking Foot. It's been on my wish list for a l-o-n-g time and I've heard Frances of Off-Kilter Quilt and others speak highly of it. I also picked up a newer class, Quilting with Rulers on a Home Machine with Amy Johnson. Color me intrigued. I don't own any longarm rulers but if she convinces me it's the thing, I'd be happy to pick some up. 

And now you're going to laugh. And laugh. And laugh. Remember that Annie Unrein pattern I referenced above, and what I said about whining my way through projects like that? Well, she has a new class on Craftsy. Again, did I say I've had a few weak moments? This one, though, makes a certain amount of logical sense. Her new class is The Ultimate Travel Bag. We can all agree I do a lot of traveling, right? And I'm always on the lookout for that perfect carry-on, weekender, totebag...whatever. I haven't found it yet, but I live in hope. However, I need to finish the second bag from the Annie Unrein class I started last year before tackling this one. Still, there's no reason I can't start digging through my stash to see what fabrics I can use, right?

What I Want to Do Now

I'm going to talk more about this in my next podcast episode--and yes, there will be a next podcast episode soon!--so for the purposes of this blog I'm just going to get a few things down in writing for my own clarity.

In the realm of personal health

Being back in school has not been good for my health, sadly. So I've got a few goals now that I've got several weeks on end where the word "routine" can actually come back into my vocabulary.

  • Start paying close attention to what and when I'm eating
  • Get back into an exercise routine.
    • Includes, but not exclusively, canal walks with the Doofus as he's put on a couple of pounds this winter himself.


In the realm of life organization

  • Clean my office/sewing room. Things have gotten a bit stacked and muddled these last couple of months.
  • Clean my daughter's room--she left behind a bit of a heap when she moved, and I need access to her bookshelves for my academic overflow, as it were. So she's coming over this afternoon and we're doing a Clean Sweep. (Tanesha of CraftyGardenMom was recently talking about that show and I was also a HUGE fan and, like her, am very disappointed that it's not on Netflix or Amazon Prime!)
  • Get my dogs to the groomer. Yikes.
  • Finally finish several blog posts (Craftsy class reviews) that I started over the last couple of months but never actually got posted. (Is this "life organization" or is this "quilting/sewing? Hmmm.)

In the realm of embroidery

  • I just want to start doing it again, regardless of which project it is. Technically speaking, I have a few projects in the works but they're all just me playing around--no deadlines involved. So my crazy quilt blocks tend to take priority, but I also have my crewel embroidery project and one purchased embroidery pattern I'm poking away at when I'm in the mood.

In the realm of quilting/sewing

This is where I have the most specific goals, although I'm not pressuring myself on them.

That's it! My daughter just showed up and she's making me vegetarian avocado/tomato burritos (her own concoction, no recipe) for lunch. And then...the Clean Sweep is on.

(Transparency: Using Craftsy links in this post help support my podcast and blog. Thank you!)

Craftsy Class Update: December 2015

Craftsy Logo

I've skipped a few updates but thought it would still be worth me doing an end-of-year assessment with where I stand on Craftsy classes. They're not as high priority for me now that I've got other classwork I need to attend to first, so reviews and updates won't be as frequent in 2016 as they were in the first half of 2015. Still n' all, I love doing Craftsy classes and will continue to work away at them as I'm able. 

By the way, I've now added links to all of my reviews in the final list of completed classes at the bottom. There are a handful that I completed prior to starting to write official reviews so there are no reviews for those classes available--that's noted where appropriate.

New Completions

(+4)

As a note here: I've removed Jinny Beyer's 2015 BOM from the "in progress" list because I don't have a category entitled "Bagged For Now." It's still in the "To Be Completed" list but it's no longer on my current radar.

Classes added since last update

(+6, but remember, it's been a few months since my last update!)

Classes To Be Completed

Current count: (18, +6 from last report) 

Completed Classes

Current count: 65 (+3)

(Disclosure: As a Craftsy affiliate, using Craftsy links on this post helps support my podcast and blog. Thank you!)

Craftsy Class Review: Bead Embroidery--Beyond the Basics with Myra Wood

Online Machine Embroidery Class

Fair warning: Adding beads to your embroidery is pretty addicting. I'm still working on embroidering my first crazy quilt block because after adding a little bit of beady-bling to the first section I embroidered, I'm suddenly off and running with those beads. Every section now has beads added, and I'm finding myself planning my embroidery designs based on where I'll be able to add the beads. Who knew? (Knitters and crocheters, check out the very end of this post for including beads in those crafts--you too can join in my addiction!)

My sudden increase in using beads meant that I was looking for as many ideas as I could get, so I quickly dove into Bead Embroidery: Beyond the Basics with Myra Wood.

Bead Embroidery: Beyond the Basics is a sequel class to Myra Wood's original Bead Embroidery class which I reviewed a few weeks ago. If you've never used beads before, you could certainly start with this Beyond the Basics class, but I'd recommend starting with her other class first as this one only has a short segment about the basic stitches. In fact, within a few minutes of watching the first lesson, I realized this class would be a "watch only" class for me. Beyond the Basics focuses on pure beadwork, rather than beads added to embroidery projects (as in her first class). This class is about how to do those beautiful, wonderful, over-the-top bead encrusted accessories such as amulets, cuffs, buttons, and boxes (etc.). Those are something I enjoy looking at and can appreciate, but it's not at all on my radar to do at this point. 

My quickly-growing bead stash

My quickly-growing bead stash

However, even if this style of beadwork isn't something I'm doing right now, I don't feel that watching the class was a waste of time. First of all, who knows? Someday I may decide I need a big ol' bead encrusted amulet necklace that's just the right finishing touch on a special outfit. Not something I see happening anytime soon, though. However, mostly, I did pick up some good information about color planning and design that's been useful as I've been doing the mostly-embroidery-with-beads-thrown-in work on my crazy quilt block. Besides, after watching this class, I could see myself adding beaded fringe to the finished crazy quilt since it'll likely be a wall-hanging and, if I do, lesson 7 will come in very handy.

So, dear readers, it's really up to you to decide what your goals are for learning bead embroidery. Do you mostly want to add beads as accents to your embroidery? If so, Bead Embroidery would be the class for you. If, however, in your viewpoint The Bead is the Thing, then you'll want to ratchet up to Bead Embroidery: Beyond the Basics for sure. 

In either case, Myra Wood is an excellent teacher. She takes you step-by-step through each stitch or technique and discusses how to fix it if things go awry. The information about products to use is very helpful, especially when it comes to making cuffs or things you need to be able to bend; she also gives extremely helpful tips about covering edges and gaps that may appear.

The invasion of the beads

The invasion of the beads

This is definitely a technique class rather than a project class. Although she makes several suggestions of projects (a bracelet/cuff, amulets, beaded boxes, fringe on lampshades and such) and gives some verbal direction as to how to do them, there aren't a lot of step-by-steps for them. The only class project that's covered in the downloadable class materials is the bracelet/cuff, and even that is definitely sketchy in the materials. It doesn't really give a pattern or dimensions, just a suggested design. If you choose to do any of the projects she talks about in the class you'll be listening to her verbal directions and figuring a lot of it out on your own.

As always, I highly recommend reading the discussion threads in the class itself. You'll pick up a lot of good information from her responses to other students' questions. Plus, there's some nice eye candy as people post pics of their works in progress. Also, do check out the student project section for the class (which you can do without buying the class)--great inspiration!

The Basics

  • Seven classes, from 18 to 22 minutes each.

  • The first lesson talks about materials and a little about overall design; lessons three and four cover additional design considerations such as focal points and dimension. 

  • Lesson two is about the four basic stitches used in this type of bead work.

  • Lesson 5 gives basic instructions about how to finish off projects such as a beaded cuff and buttons, as well as how to attend to the edges of the beadwork for any project.

  • Lesson 6 is how to do beaded embellishments and appliques, which a very helpful tip about using store bought applique patches as your foundation for the beadwork.

  • Lesson 7 is fringe and beaded accents.

I enjoyed Bead Embroidery: Beyond the Basics with Myra Wood even if I won't be doing this level of beadwork anytime soon. As I said above, there were a lot of good tips and design information in this class that have been useful to me as I've been doing my more embroidery-based beadwork. Certainly, if you're into doing some serious beadwork, I'd highly recommend this class!

P.S. For you knitters out there, did you know you could also play with beads? Check out Laura Nelkin's Knitting with Beads or Betsy Hershberg's Brilliant Knit Beads! Also, if you crochet, there's Amazing Crochet Textures with Drew Emborsky that includes beadwork.

(Disclosure: As a Craftsy affiliate, clicking on Craftsy links in this post help support my podcast and blog. Thank you!)


Crazy Quilt Slow Stitch-a-Long: Second Crazy Quilt Block

image.jpg

I'm actually not being as slow on my stitch-a-long at the moment as I'd thought I'd be. I figured I'd get several blocks done now before I start school again--that way I can just work on embroidery in the pockets of time I get once I'm back in class.

So, to whit: I've now got my second crazy quilt block pieced. It sat for awhile because there were some gaps that I had to fix and I had a couple of other projects I needed to knock out first. When I got a random few minutes earlier this week, though, I was able to fix those gaps and call the block done. Well, almost done. I still need to stay-stitch the outside edges so it doesn't drive me nuts while I'm embroidering

I don't like this one nearly as well as my first block. Partly, I tried to get more adventurous in the fabrics and I'm not 100% behind my own choices, but that can probably be fixed with some clever embroidery. The other part was simply my struggles with filling those gaps that appeared. I've decided I'm not a fan of this particular method.

For those of you playing along at home, this is the second block style in Allie Aller's Crazy Quilt class on Craftsy: curved piecing using templates. The curved piecing wasn't a problem at all, but some of the fabric pieces just weren't big enough to fully cover the places they were supposed to cover, somehow. Again, the nice thing about crazy quilts is you can just throw some more fabric on--it's just a little harder to work that out with the curves than it was on my first block that was all straight lines. I tried to keep paying attention to balancing color and design as I was adding extra fabrics to cover gaps, but I still think it would've looked better had I not had to add three extra spots of fabric. Oh well--again, in the grand scheme of things, when I put several blocks altogether, this probably won't be an issue at all.

Her next block style doesn't include templates. Yay! I'm looking forward to digging into that one, but I'm giving myself a few days before kicking it into gear. 

Don't forget to check out the progress of other folks who have joined the Stitch-a-long. You can join the Flickr group even if you're just a lurker!

Craftsy Class Review: Bead Embroidery with Myra Wood

I'm digging this one out of memory a bit because I actually finished this class several months ago. However, it goes to show the value of Craftsy classes that I was able to review material in it again this past week when I was doing some beadwork on my crazy quilt block!

For those of you doing our crazy quilt slow stitch-a-long, you will definitely want to pay attention to this review. For the rest of you--it's still really good stuff, even if you're not playing in our sandbox right now!

Bead Embroidery with Myra Wood is an excellent class for learning how to add some bling to your projects. I'm not interested (at least, at this stage) in doing a bead-encrusted-something-or-other, but I do like a little subtle shine here and there on the right projects. I'd bought and watched Bead Embroidery last summer when I was plowing through every hand embroidery class Craftsy had going at the time, even though I didn't really know at that moment what I might throw beads onto. But when I was doing my first bit of embroidery on my first crazy quilt block last week, I realized that a touch of beadwork was exactly what was called for. 

"I know how to do that!" I exclaimed in my head. Or it might have been out loud. I'll never tell.

It's really hard to get a decent picture of bling but trust me, there's a little sparkle going on here!

It's really hard to get a decent picture of bling but trust me, there's a little sparkle going on here!

I'm now going back and referencing the class more fully again--I could easily recall the basics that I used in this particular instance, but I have plans for more complex beadwork coming up and have been reviewing Wood's tips and techniques. I also bought more sequins. Because everyone needs more sequins in their lives, apparently. (Although I've now learned that sequins are a lot like working with glitter--they end up everywhere. The Doofus was looking quite festive as he slept on the floor next to the table where I was working.)

I got so much out of this class that when her sequel class went on sale, Bead Embroidery: Beyond the Basics, I bought that too, though I've not started watching it yet. I want to be able to work my way through more of the techniques in the first class before I get ahead of myself!

Anyway, back to the first one...

There is a project for this class that was tempting, but I decided to stick to using the techniques on my own projects. I will say that it's definitely worth taking a cruise through the photo gallery of class projects because there is some beautiful work represented! I found Myra Wood's presentation style very comfortable--straightforward but not stilted. This class is the one that convinced me to buy a new style of embroidery hoop that I love. Although I use other hoops and (gasp) even go hoopless at times, the combo hoop is definitely good for beading.

The class materials, while predominantly geared at the class project, do include useful information about supplies in general. In terms of the class project, the materials include the design to trace as well as a stitch guide if you want to follow the design exactly--it's all very clear to follow.

So...I'm off and running! Just watch my future crazy quilt posts to see the benefits of this class!

The Basics

  • 8 lessons, ranging from 13 to 25 minutes, although the vast majority of them are over 20 minutes long.
  • The first lesson is some introductory material and information about needles, hoops, threads, and beads.
  • Lessons two through six are a wide variety of stitches and designs. The classes are organized as categories, but each class has several types of stitches and/or variations on the basic stitch. If you're doing the class project, she'll show where each stitch shows up in the project. (Even if you do the project, there's a high level of variability in the project design so you can still very much make it yours.)
  • Lesson 7 covers ways to add that perfect finishing touch to your bead design--assessing gaps and adding just a little extra something. It also includes a gallery of inspiration.
  • Lesson 8 gives the final information about putting together the class project. If you're not doing the project, you'll still want to watch this lesson as she addresses some issues common to most embroidery/bead projects such as pressing out hoop marks in the fabric and such.

I can't wait to dig my needle into more beadwork, so to speak. I highly recommend Bead Embroidery with Myra Wood. Keep an eye out--although it'll be awhile--for my review of her sequel class as well!

(Transparency statement: As a Craftsy and Amazon affiliate, using the Craftsy and Amazon links in this post help support my podcast and blog. Thank you!)


Craftsy Class Review: Building Better Bags--Interfacing and Structure with Sara Lawson

I admit: I can get obsessive sometimes.

Yes, I'm so determined to get more comfortable with bag-making that I bought Building Better Bags: Interfacing and Structure with Sara Lawson (of Sew Sweetness).

Nope, still really don't like making bags. Probably never will--it's just not my bag (ar ar ar). For some reason, though, I'm feeling a bit stubborn about making myself get better at it. As I think I've mentioned in previous reviews, one of the big issues when it comes to following patterns and tutorials for bag-making is that I didn't come to sewing from garment-making, I came to it from quilting. I had to learn how to stitch in a straight line and keep an accurate 1/4" seam and that was about it.

So, one of my weaknesses when it came to sewing bags has been a lack of knowledge about interfacings. One doesn't run into interfacings much in the quilting world. I'm figuring it's lucky I had even absorbed the definition of the word from my Mom's years of garment-sewing when we were kids and before we rebelled against wearing homemade clothes--a rebellion, however, that had a happy ending as it's what propelled her into the world of quilting. But I digress.

When I saw Building Better Bags: Interfacing and Structure with Sara Lawson pop up on sale, I decided that although it would probably be a bit like watching paint dry, it was information I should probably have. Plus, I do really like Sara Lawson's bag designs--I'd like to get comfortable enough in my skills that I could tackle some of her more interesting patterns and not end up wanting to throw things or swearing a blue streak through the entire process.

My goals are small, really. Less throwing and swearing. That would be good.

I have to say--the class did have really good information. I do feel like I have a much better understanding now of the variety of interfacings and stabilizers that are available and what each one of them brings to the table. I feel like I could more easily approach some bag patterns and perhaps substitute different innards if I want a different result. So that's all really good--and I'm glad I have the class for reference in later bag-making endeavors. I would have liked Sara Lawson's presentation style to be a little more relaxed in the class, but she did give the information very clearly and in a very easy-to-understand manner. 

I immediately felt the benefit of the class, by the way, when I started watching again the Crazy Quilt class with Allie Aller and she referred to the interfacing/stabilizers she used. I knew what she was talking about now!

This is purely an informational/reference class: There are no class projects, although she shows tons of examples from her really wonderful bag designs. (Hence, no pictures to share with this post.) The class materials include an excellent reference chart for stabilizers and interfacings that I'm going to hang on my wall to check whenever a pattern calls for a particular brand that I can't find, or just says the type and I have no idea what they mean. 

If you're an old-hand at this kind of thing, you could probably bypass it. But if, like me, you have only passing reference to the fact that there even is such a beast called "Interfacing," you will find this class tremendously helpful. If also, like me, you're a relative newbie on the bag-making scene--take advantage of this class earlier in your journey down this path than I was able to. This information would probably have lessened my frustration level somewhat in my prior bag-making endeavors. 

The Basics

  • 8 classes, ranging from 10 minutes to 23 minutes, although most are about 12-15 minutes.
  • Lesson one is simply a brief introduction of Sara Lawson and Sew Sweetness designs.
  • Lesson 2 gives the foundational information about what interfacing is, how to choose and purchase the best one for the job, and how to test it before committing your project to it.
  • Lessons 3 through 5 cover the different weights and types of stabilizers in categories, and she gives very helpful tips for how to use each with the most success (tips for sewing, fusing, and so forth).
  • Lesson 6 is entitled "Structured Reinforcements" and covers the other types of materials you can use as a stabilizer, how to do a false bottom, and reinforced handles.
  • Lesson 7 is about creating and attaching bias binding for seams and how to make and install piping.
  • Lesson 8 offers great finishing touches appropriate for any bag design, and how to care for your bags long-term.

So, while not the most exciting class I've ever taken, in terms of the information Building Better Bags: Interfacing and Structure with Sara Lawson presents it's a solid addition to my repertoire. I do recommend it if you've had the same questions swimming in your head as I have!

(Transparency statement: As a Craftsy affiliate, using Craftsy links in this post help support my podcast and blog. Thanks so much!)


Craftsy Class Review: Cook Smarter--Solutions for Weeknight Dinners with Sara Moulton

Craftsy

I'm a bit behind in my class reviews as I've had a little time to actually complete a handful in the last several weeks, but not enough time to write about them! So I'm going to try to catch up with myself this week. 

First up--cooking! 

My husband and I used to really enjoy Sara Moulton's first cooking show that was on years ago. It's a rare cooking show that we'd both sit and watch, at least those that aren't of the competitive variety, but there was something about Sara's style that we both enjoyed. When I saw recently that she had a Craftsy class available, I'm not sure it would've mattered what the topic was as I'd probably have bought it anyway. But the fact that I first noticed it at a time when I was bemoaning the fact that I rarely had time to actually cook anymore, it seemed particularly fortuitous. 

And so, for today's post, we're talking about Cook Smarter: Solutions for Weeknight Dinners with Sara Moulton.

As I've been cooking for...well, let's just say "awhile" and not anything else that will emphasize how long I've been around...I can't say that I learned a whole lot of new techniques or information from this class. However, I did pick up a few good ideas about how to organize myself better in my shopping trips so I could more easily cook a meal on the fly during the week. My husband won't eat leftovers at all--even disguised as other meals--and our freezer isn't big enough to stock up on freezer meals. (He also won't eat casseroles, so that knocks out another whole category of the "plan ahead" method.) For years, I've planned out a menu that would then become my shopping list and would leave myself notes all over the kitchen about what needed to get done when. In other words, I was basically doing everything "right" by all the usual methods. However, if something happened that I wasn't able to follow that particular menu, it became a bit of a catch-as-catch-can once the week got rolling. And that happened more weeks than not. Sara has a simpler method that allows for a lot more on-the-spot decision-making that's still fast and easy. She also got me thinking more about what convenience foods I could keep on hand (in what little freezer space I do have) that might make weeknights a little less stressful but still provide a home-cooked meal rather than yet another sandwich, salad, or pizza. 

Fish with Mustard Tarragon Sauce

Fish with Mustard Tarragon Sauce

I've only made one of her recipes so far: The Fish with Mustard Tarragon Sauce was very good and that sauce would be equally good on chicken, so that's a definite keeper. This class isn't really about the recipes themselves, however, so much as it is about ways to think about meal planning and certain types of techniques and tools that make things move much faster. I've definitely shifted the way I stock my pantry, freezer, and refrigerator a little bit now, so although we're still not at 100%, I can say that we're eating actual cooked meals a couple more times a week than we had been. 

If you're a new cook, I think you'd get a lot out of this class. If you're a cook with experience, you may still want to give it a whirl like I did. And, of course, there's Sara. I'm a fan. 

The Basics

  • 7 lessons, 15 to about 30 minutes in length.
  • Each lesson has one or more recipes used for teaching the tips or techniques of that lesson, but she spends a lot of time in each talking about variations and jumping-off-points for other uses as well.
  • The first lesson lays the foundation with discussions about what to stock, how to plan, and what she refers to as "homestyle Mise en Place"--in other words, how to set yourself up realistically (not chef-style) to speed the cooking process up.
  • Lesson 2 focuses on side dishes as well as how to do grains (rice and such) ahead of time; I plan on trying out her freezer technique here as it wouldn't take up much room.
  • Lesson 3 addresses several recipes that can be sped up simply in how you prepare the ingredients--another lesson that provides all sorts of options and adaptations.
  • Lesson 4 is "Salad for Supper," and I found her information about homemade salad dressings particularly useful.
  • Lesson 5 is all about eggs for dinner. There are some really interesting suggestions here. Positive my husband wouldn't go for any of them, but I may keep them in mind for times I'm on my own for a meal.
  • Lesson 6 has a vegetarian emphasis and good information about making compound butters--a fast way to throw some special flavor on a very basic meal.
  • Lesson 7 is how to cook once  for two different meals--again, techniques that could be adapted in a lot of ways.
  • The class materials are worth it themselves: 16 pages of recipes!

My final review of Cook Smarter: Solutions for Weeknight Dinners with Sara Moulton is, of course, two thumbs up. I'll be returning to this one often!

(Transparency statement: As a Craftsy affiliate, using the Craftsy links on this post help support my podcast and blog. Thank you very much!)

Crazy Quilt Slow Stitch-A-Long: My first crazy quilt block done!

I poked away at this a little bit off and on all weekend in between working on my paper. (Makes a nice change of pace.) The only thing that actually took any time was choosing my fabrics as I was trying to pay attention to which ones looked good next to each other, balancing color and design across the block, etc. Once I got everything cut and ready to go, the piecing was super-fast.

The picture doesn't do justice to the fabrics, of course. You really oughta see it in person. The cool thing to me is that this is a very international block:

  • The solids are, for the most part, cross-wovens from Indonesia that I bought from a vendor in Houston a few years back.  
  • The one with the diamonds in the lower right is a cross-woven scrap that the tailor in Myanmar had given me--it's green and purple cross-woven. It's gorgeous in person.
  • The textured in the upper right is also from Myanmar.
  • The dark bronze solid towards the upper left is a scrap from fabric I bought in Thailand. (The camera made it go all moire-like but it's really another crosswoven of brown and gold.)

The piece of lace is not the antique lace I've been talking about in my podcast. I wanted to use something I didn't care as much about for my first try, so this is a scrap of a hand-dyed lace whose origin I don't remember--it's either lace I bought at a sewing guild rummage sale and tossed into a dye bath just to see what would happen, or it's a dyed lace from a scrap bag I got a year or so ago from an art quilter who was destashing some of her experiments. In any case...I thought the mottled color was interesting with the rest of the fabrics in this block, so I spray basted it to a background silk that I'd stabilized with lightweight woven fusible interfacing (as per Allie Aller's method). It's pretty solidly basted down but I'll still be embroidering it down to be sure. BTdubs, I have a lot of that lace, so it may well be showing up again.

The four long pieces around the outside are insurance. The block came a bit short of 8 1/2" square even though I thought my printed pattern matched Allie Aller's measurements. But that's the wonderful thing about crazy blocks--just slap some more fabric on there and call it a day! Most of those strips will be buried in the seams (it's an 8" finished block), but even if part of them shows it just becomes part of the overall design.

Can't wait to dig my embroidery needle into this puppy!

Are you doing the Crazy Quilt Slow Stitch-A-Long with me?

My first block deadline is this coming Saturday (forasmuch as we're even sticking to deadlines). I got mine done a bit early. Yay for me. Don't forget to join QFTRUcrazyquilts group on Flickr and post a pic of whatever block you're working on!

Finally--a Finish! Butterflies are Free to Fly

Finally, it's done!

This is my completed project from Sue Spargo's Craftsy class Embroidering Texture and Dimension by Hand. Click here for my review of the class and a couple of pictures of the project in progress.

I'm not loving the final product but that has nothing to do with Sue's design or class--I love her work and the class was great fun. 

No, the issues are all "user error." So--if you take her class or use one of her patterns or books, follow her directions! She knows what of she speaks. I didn't, and it bought me all sorts of trouble.  (I went into more detail on that on my last podcast episode, so check it out if you want to avoid the same difficulties.)

Still n' all, I had a lot of fun for most of the process. I question a couple of my design choices but I did achieve my overall goals, which were (1) learning embroidery, and (2) using as many different types of threads as possible. I even threw some beads on there.

Mostly--yay, it's done!

Meanwhile, you can tell I've been bitten by the embroidery bug hard--here's a picture of more pretty mail I got this week.

Check out www.colourcomplements.com. Hand-dyed embroidery threads tastiness. She's also got a great blog to follow. She ships from Canada, by the way, but it came fast!


 I love these threads. So much so that I couldn't wait to put them to work so I added a bullion rose to my free-form sampler piece I've got working. 

Not too shabby for my first attempt at one of those roses. But that thread-gorgeousness makes anything look good. Yums.

Craftsy Class Review: Mobile Photography with Jack Davis

I finally completed another Craftsy class! Mind you, this one was a bit of a gimme but I can use some of those about now.

Last year, after I'd done a few other Craftsy photography classes that used my "real" camera, I sent Craftsy an email. "Love these classes," I said, "but the reality is most of the time I only want to bring my cell phone, not lug my big camera and several lenses. Is there a chance that Craftsy would do a class on photography using your cell phone camera?" (Or words to that effect.) They promptly replied that they were working on one.

And so was born Mobile Photography with Jack Davis. I'm so happy.

I plowed through the lessons pretty quick, watching them over breakfast and with my cell phone in hand. He addresses composition a little bit, but the class really focuses on how to use all the settings and features in your phone camera. Davis shows both iOS and Android features, so either user will benefit from this class. 

Forasmuch as I've done tons of photography with my phone over the last few years, I learned about some great gadgets in the first lesson (and have added several to my Christmas wish list), and picked up several tips in the second lesson that addresses basic settings and such. So I was feeling the benefit of the class almost immediately! The rest of the lessons walk through all the settings available natively in your iPhone or Android phone, as well as highlighting a lot of his favorite apps for taking photos and video and editing them afterwards. The final lesson includes information about backing up your photos to online services, sharing, and other things you can do with your photos once you're done messing with them.

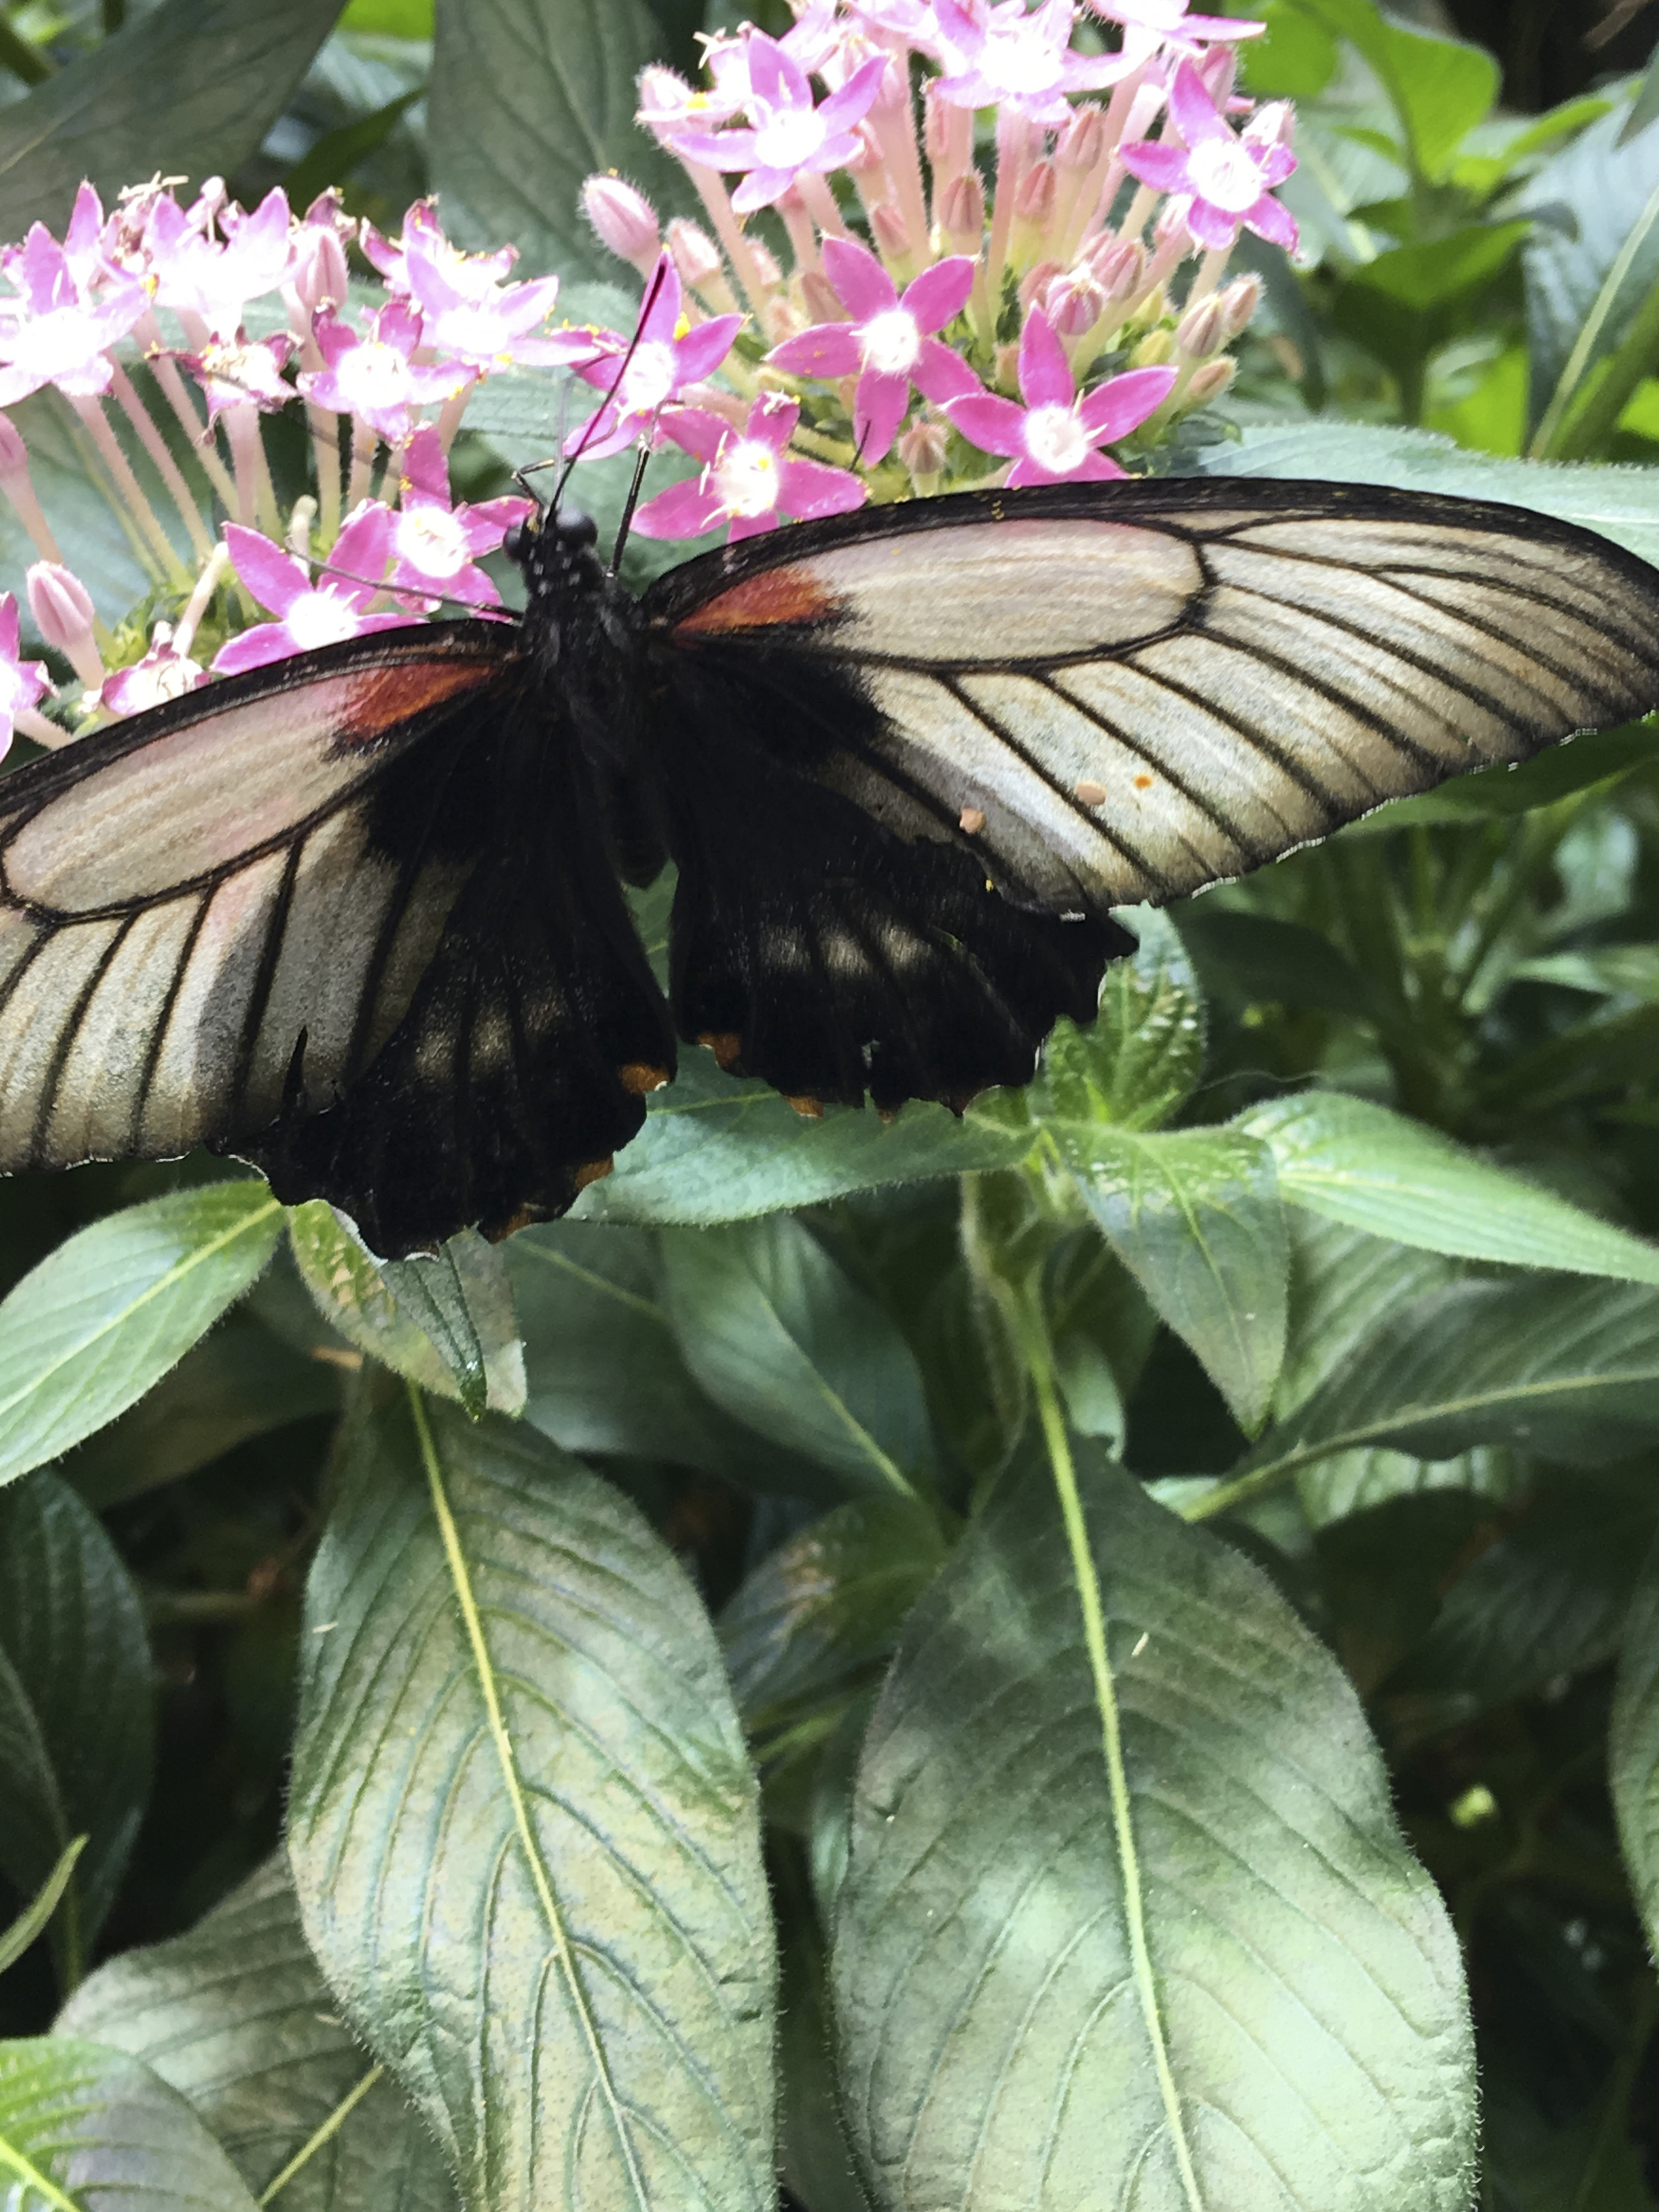
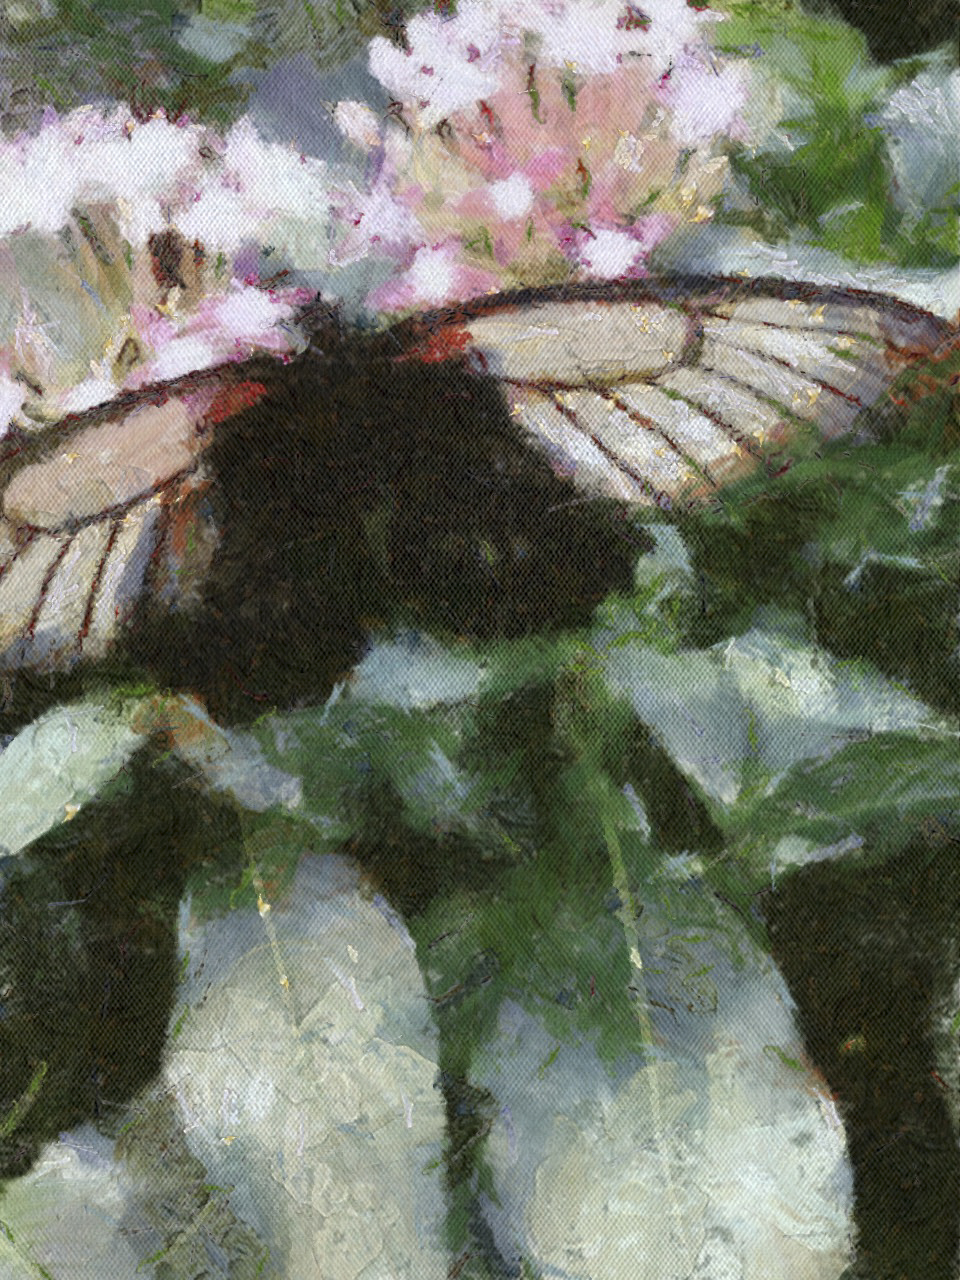
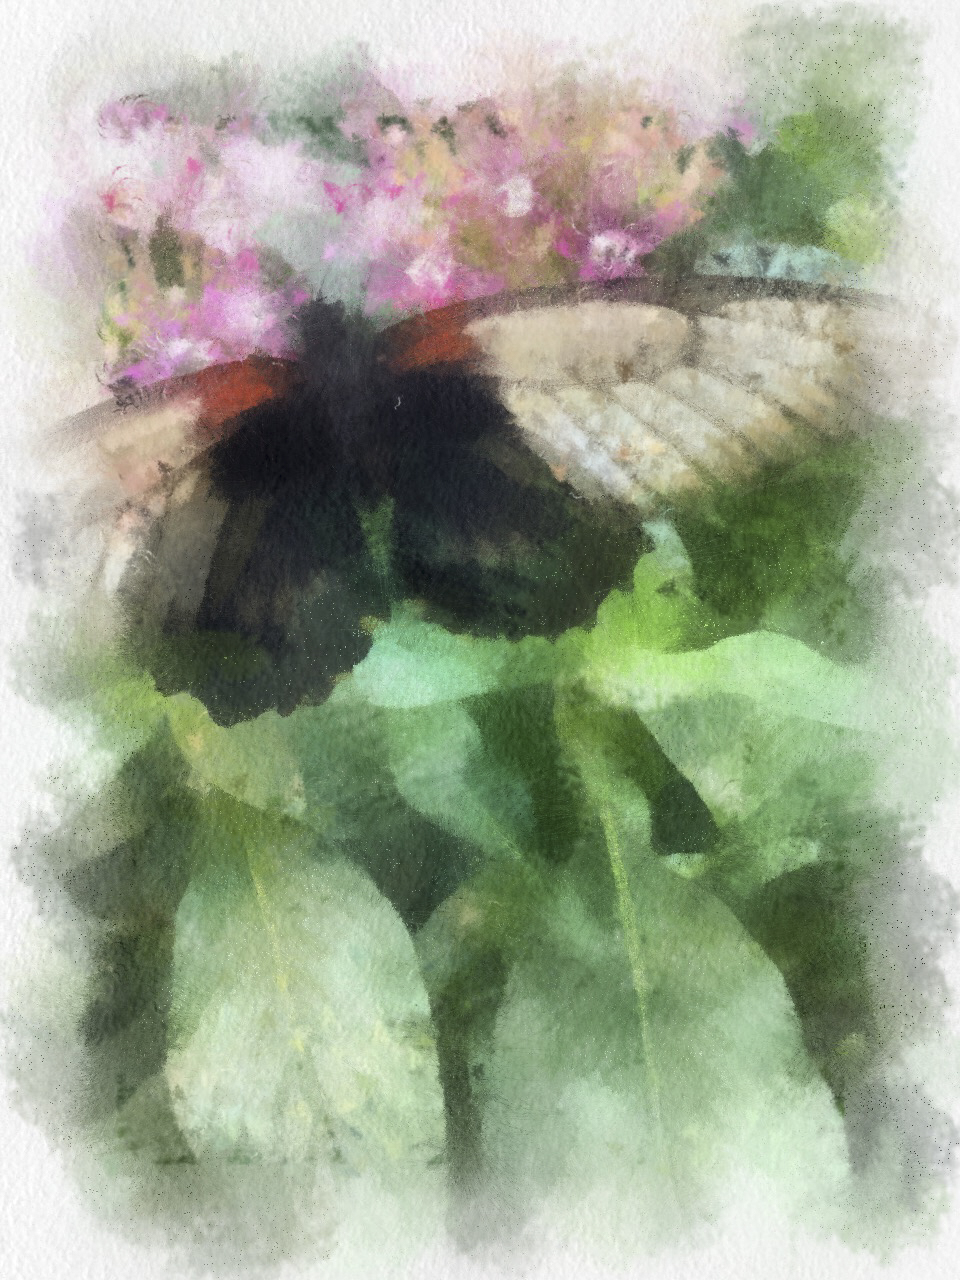
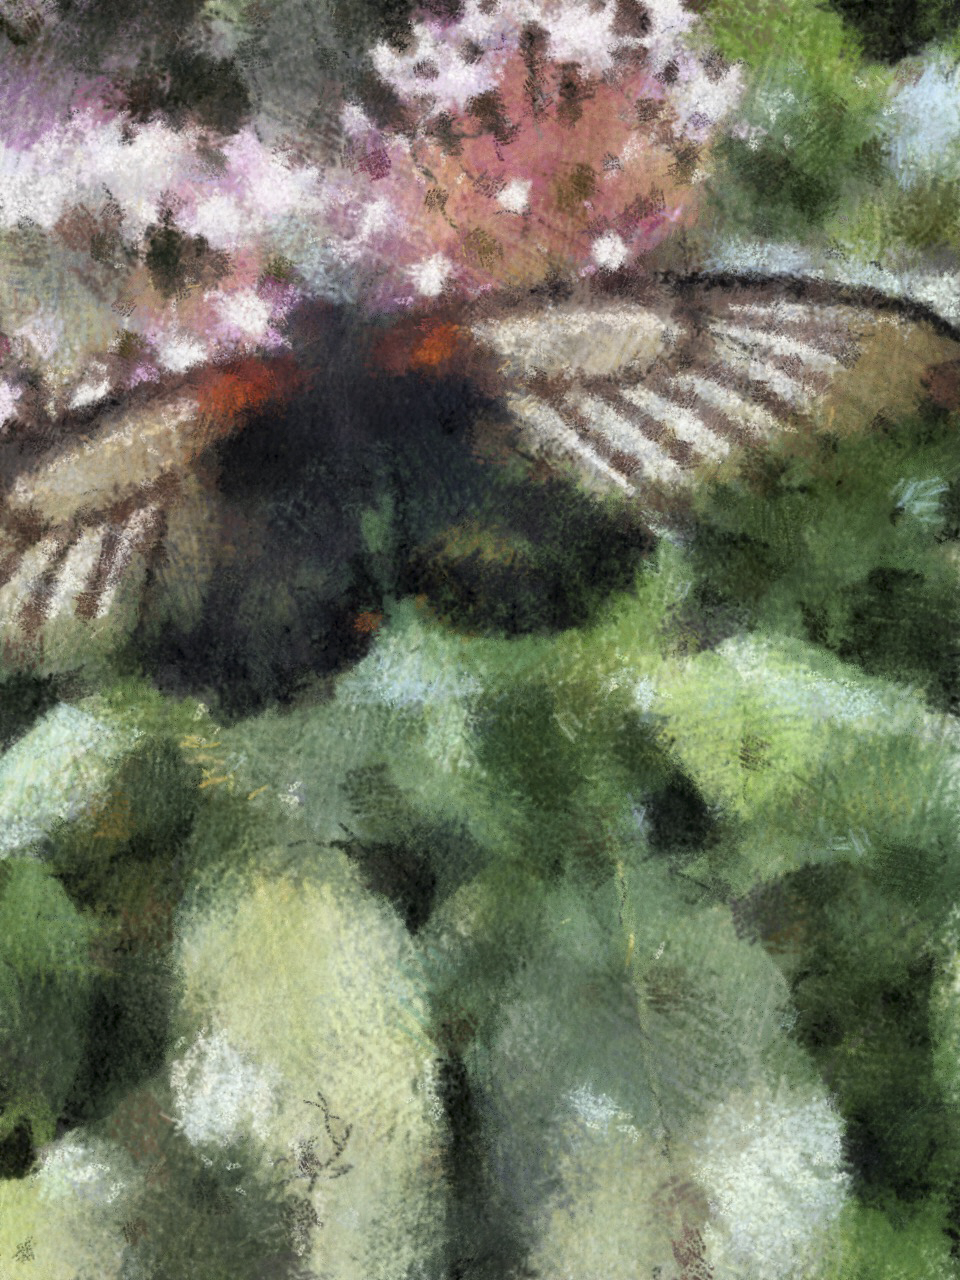
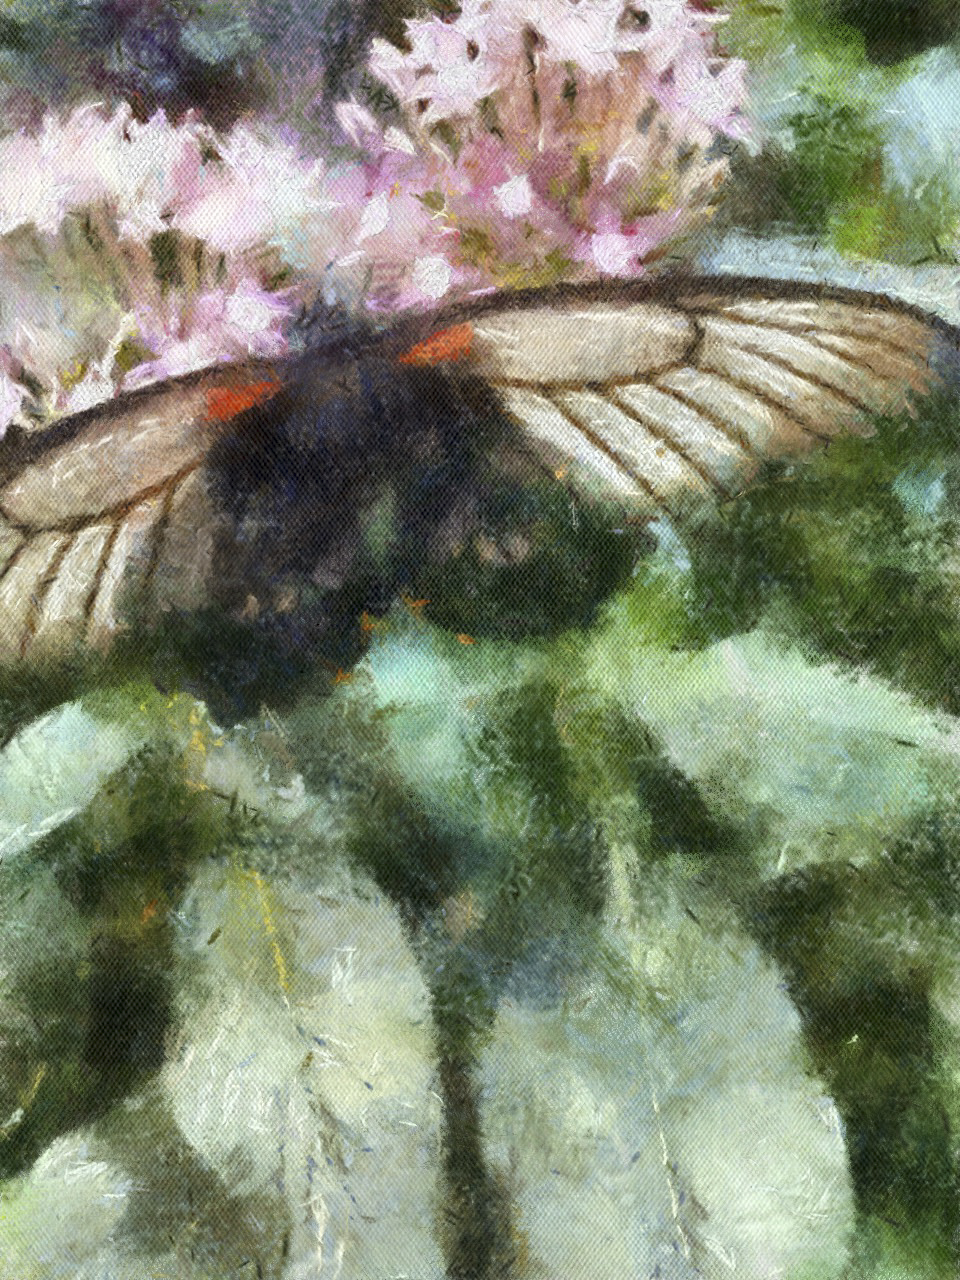
He demonstrates a lot of "creative photoediting" apps, such as my usual favorite, Waterlogue. However, he introduced me to loads of new ones so I've been going to town. Check out this photogallery of what I produced just using the most basic settings in AutoPainter, AutoPainter 2, and AutoPainter 3. I included the original photo I took at the Butterfly Garden in a local children's museum recently for comparison.

So.

Much.

Fun.

(The image gallery is on a timer to auto-forward but you can also use the forward and back arrows on the side to control the speed.) (Second parenthetical statement: Waterlogue and AutoPainter apps seem to only be available for iOS. If you're Droid-based, I found this thread that has some suggestions. Feel free to leave other suggestions for your fellow non-iOS friends in the comments to this post.)

Overall, Jack Davis is a good teacher. He has a very relaxed approach and takes you step-by-step through things so you can better understand how to do it yourself. I really enjoyed this class and plan to do a lot of practicing over the holidays so I'll probably be tweeting a lot of random photos for the next couple of months. 

One important note: This is a pretty time-constrained class, I think. Given the quick advance of technology, if you wait too long to take this class apps will have either disappeared or will have been updated and changed. So although with Craftsy classes you can buy it and own it forever and watch it years from now if you choose, this is a class I'd highly recommend purchasing and watching sooner rather than later. In fact, buy it and start watching it today. You never know when the next big system update for your phone or favorite apps will occur. 

The Basics

CleverPainter app--this one you can control where you're painting, level of detail, etc. Oh, the possibilities!

CleverPainter app--this one you can control where you're painting, level of detail, etc. Oh, the possibilities!

  • 7 lessons, ranging from about 21 to 28 minutes in length each.
  • Lesson 1 covers technology and gear--additional gadgets you might want to consider if you really want to leverage your phone's camera ability.
  • Lesson 2 addresses essentials--what are the basic native settings in your cell camera (both iOS and Android), a discussion of the HDR setting, and doing panoramas using your native app as well as a few other apps you might want to try.
  • Lesson 3 is "advanced shooting," and I picked up some excellent tips here about burst mode, motion blur, and video settings.
  • Lesson 4 addresses basic photoediting of color, contrast, sharpening, and so forth, using both native capabilities and other apps.
  • Lesson 5 is retouching and blending photos, again using native capabilities as well as other apps.
  • Lesson 6 gets super-fun with all sorts of creative stuff you can do either using your camera's native capabilities or a bunch of other apps you will likely want to play with. (I downloaded several apps while watching this lesson!)
  • Lesson 7 is syncing, sharing, and output--in other words, what to do with all that fun stuff once it's sitting in your camera memory.

Mobile Photography with Jack Davis: Two thumbs up. Well, my thumbs would be up if I could get them off my phone playing with all these great new apps!

(Usual disclaimer: As a Craftsy affiliate, using Craftsy links in this post helps support my podcast and blog, so thank you very much. And by the way, at this writing Craftsy is having a big sale so you'll definitely want to check it out! )