TAA-DAAA! Introducing the Storm at Sea Top Finished!

Can you hear my happy dance from there?

I couldn’t fit it all in one picture—it being huge n’ all. Something like 108” by some-other-big-number. As I’ve thought about it (I was still debating when I posted my episode), I will definitely be sending this puppy out for quilting. I need to keep truckin’.

Made using the Storm at Sea block die from AccuQuilt*, an assortment of batiks, and a whole lot of Aurifil 50 wt “Sea Biscuit” thread, my new favorite neutral. The couple who will be receiving it are California kids, so a sea and beach theme seemed appropriate. Plus, I’ve always wanted to make a Storm at Sea. Now I’ve done it. May never do it again.

*These affiliate links help support my blog and podcast. Thank you!

Staycation Day 5: Have I mentioned how much I hate doing backings?

With a purple passion.

th-23095873694-480x640.jpg

So, on the happy side of things, I finally got Cosmos done. This was one of my Cotton Cuts Puzzle Mystery Quilts—I think from maybe 2018? It’s an older one. I did the smaller size on this so it’s finished something like 48x60” or something along those lines. You have the option of adding borders but I didn’t choose to.

Learn from me: The difficulty with doing a BOTM over several years is you may not remember exactly what you did in terms of the 1/4” seam. Was I using a scant one when I started? A full one? Was I using this foot or the other foot? In other words, the end result didn’t come out exactly square. I’m not sweating it. It’s close enough for horseshoes and I’m not doing this for a show or anything. But I should remind myself to put a post-it in the project box with my exact foot and needle settings for consistency.

That being said, done is done. And done is good.

I then worked on the backings for both of the Puzzle Mystery Quilts (see Stratford here).

The backing on Cosmos went just fine. I still hated working with it. It’s something about wrestling with large swaths of fabric that gets to me. Even a pieced backing is irritating because eventually it still becomes a large swath of fabric—it just takes longer to get to that point. Which is equally irritating. When I get to the backing, I just want it over with as quickly as possible.

Then I got to the backing for Stratford, which is a larger quilt than Cosmos so it required a little different logic around how to cut and sew things back together to get them large enough in the right proportions. Somehow, I managed to cut it wrong. It would’ve been just barely big enough for the quilt itself, but not leave any to spare for attaching to the longarm machine correctly and to allow for the slack that the quilting process needs. I ended up having to sew the scraps from the original cuts together and sew them onto the end of the backing, so there’s a seam in an awkward place. It’s possible the seam may end up right along the outer edge of the border and might be able to get trimmed off in the end, but we’ll see. It was irritation on irritation, but again, “Done is Done and Done is Good.”

That was it for Day 5, except some reading and more binge-watching of History Channel’s Alone. (I’m hooked.)


Another finish! Baby Quilt #2

What a week. I did some protesting last weekend which, go figure, being outside all weekend in the pollen-filled air, subsequently felled me for much of this week. I did go in for my COVID-19 test as suggested for all protestors and it came back negative. I wasn’t expecting anything else. Everyone was masked at the protests and although we weren’t always able to keep the 6’ distance with a couple of thousand of us marching through city streets, it was still pretty amazing that no one even bumped into me. I’d say we were keeping 3’. All of my symptoms this week were my regular ol’ allergy symptoms—sinus, fatigue, itchy eyes, etc.

So, unfortunately, although I’d planned on finishing baby quilt #2 last weekend, I didn’t feel up to doing anything with it until this afternoon.

Yay—it’s done!

IMG_0692.JPEG

To recap: This started out as a way for me to play with some of my (at the time brand-new) Accuquilt dies, and a fat quarter collection I’d had for a long time, focused on the alphabet fabric. I scanned the fabric and did a quick design in EQ8 to figure out fabric layout.

I then miscut the fabric that was supposed to be in the corner squares of the star blocks, and didn’t have enough left to be able to fix it with the same fabric. Lo and behold, I decided to fussy cut some valentine fabric I’ve had in my stash for years, not using any squares that had “Feb 14” on it so it could be more generically lovey-dovey. Don’t like it as well as the original posy fabric but it works and I’m glad to have that fabric out of my stash.

When it came to the border, the butterfly fabric was the only thing I had that was even close to the right red. Again, wouldn’t have been what I picked if I were in a quilt shop with all sorts of options, but it works and, again, nice to have that fabric out of my stash. (I believe both fabrics came from the same scrap box from Fat Quarter Shop or wherever I used to periodically buy those from. Neither of them are anything I’d have selected myself for my stash.)

I dug into my strip stash for the binding and found four strips of the same mottled red that works just about perfectly. Phew.

In the grand question of “do you buy for a project or do you buy for a stash,” this project is an excellent example of why it’s handy to buy for a stash. I created this whole quilt on impulse without buying a single piece of fabric. We won’t include the money spent on the AccuQuilt, of course.


IMG_0693.JPEG

If you remember some previous waffling I was doing about this, I did end up doing the whole binding by machine this time.

I watched a quick refresher video from Jenny Doan (I’ll post it below) and realized that in my past efforts I’d chosen stitches that required me to stick right along that seam line and have everything lined up with a precision that just made life more difficult than I needed. After watching the stitch that Jenny Doan used, I decided to use a fun loopy stitch on my machine and life was ever-so-much simpler!

And can’t beat the speed. I had the whole binding put on within 30-45 minutes. Sure, it’s a small quilt, but still. Love that kind of a finish.


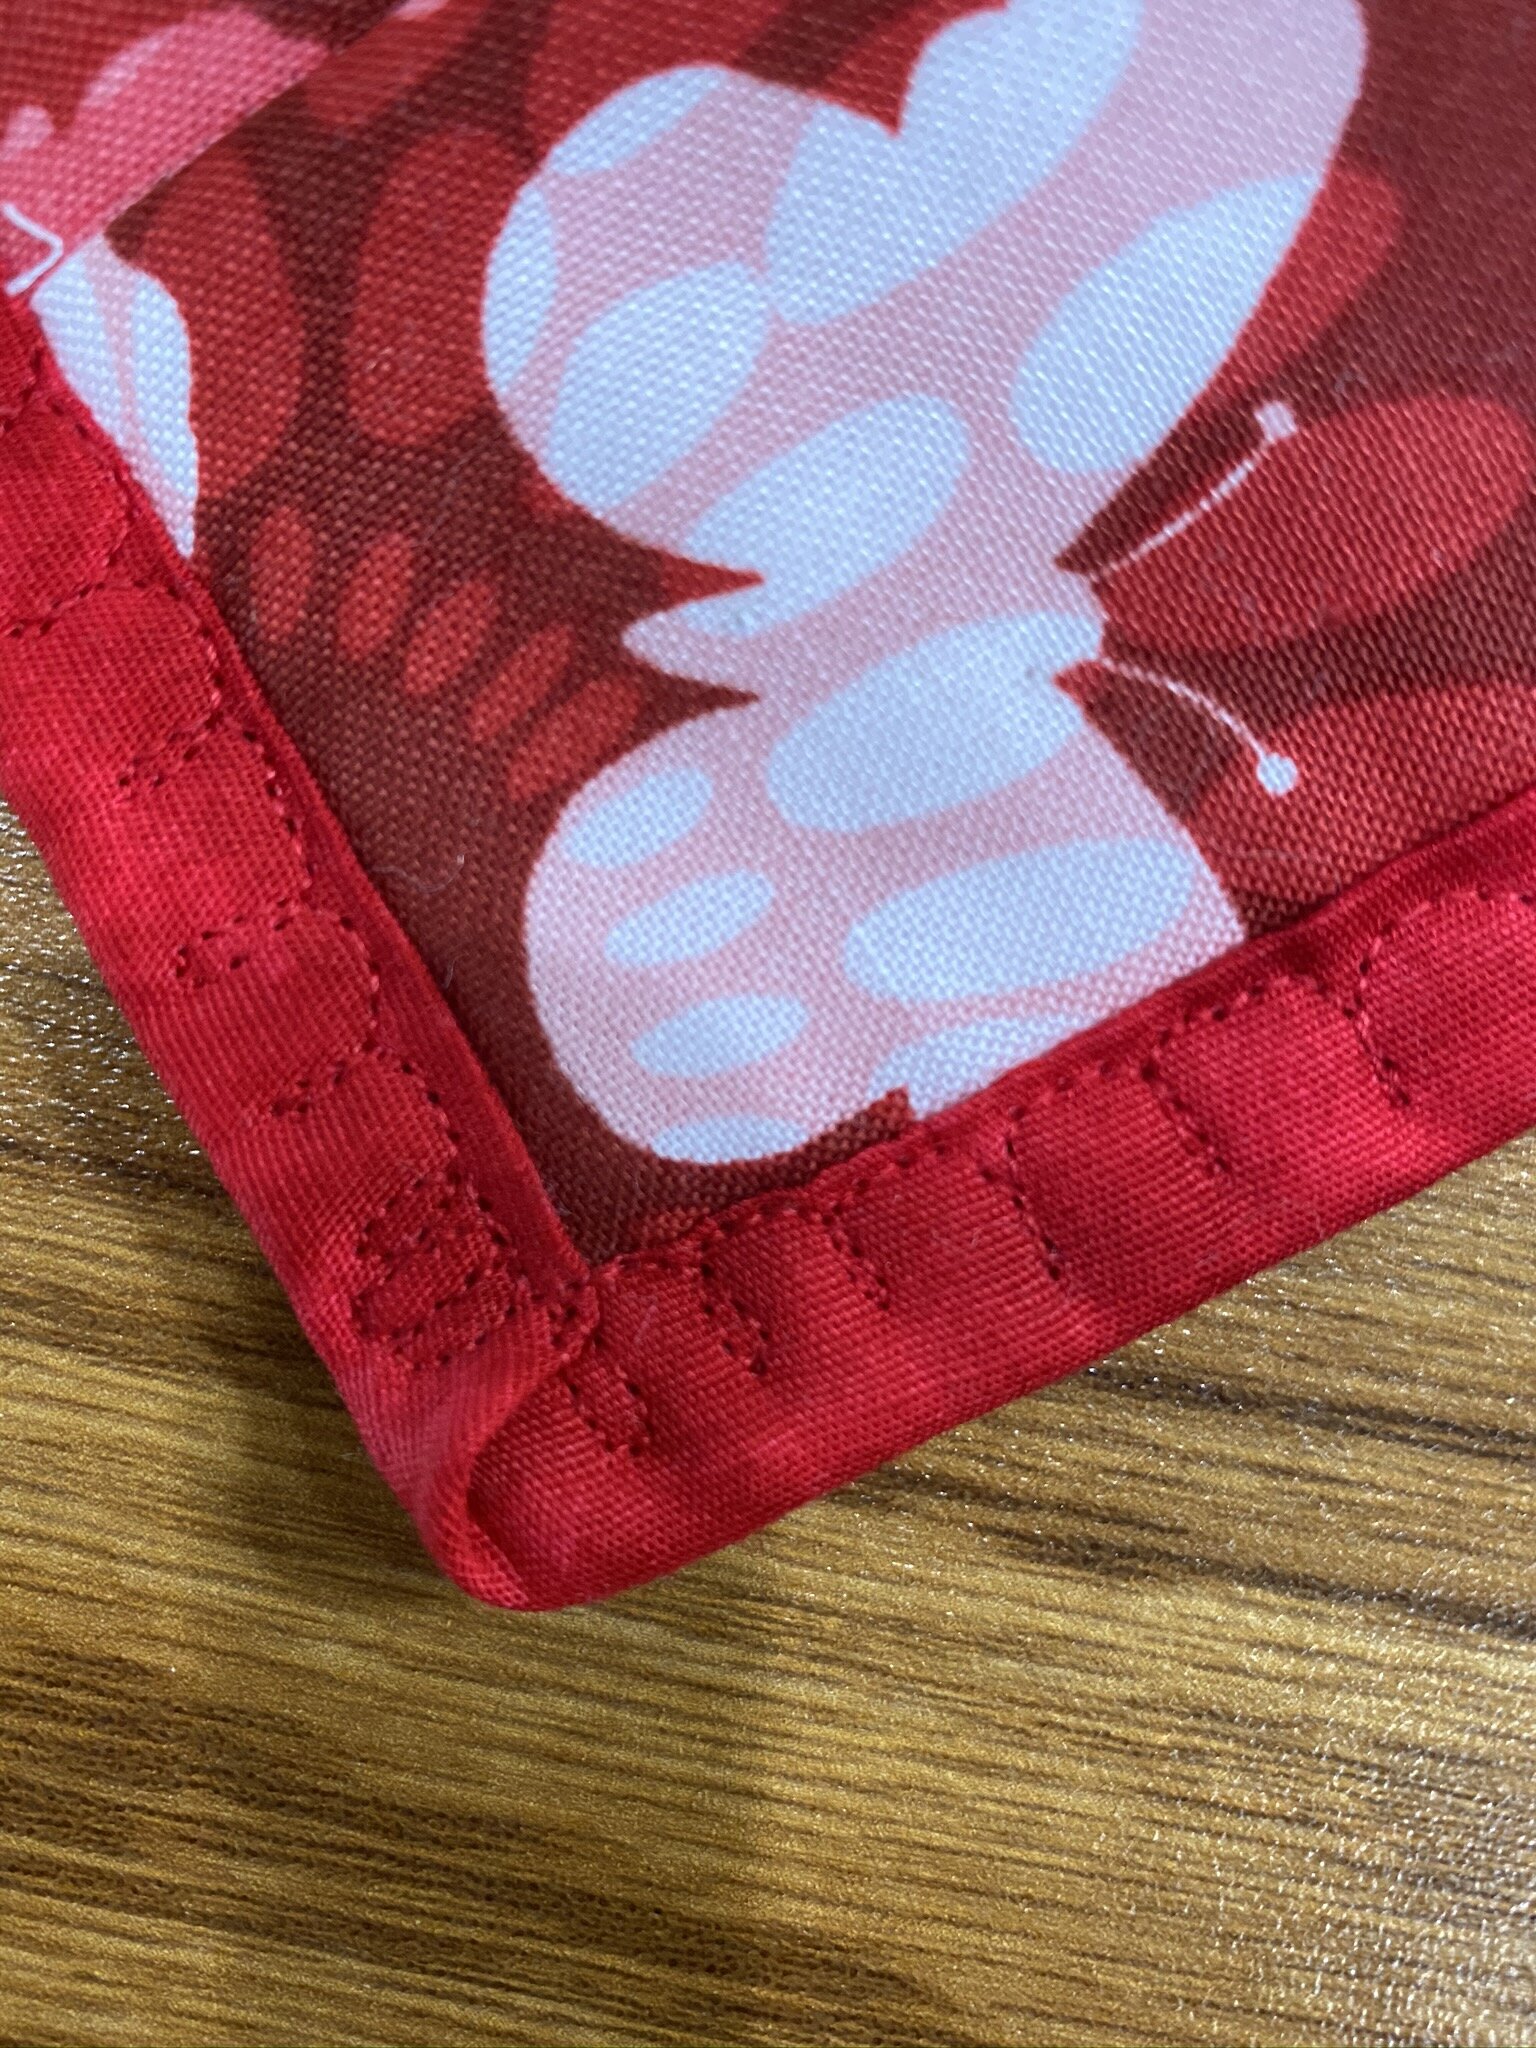
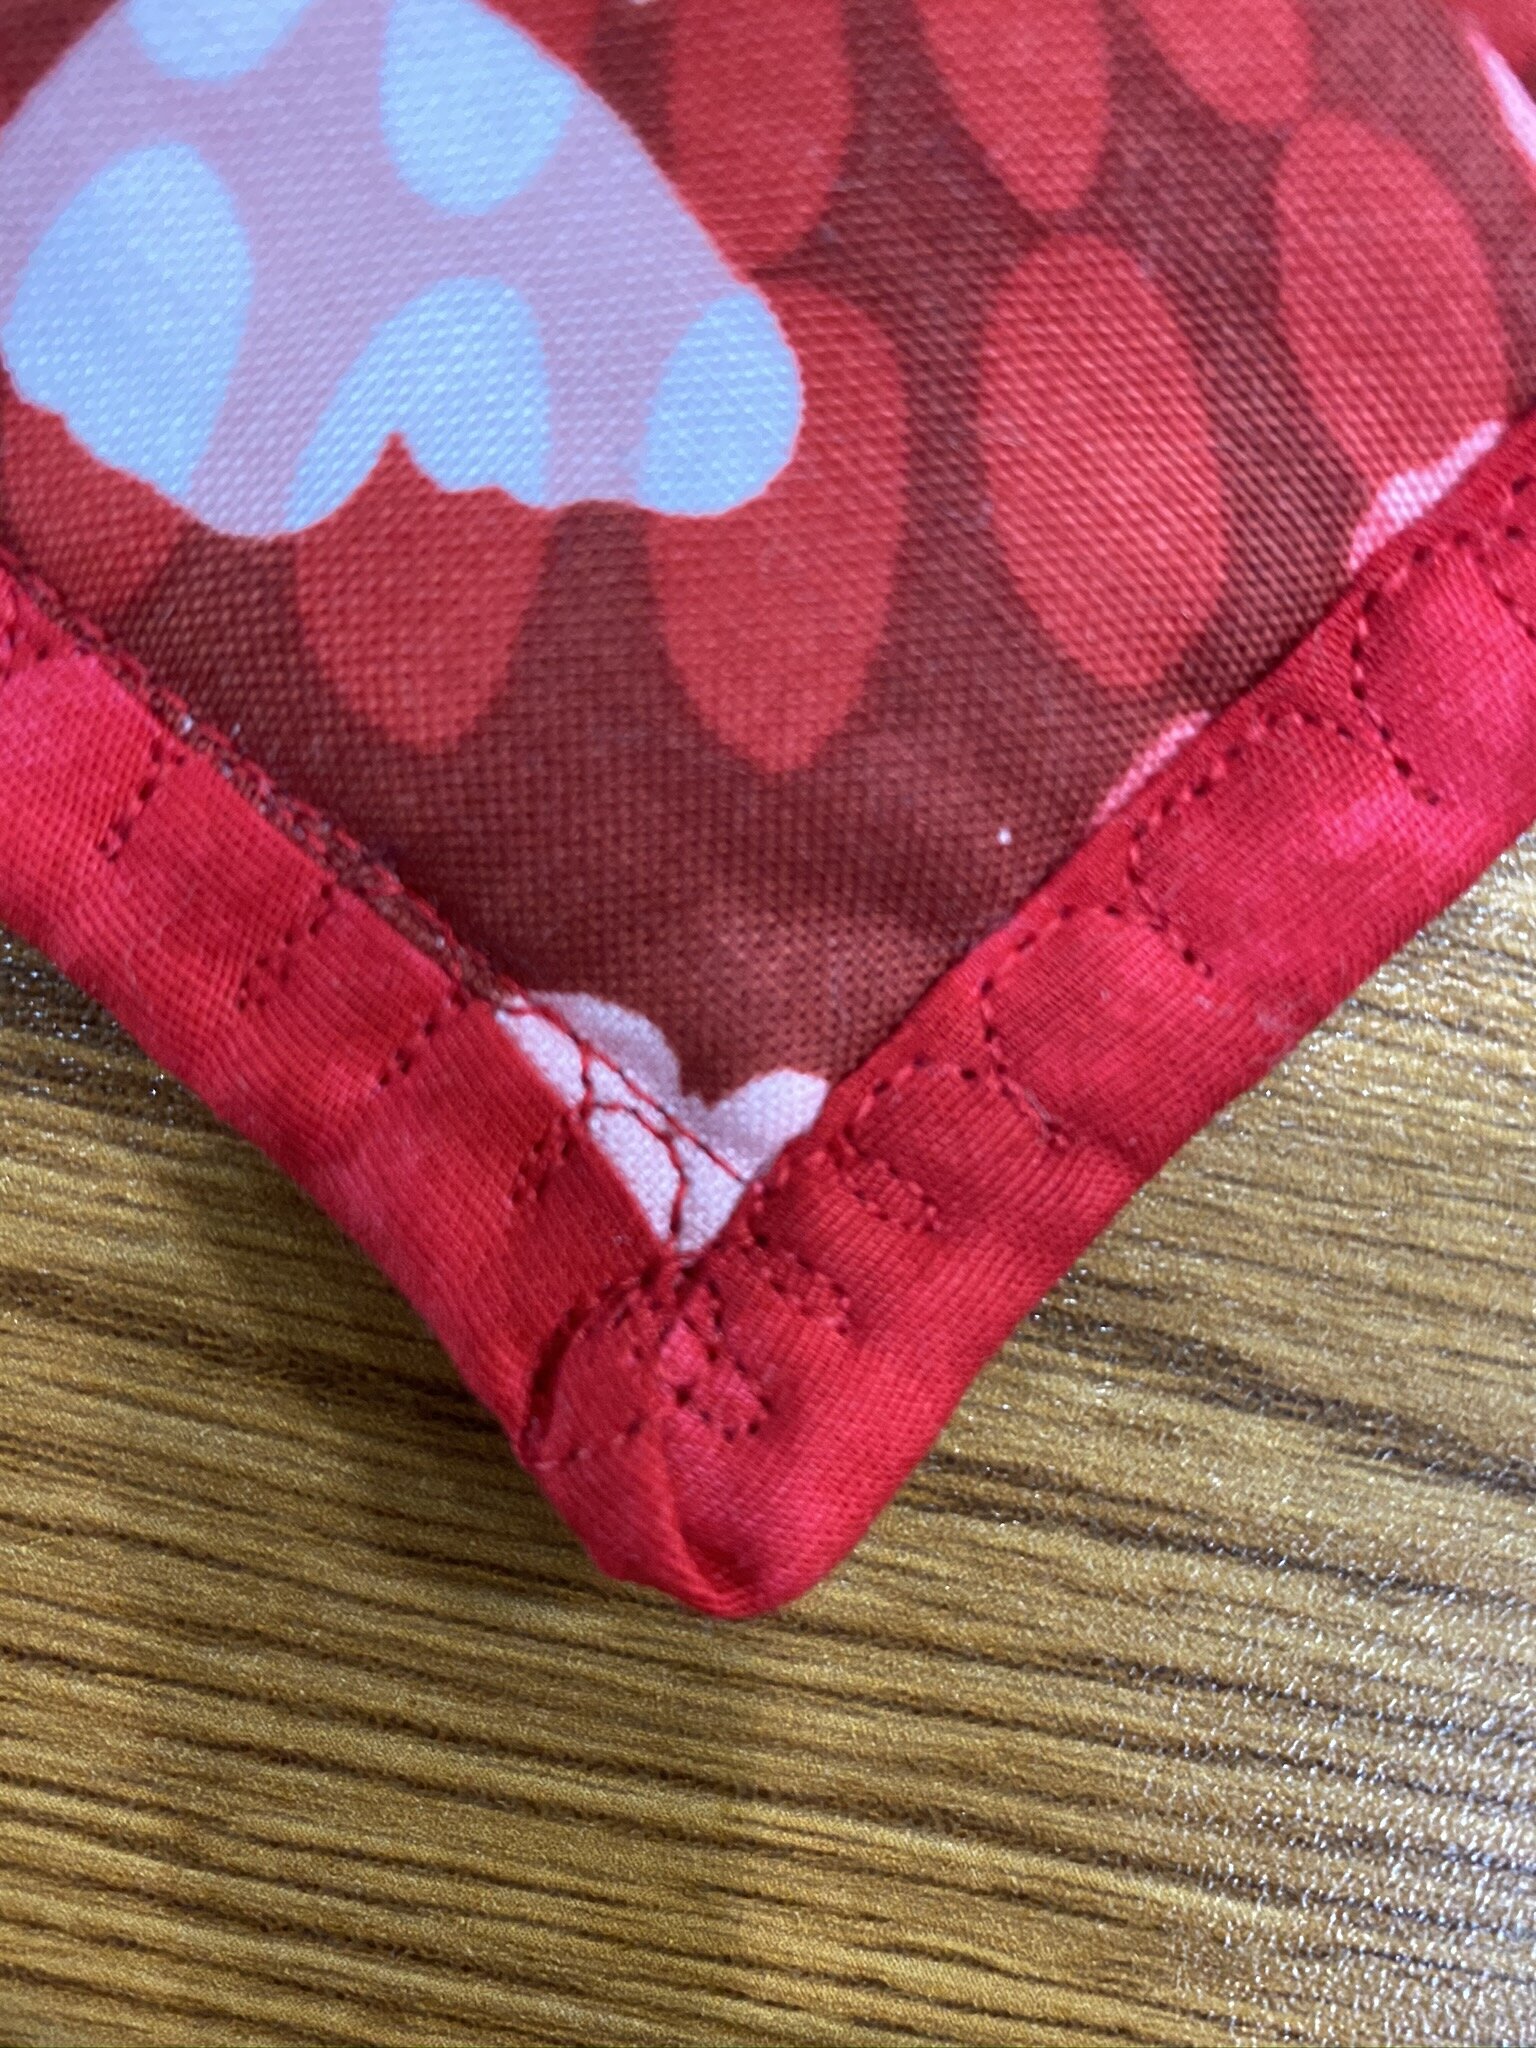
I’d mentioned during my “waffling” comments that I’d had difficulty with the corners in previous attempts at machine binding. That was the only reason I’d gone to the Jenny Doan well, to see if she had good tips. And sure enough she did—just sew right over the top of them! So I got my miters folded down neatly and then just continued the design right around the corner. It worked really well, 50% of the time.

Best corner in image on top; worst corner in image on the bottom. The other two were pretty dang good and not quite so bad, respectively.

The worst corner was the last one, and I think I was having problems with stuff getting a little stretchy by then. Plus I was wearing out (still allergy-ridden), so I wasn’t being quite as patient and careful.

But what do we say? Altogether now…

“Baby quilt. Baby quilt. Baby quilt.”


IMG_0696.JPEG

And in the same theme of using up my stash, the backing was a random yellow flannel sitting on my shelves that I can’t identify at all. No idea where or how it came to be living in my sewing room. Apparently it was waiting for me to have a new baby niece.

You can see the extremely simple ditch quilting I did on this puppy. I really wanted this to be as worry-free a baby quilt as possible for the parents, so I made an effort not to make an effort, if that makes sense.

Now that it’s done, I’m going to toss it in the wash with a handful of color catchers and a prayer that all that red stays exactly where it is.

Baby quilt. Baby quilt. Baby quilt.


Look, Ma, I have a finish!

I started out with this.

(Artisan Spirit Water Garden by Northcott.)

(Artisan Spirit Water Garden by Northcott.)

And this. Because I felt too lazy at the moment to cut strips from my leftover batting.

IMG_1833.jpeg

Unfortunately, when I opened up the jelly roll, the insides looked like this.

IMG_1834.jpeg

So I had to do this.

Eventually, a podcast episode or two later, I ended up with this.

IMG_1836.jpeg

I’m sorry to say, this gave its life for the cause.

IMG_1846.jpeg

Soon I was able to start doing this.

For hours. And hours. Sheesh, it felt like it took for-freakin’-ever.

But finally, yay! I got to this!

IMG_1864.jpeg

I wound it into a ball as per the directions, and the final step went by speedy-speedy compared to the rest of the process. Within a couple of hours, I had this.

IMG_1874.jpeg

Well, that and a new iron.

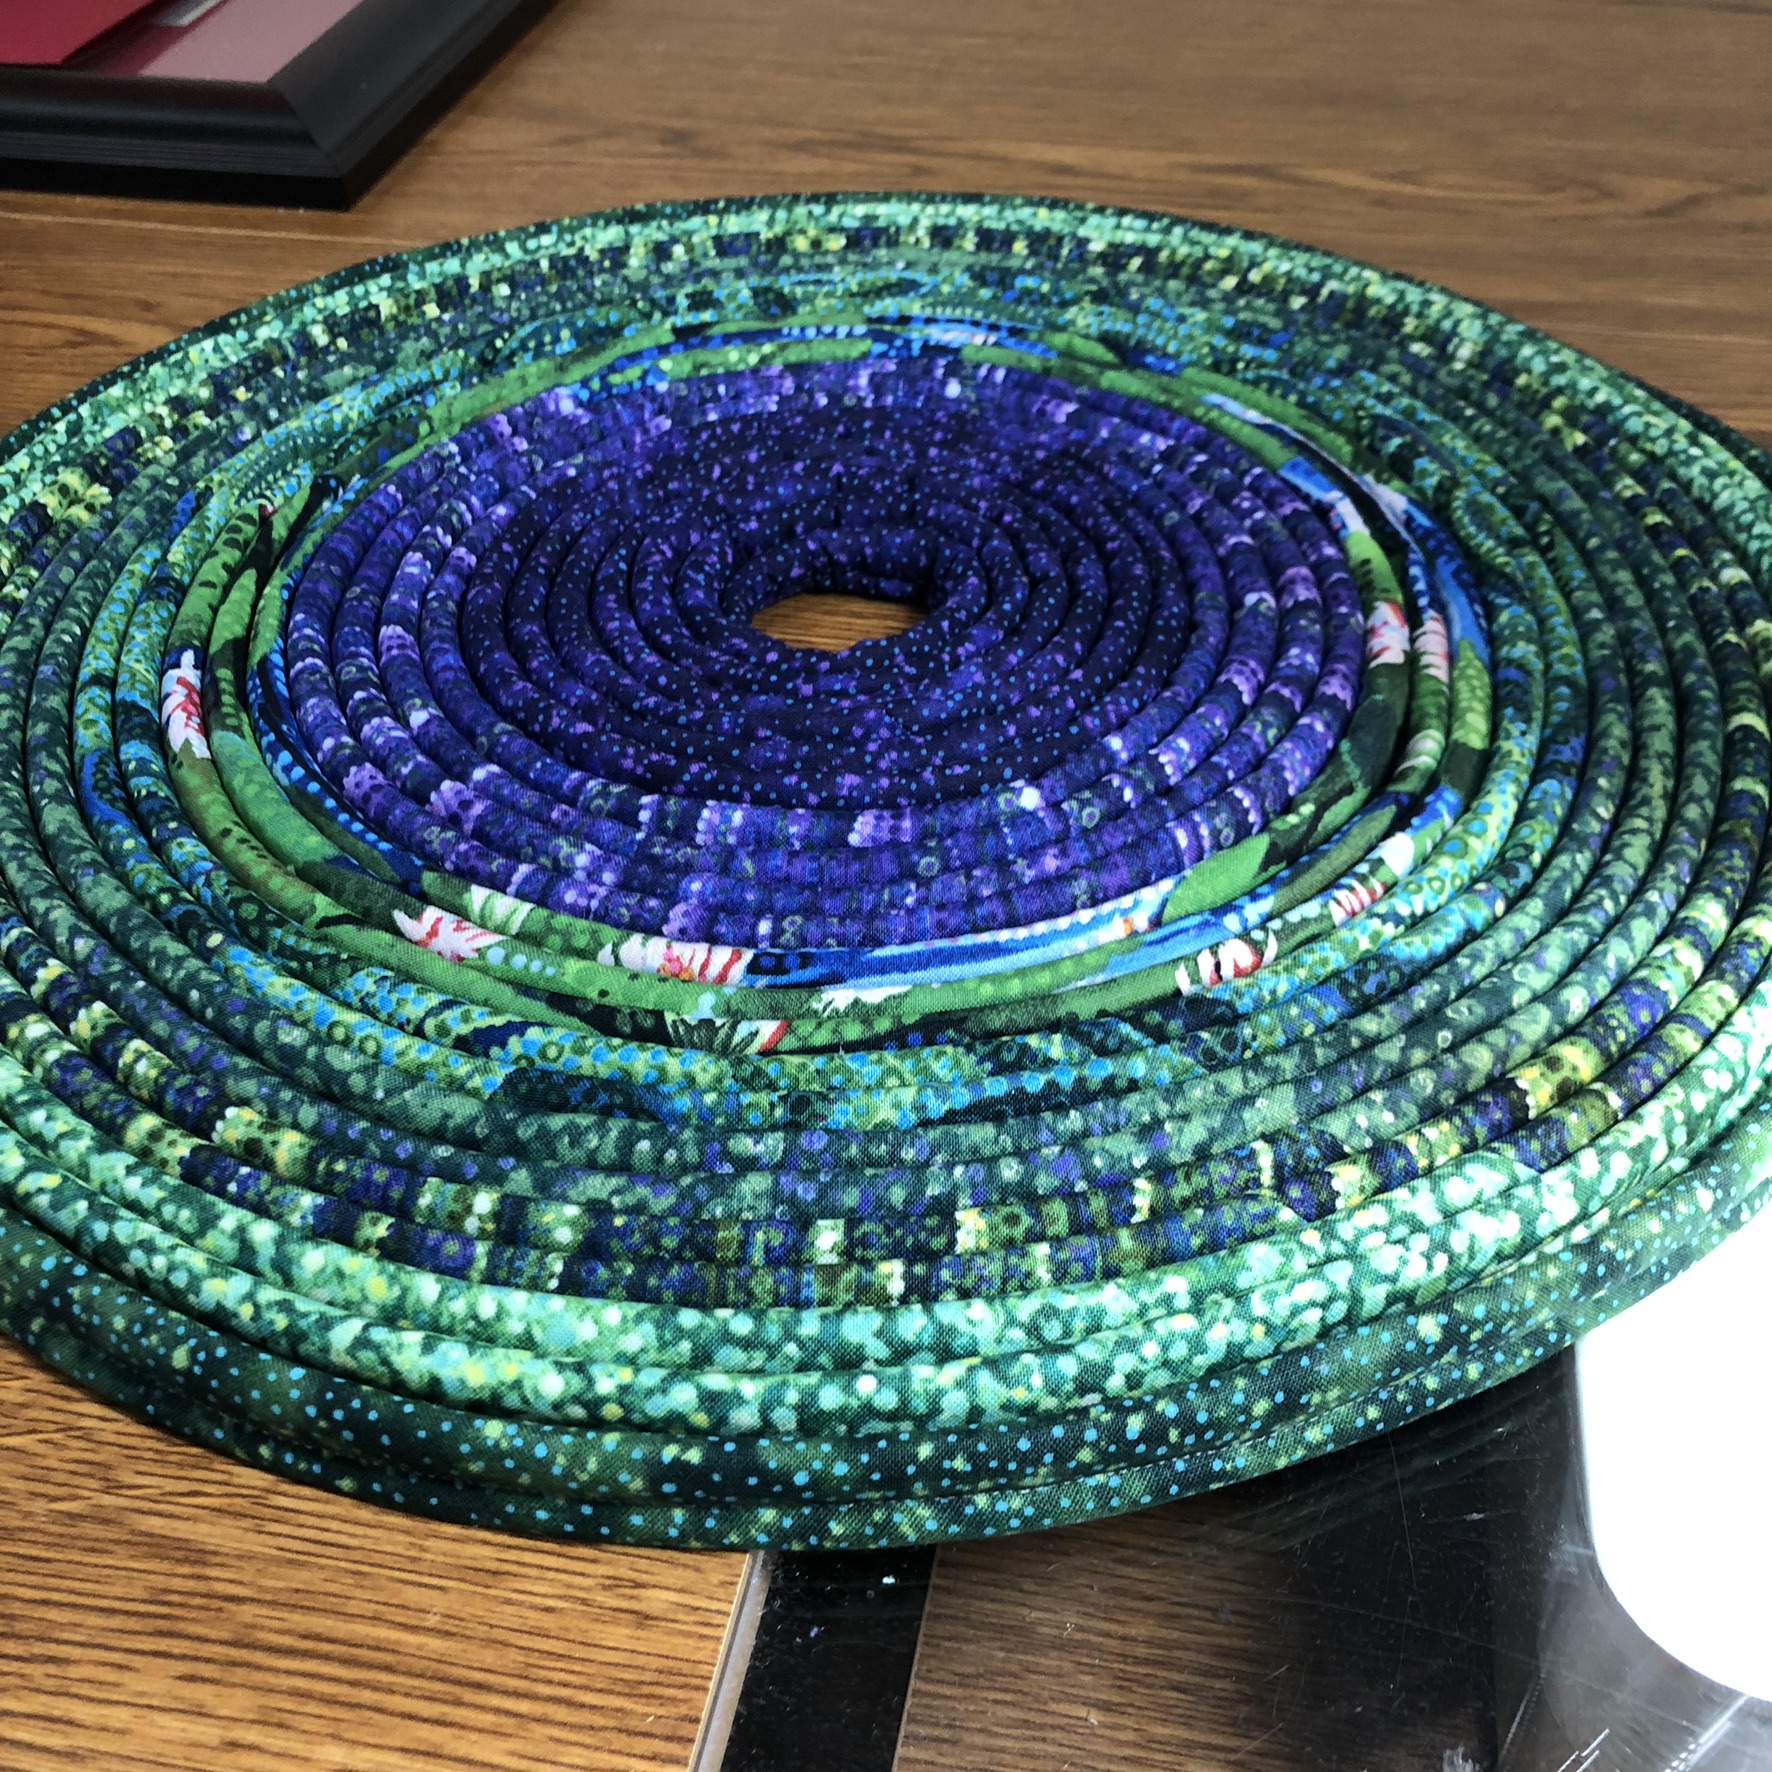
So, my first jelly roll rug is complete. I’ve learned a few things along the way. I had difficulty choosing thread and now that I know what really does end up being visible I’d have made different choices. But trust the pattern—when it says to wind five bobbins before starting, wind five bobbins. I went through four and some.

I did my best not to let it get wonky (kidney-shaped) during the first few passes but my first few rows were way off. I was able to beat it back into almost-submission as I continued to go around that curve so it didn’t end up as bad as it started. I’m not sure I liked the way the pattern described the initial start, but now that I’ve made one I have a better idea what to look out for.

This was meant to be a gift. I haven’t decided if I like it enough to actually send it off. On the other hand, I don’t necessarily want to keep it around, either. I like those colors but I have none of them in my house. So I’ll ponder a bit.

This is addictive. I could easily see myself making more and, next time, actually cutting the batting strips to use up some of my odd left-over pieces.

It’s a Finish! 9-Patch Pizzazz

he retirement party was yesterday and the quilt has been gifted, so now I can post the pictures.

No, as I’ve said before, quilting is not like riding a bike. I made just about every rookie mistake I could have on this puppy but I persevered and, eventually, things started flowing again. Mostly, I got ‘er done!

This is the 9-Patch Pizzazz technique by Judy Sisneros. It’s a great way to use large scale fabrics, and it’s also a design that leaves a lot of room for your own sense of color and artistic layouts. This is the second one of these I made, and I may make more in the future. The part that takes the longest is deciding on your layout.

IMAGE.JPG

Before I sat down to quilt it, I pulled out a muslin practice quilt sandwich and ran myself through a FMQ design that I used to do, just to see if it was going to give me grief. Surprisingly, this was the part of quilting that was like riding a bike! I immediately got back into the rhythm and movement. I have to say my practice sandwich wasn’t half bad!

That made me feel a lot more confident about quilting the whole quilt. 

I had some difficulties with batting. I didn’t have any big enough in batting bin (and not enough scraps of any one kind to be able to stitch pieces together for use), so I made a quick run to Joanns. This is where my being-out-of-the-game came into play—I couldn’t for the life of me remember which brand of cotton batting I used to like. I prefer cotton to poly as I like the drape and the “antique” look you get when you wash it. Batting was on sale so I chose Mountain Mist—and bought three bags of it so be prepared for another couple of quilts I want to finish. When I got home and started spray basting it to the backing, it gave me no end of grief. It was super thin—almost see-through in some places—and as I tried to smooth the wrinkles out of it, it just keep stretching, puckering, and getting thinner. I was afraid I was going to pull right through it.  

After about a half hour of monkeying with it, I finally gave up, ripped it totally off the back, and decided I’d have to go back to Joanns again. This time I picked up a poly batt, then one Warm and Natural cotton batt to work with later. Looking at it more closely, I’m pretty sure that’s the one I used to use—it’s much sturdier than the Mountain Mist but still really drapable.  

Anyway, the poly batt went down beautifully and I had the entire quilt basted in about 15 minutes this time. Go figure. 

Once I had it under the needle, the quilting went really well. I’ll talk more about that on my next podcast episode. Meanwhile, here’s what you’re really waiting for... 

(The pictures automatically transition every 4 seconds. You can use the forward and back buttons to go through it faster/slower. If you're viewing this in a blog reader, you may not see the pictures--just go through to the web version.)

Finally--Jacob's Ladder Revealed

It's finished AND delivered to my brother-in-law and sister-in-law--a wedding gift that's not quite a year late. (There's still a month to go before their one-year anniversary--woot! I made it in the window of "yes, it's okay to give a wedding gift up to one year after the actual wedding.")

This started out, way back last February (2015, that is), as an EQ7 design. Jacob's Ladder and "Road to California" are pretty much the same block, if you're looking for it in EQ.

I knew I wanted to use up as much stash fabric as possible, and I did blue and cream/beige because I thought it was a nice color scheme for something that involves male and female recipients.

Besides, I've always liked that color combination. So there's that.

It took over a year not because it was a hard quilt to make but because there were large chunks of time in there I didn't get to it at all. I took a good run at it right before the wedding, then I took another good run at it right before Christmas...and then I took another run at it after Christmas and got the top pieced so I could drop it off at my LQS for long-arm quilting before I hit a long spate of travel...

And finally, several months after picking it up from the LQS, I finally got it to the couple last night. So I can finally, completely and totally, call it done.

Whole quilt. Can you see the slight "woven" feel to the design? I love Jacob's Ladder because it's a seriously versatile block!

Whole quilt. Can you see the slight "woven" feel to the design? I love Jacob's Ladder because it's a seriously versatile block!

Block detail--to show you the quilting design, not my piecing--although this block's not too bad, considering. 

Block detail--to show you the quilting design, not my piecing--although this block's not too bad, considering. 

Border quilting detail. Plus, I am so pleased with that border fabric--it was the perfect find!

Border quilting detail. Plus, I am so pleased with that border fabric--it was the perfect find!

Corner--you can see the inner and outer border quilting designs here.

Corner--you can see the inner and outer border quilting designs here.

She used a variation of the interior block quilting design in the parts of the block that end up looking more like sashing. Very effective.

She used a variation of the interior block quilting design in the parts of the block that end up looking more like sashing. Very effective.


And to continue my "dogs with quilts" series...

Why are you keeping us out here, Mom?

Why are you keeping us out here, Mom?

Because THAT'S what happens when I don't!

Because THAT'S what happens when I don't!

Post-4SI Weekend Accomplishments

On the spur of the moment, we U.S. #Twilters declared this past weekend #4SI--in other words, the 4th of July Sew In. Most people were out and about with friends and family for the weekend so there wasn't a ton of activity online, but it was still, as always, fun to keep up with one another. 

So here's what I got done with some mammoth (for me) sewing sessions on Saturday and Sunday:

Catch-All Caddy--done! I'll post a separate blog entry about this one. It was a thing. Although it wasn't as much a thing as the Everything in Its Place Bag or the Cosmetics Bag. But still. A thing.


Designs stabilized and traced for Postcard Cuties Halloween embroidery BOM for months one and two--done! Just in time, too, as we got the email today that month three is on its way. (Yeah, I know, you can't see much in the pictures, but really--they're all done!)


Design traced for Nouveau Witch--partly done. I've got the linen background cut, pressed (which took some doing--it is linen, after all), and stabilized. I haven't gotten the tracing done yet. See above. By the time I got all that done my neck needed a break from looking down so I put off tracing the witch for another day. No pics yet since it's just, well, a piece of linen. 

And gravy: I did get the second snowman embroidered. Just need to get him fitted with his hat, sewn together, and stuffed. I'll post a pic of him when he's totally done. Not that he looks much different from the other guy.

Binding on Jacob's Ladder--not done yet. By the time I got done working on that caddy every day my shoulders, neck, and hands were whining at me so I didn't push it. I'm working on it this week, though. Although I got the BOM embroidery designs traced I'm not letting myself start embroidering them until I get that binding finished, dang it.

Basically--woo for me--I got everything done I wanted to get done! 

I don't have much going on this coming weekend, either, so I am already starting to think through what I might focus on accomplishing. I think I'm hearing Annie Unrein call my name again...

(Craftsy links help support my podcast and blog--thank you!)

Post-weekend progress and errata

I got a lot done this weekend, but I also realized I had two designers confused when I wrote a blog post and spoke on my podcast episode (posted yesterday).

The Christmas ornament embroidery I'm working on is Lynette Anderson Designs. She's from Australia.

The Postcard Cuties for Halloween Block of the Month I'm doing is Bunny Hill Designs. She's not from Australia. She's from the U.S. 

I've fixed the BOM blog post to note the error. I can't fix the podcast episode in which I think I said both projects were Lynette Anderson. Apparently I had too relaxing a weekend and my brain just stopped working altogether. Sorry about that!

Meanwhile, I did make progress!

1. I got the label affixed and the binding put on the front of the Jacob's Ladder quilt. I then got about 36" of the binding hand-stitched to the back while watching Stargate Atlantis (our current summer viewing fun). I haven't done the math to figure out how many inches I have left to go on that hand-stitching. Too depressing. I'm just enjoying the zen.

By the way, tried a new method for keeping the binding organized while sewing it on--I've seen this as a tip in a few places, and it really works! 

If you've got two thread spindles on your machine, roll up the binding and put it on one of them. I was concerned it would get tangled with the thread but it never did--I just kept a bit of an eye on it to make sure. 


2. I made progress on the Catch-all Caddy.

Trust me--that's a lot of progress. 


3. I got the first of the two Christmas ornaments completely done. The second is now on hold until I get that binding done.

He's kinda cute. His button hat is a little off in this picture (you shouldn't see the end of the stitching on the one side) but I just twitch it with my finger and it goes back into place. 

A point of slight interest on the stuffing: I bought myself a meditation cushion a few weeks ago as none of the cushions in my house were the right height/firmness. That puppy was rock hard when I got it, so I kept pulling out more and more stuffing until it got to a comfortable firmness I could handle for meditation sessions. The stuffing is 100% cotton fiber--beautifully smooth and soft, actually. I kept all the stuffing I was pulling out in a bag and stashed it in my sewing room. Came in handy for this! I've still got plenty left--can stuff more little fun things like this, of course, but some may also eventually make it down to my dye studio. I think it would be fun to play with. Way to re-purpose!

So--all of this progress, plus time poolside, a Saturday afternoon nap, and lunch with a friend, adds up to a really wonderful weekend. Ready for the week ahead!

Another finish! A New Travel Accessory

Probably not a surprise, given how much I travel, I've been hankering after some updated travel accessories of late. I've been using a jewelry roll that I bought from Etsy a few years back and I really liked it at first. But over the years my necklaces have shifted to bigger, clunkier, heavier things that refused to stay neatly corralled when it was rolled and were always trying to make a break for it out the ends. I began a search for a jewelry roll pattern with pockets that would keep everything more together and was so pleased to find such a thing in a jewelry roll pattern by ModKid/Patty Young Designs on Craftsy. Perfect!

The inside has one lined zipper pocket, four pockets on one panel (two tall, two shorter), and two tall pockets on the third panel. The button straps at the top are mostly for rings but I don't wear any other than my wedding/engagement rings and those puppies never come off. (Not even sure they could at this point; been wearing them nigh on 30 years). However, it's nice to be able to just slip the necklaces on without having to unhook them, and then button everything back down again.

(Photo gallery below will automatically forward, or use forward/back buttons on the sides. If viewing this in a feed reader or by email, the gallery may not appear; you may need to view it on my blog.)

 True confessions: I broke two needles doing the last topstitching as I hit some really thick seams (should've had a denim needle on hand, I guess), but other than that, and the fact that I had re-learn how to use my buttonhole feature on my machine, and I also had to learn how to do a different type of zipper pocket on this one...it all went pretty dang well!

Plus, I got to use up some cute fabric that hadn't found a purpose yet. Looking forward to this jewelry roll becoming a travel companion for the next several years

Finally! A finish that's been a long time a-comin'...

Remember oh-so-long ago when I started Annie Unrein's Travel Organizers class on Craftsy? Remember that I did actually finish the Everything in It's Place bag and post my class review back in the yesteryear? Remember how I mentioned in that review that it would probably "take me six months" to get the second bag done?

Ahem.

At least it's not a full year. Not quite. I'm about three weeks shy of a full calendar--which is, in this case, very similar to being a few cards short of a full deck.

Ah well, it's done. There was a bit of cussing, a couple of broken needles, some major surgery and a mulligan on a whole section of it, then finally just bagging any idea of something I'd be happy with other people seeing when I then messed up exactly the same part the second time and just moving on so I could get 'er done.

This puppy ain't making it to show n' tell at guild. It's definitely a note in the category of "I learned a lot, and mostly I learned I'm never making this stinkin' cosmetics bag pattern again." This is not an Annie-Unrein-Pattern problem. This is all in my execution. And this was a particularly challenging project for someone with my fairly newbie status when it comes to sewing accessories like this.

It actually mostly went swimmingly until the very end. I was extremely optimistic, indeed. And then the whole project went pear-shaped, to make the whole experience sound far too gentle and sweet, in the last couple of steps. The binding is my Waterloo, as it turns out. And Annie sure is fond of her binding--inside and out. I had similar problems with the EIIP bag binding, but this one took those problems and magnified them to the nth degree.

The first little snafu was with the webbing that goes in the handle. I'd had an early piece completely shred on me so I'd had to cut a second piece, which then meant the remainder was a bit too short for the piece it was to be used in. So I had to "franken-webbing" the unshredded part of the discarded webbing back to the longer piece. I tried zig-zagging it together. 

It felt strong enough, but as I was pulling it through the fabric casing the ends shredded again and the whole thing fell apart--which subsequently required about 10 minutes of fishing to get the short end back out of the middle of the fabric tube.

Fortunately, I happened to be on a Google Hangout sew-in hosted by the Stitch crew and got some good advice for options. The one that worked (I believe maybe originally from Nancy Zeiman?) was to wrap a piece of scrap fabric around it and then stitch the fabric to the webbing. Beautiful. Although, by the way, I learned that webbing--made from nylon which wasn't really on my radar--hardens into a tough plastic mess when you accidentally hit it with an iron. (Fortunately, I was able to clean up the iron.)

And then everything was fine for a few more steps (representing a few more hours). And then I got to the binding. Oh well. It's done.

Here's the outside, all hooked up. 

The fabric is a batik that had been given to me as a thank-you gift when I did a speaking engagement in ...where? Can you guess? Yep, Kansas, the Sunflower State. I've held onto it for a few years to try to find the right project for it. I thought it would be fitting to have a travel bag for work made from a gift received through work. And it still is--even if no one ever actually sees this thing. I won't be sending them pictures. 


And here's the inside in all its four-pocket glory.

Strangely, that pouch pocket on the bottom didn't really give me any problem at all. Nor did the vinyl pockets, since I've now got my handy-dandy Teflon foot (or, in the Janome world, the Ultra-Glide). Yep, if you're going to work with vinyl, that is well worth the purchase. My Ultra-Glide foot just skated right over that vinyl with no problem whatsoever. If only I'd just bitten the bullet and bought it when I was working on the EIIP bag. Life would've been much easier!

However, getting the binding on around that same darn pouch pocket was a real... ahem. This is a family blog. There will be none of that language here, young lady.

Now, the real question is--will I really use this when I travel? The jury is out on that. I'm going away with my husband on vacation next week and we're driving so, in that instance, yes, I'll take it for a spin. Luggage space isn't really an issue. 

However, for air travel? Probably not so much. Pam of Hip to Be a Square made this bag awhile back and told me she had problems traveling with it because the hook on the top is too small to hang on the clothing hooks on the back of hotel bathroom doors, which is what you're supposed to do with a toiletries/cosmetics bag like this. So that's kind of a pain.

Of bigger concern is the overall size. Here's a comparison photo with my usual L.L. Bean (well-worn) toiletries bag.

Compared to a bag that I already sometimes have difficulty finding room for in my suitcase, the Annie Unrein bag is a bit of a behemoth. I like to travel really light. In fact, when I'm only gone a couple of days I don't even bother with the L.L. Bean bag--I just use a zippered pouch or two and use as many hotel-provided toiletries as possible.

So the jury's out on how useful this new cosmetics bag will be. I strongly suspect I'll find some other use for it--like as another embroidery project bag or something like that. As long as it's something that doesn't have to appear in public, I'm good.

But it's done. And sometimes, done is even better than not-particularly-good, let alone perfect.

And so I went on retreat... (I guess this is #SBSI)

I made an impulsive almost-last-minute decision to attend a quilt retreat this weekend sponsored by a sorta-kinda-LQS. I went on her first retreat two years ago--horribly sick, had to go home at night to sleep in my own bed, didn't get a lot done. Couldn't go last year as I'd only recently gotten home from my international jaunt. I'd put my name in for this year but waffled for months over whether I'd be able to go. Finally decided I really needed some friend-time and quilty-time so about 10 days before the retreat I contacted the LQS owner and was able to send in my deposit. I'm so glad I did.

image.jpg

My home away from home... It was a small enough retreat that several of us got rooms to ourselves. That's my "Quilt I Saved from Almost Certain Destruction" on the bed (episode 17 and this blog post). The armchair was convenient for getting some class reading done here and there as well.

 
image.jpg

Our weather. 

Unexpected, but pretty. (Drive 10 minutes in any direction and no snow. For some reason, our retreat center was right in a blizzard pocket.)


image.jpg

The way we ate. All freaking weekend. I don't even want to know how much I gained/ 

 
image.jpg

Oh...and did I mention the desserts? Yikes.


My friend surprised me with a little gift on the table space she'd set aside for me (I arrived a few hours after most others). Adorbs! 


The retreat started Thursday morning but I didn't go down until after work Thursday, which meant I got there right about dinner time. Thursday evening, therefore, after getting my stuff all set up, I decided to just go for a little embroidery Zen. I got one more patch on my crazy quilt block done. 

I wasn't keen on the way the feather turned out (my markings kept disappearing on me, urgh), so I used the Rule of Distraction. Put enough beady-bling on there and you don't notice anything else!

 
image.jpg

By Friday morning, I was ready to rock n' roll. This was a guild BOM from 2008. Got all the blocks finally pieced a couple of years ago. I'd put fabrics for the sashing, inner border and outer border in the bin with the blocks so at least I knew more or less what I'd intended to do back then. Now the top is done--woo!  

This is just for me so I'll probably just do an all-over FMQ on my DM. So we'll see how long it takes me to get it REALLY done.

 
image.jpg

Saturday's job was my second UFO of the weekend. This is a jelly roll quilt from Jelly Roll Sampler Quilts by Pam and Nicky Lintott (a gift from listener Carolyn of the U.K.--thanks!). Started it around 2012-ish. Finished the blocks in maybe 2014. Took it to an LQS Super Bowl Sale this weekend and amazingly found sashing and border fabrics pretty quick despite the crowds. That burgundy stripe between the two borders is a flange--first one I've done, and I love it. Just the right amount of accent for the burgundy in the blocks. I'll probably use that same fabric for the binding. Haven't decided if I'll do it myself, or maybe rent time on a long-arm to do it myself that way, or send it out. I'm giving myself another week or so to think about that. It's going to someone else so there's a little more at stake than with that other one.

 
image.jpg

As a small, fast project for a break between the two UFOs, I fused this kit. It's most likely from an Edyta Sitar BOM quilt* but I bought just this one block at an LQS so I don't actually know for sure: The block kits were in an unmarked basket; there were only three months' worth there; and no picture or information available about the completed quilt. I thought this one would make a great background for some fun embroidery and beadwork. All the pieces were pre-cut and pre-fused, so it was basically just putting together a puzzle. I mostly followed the picture on the package but I moved the bird from sitting on one of the leaves at the top to sitting on the basket--I thought that made him far more prominent and we all know how I feel about pudgy birds.  

*Later edit: I did some googling and yes, it's Edyta Sitar, Seasonal Silhouettes.

I also traced another embroidery design on some linen using a big picture window and the last remaining light of the afternoon, but didn't take a picture of it. Not terribly exciting anyway. 

Finally, I had some time left Saturday night and Sunday morning, so I made another little zipper pouch. This one is the Ditty Bag pattern from www.byannie.com. (The pattern has three sizes; I made the medium-sized one.) Wasn't too hard to do, other than the usual annoying fiddly bit sewing around that curve on either side. Zippers are going pretty easy for me these days. Yay. It's got some nice structure but if I use the pattern again, I won't bother with the binding on the inside--it was a pill and doesn't really add much. Finishing the seam with a zig-zag would be good enough. 

Oh, and I got a decent amount of class reading done. So there's that too.

All in all, a good time. And now, for the rest of #SBSI, now that my week's assignments are done, I'm going to hang out in front of the TV with my man and four-leggeds and do some more embroidery.

(By the way--I realize I didn't draw the name for the Quilty Resolution challenge yet--I'll take care of that manana!)

Craftsy Class Review: Bead Embroidery--Beyond the Basics with Myra Wood

Online Machine Embroidery Class

Fair warning: Adding beads to your embroidery is pretty addicting. I'm still working on embroidering my first crazy quilt block because after adding a little bit of beady-bling to the first section I embroidered, I'm suddenly off and running with those beads. Every section now has beads added, and I'm finding myself planning my embroidery designs based on where I'll be able to add the beads. Who knew? (Knitters and crocheters, check out the very end of this post for including beads in those crafts--you too can join in my addiction!)

My sudden increase in using beads meant that I was looking for as many ideas as I could get, so I quickly dove into Bead Embroidery: Beyond the Basics with Myra Wood.

Bead Embroidery: Beyond the Basics is a sequel class to Myra Wood's original Bead Embroidery class which I reviewed a few weeks ago. If you've never used beads before, you could certainly start with this Beyond the Basics class, but I'd recommend starting with her other class first as this one only has a short segment about the basic stitches. In fact, within a few minutes of watching the first lesson, I realized this class would be a "watch only" class for me. Beyond the Basics focuses on pure beadwork, rather than beads added to embroidery projects (as in her first class). This class is about how to do those beautiful, wonderful, over-the-top bead encrusted accessories such as amulets, cuffs, buttons, and boxes (etc.). Those are something I enjoy looking at and can appreciate, but it's not at all on my radar to do at this point. 

My quickly-growing bead stash

My quickly-growing bead stash

However, even if this style of beadwork isn't something I'm doing right now, I don't feel that watching the class was a waste of time. First of all, who knows? Someday I may decide I need a big ol' bead encrusted amulet necklace that's just the right finishing touch on a special outfit. Not something I see happening anytime soon, though. However, mostly, I did pick up some good information about color planning and design that's been useful as I've been doing the mostly-embroidery-with-beads-thrown-in work on my crazy quilt block. Besides, after watching this class, I could see myself adding beaded fringe to the finished crazy quilt since it'll likely be a wall-hanging and, if I do, lesson 7 will come in very handy.

So, dear readers, it's really up to you to decide what your goals are for learning bead embroidery. Do you mostly want to add beads as accents to your embroidery? If so, Bead Embroidery would be the class for you. If, however, in your viewpoint The Bead is the Thing, then you'll want to ratchet up to Bead Embroidery: Beyond the Basics for sure. 

In either case, Myra Wood is an excellent teacher. She takes you step-by-step through each stitch or technique and discusses how to fix it if things go awry. The information about products to use is very helpful, especially when it comes to making cuffs or things you need to be able to bend; she also gives extremely helpful tips about covering edges and gaps that may appear.

The invasion of the beads

The invasion of the beads

This is definitely a technique class rather than a project class. Although she makes several suggestions of projects (a bracelet/cuff, amulets, beaded boxes, fringe on lampshades and such) and gives some verbal direction as to how to do them, there aren't a lot of step-by-steps for them. The only class project that's covered in the downloadable class materials is the bracelet/cuff, and even that is definitely sketchy in the materials. It doesn't really give a pattern or dimensions, just a suggested design. If you choose to do any of the projects she talks about in the class you'll be listening to her verbal directions and figuring a lot of it out on your own.

As always, I highly recommend reading the discussion threads in the class itself. You'll pick up a lot of good information from her responses to other students' questions. Plus, there's some nice eye candy as people post pics of their works in progress. Also, do check out the student project section for the class (which you can do without buying the class)--great inspiration!

The Basics

  • Seven classes, from 18 to 22 minutes each.

  • The first lesson talks about materials and a little about overall design; lessons three and four cover additional design considerations such as focal points and dimension. 

  • Lesson two is about the four basic stitches used in this type of bead work.

  • Lesson 5 gives basic instructions about how to finish off projects such as a beaded cuff and buttons, as well as how to attend to the edges of the beadwork for any project.

  • Lesson 6 is how to do beaded embellishments and appliques, which a very helpful tip about using store bought applique patches as your foundation for the beadwork.

  • Lesson 7 is fringe and beaded accents.

I enjoyed Bead Embroidery: Beyond the Basics with Myra Wood even if I won't be doing this level of beadwork anytime soon. As I said above, there were a lot of good tips and design information in this class that have been useful to me as I've been doing my more embroidery-based beadwork. Certainly, if you're into doing some serious beadwork, I'd highly recommend this class!

P.S. For you knitters out there, did you know you could also play with beads? Check out Laura Nelkin's Knitting with Beads or Betsy Hershberg's Brilliant Knit Beads! Also, if you crochet, there's Amazing Crochet Textures with Drew Emborsky that includes beadwork.

(Disclosure: As a Craftsy affiliate, clicking on Craftsy links in this post help support my podcast and blog. Thank you!)


Two Christmas Finishes

image.jpg

(The #BDSI giveaway is still live until midnight Eastern time tonight, Sunday! Just go back one blog post to enter.)

I can finally post the pics of the pudgy bird garland; I gave my MIL hers a couple of days before Christmas although I snuck it into the house and hung it across her tree while she was occupied with other things, so she didn't see it until a few hours later. She knew it came from me, though, so I got a phone call immediately upon its discovery.

If I were to make this again, I'd do two things differently: 

1. Cut both sides of each bird at the same time rather than separately. No matter how accurately you try to cut, that darn felted wool always scootches so I had to do a lot of trimming once I put the birds together to get them to match. 

2. Rather than inserting the ribbon between the bird halves, I'd just put them all on one side of the ribbon. That way I could've stitched the birds together and, again, kept them evenly matched.  

image.jpg

Here's the second one I ended up making and keeping--if you don't know the backstory, I talked about it a couple of podcast episodes ago.

It does look pretty cute hanging on the mantle. Especially when it's largely covered up by other stuff. I don't like this one as well as the other because I attached it to the ribbon differently and the end result wasn't stellar. Oh well, lesson learned. And that's why my MIL got the other one.  (Note the quilted postcards that are now a permanent part of my Christmas decorations--thanks to a couple of postcard swaps hosted by Sandi of Quilt Cabana Corner podcast.) But no, I didn't make any of those stockings. Someday...

image.jpg


Here's the first of the two framed embroidery projects I did for my daughter to hang in the kitchen of her apartment. The patterns are from Kelly Fletcher Design, or KFNeedlework Design on Etsy--great shop! 

I changed up the colors from her original design because my daughter likes blue,though the colors in the original design were quite nice. 

 
image.jpg

And here's the matching project. Kelly Fletcher actually has several designs revolving around tea that are all quite wonderful. It took me awhile to decide which I wanted to do.

I also bought another of her designs to do just for me when my schedule allows; she has a couple of others that I'm looking at for future projects. I really enjoy her work--great stuff! 

Now I'm only working on one quilty project for someone else--everything else is just for me and for fun! Woo!

A fast finish: Fidget Quilt

I will talk about this on my podcast this week, so if you want all the background and more detailed information about (1) how this project came about and (2) why I went the direction I did with it, give the episode a listen (whenever I manage to get it posted). Meanwhile, in a nutshell, my father-in-law has a rare form of Alzheimers. Like many people suffering with dementia, he has a habit of constantly fidgeting with things in his hands--napkins, blankets, handkerchiefs.... So, as quilters tend to do, when they see a need, they figure out a way to turn it into a quilt. "Touch quilts" or "Fidget quilts" for those suffering with dementia are a thing.  

image.jpg

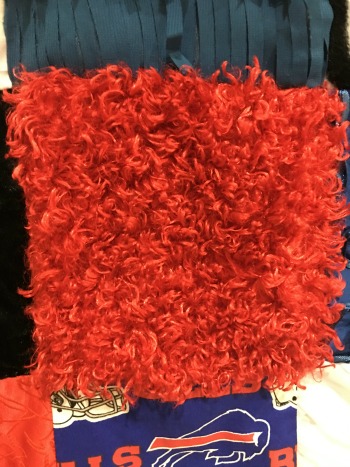
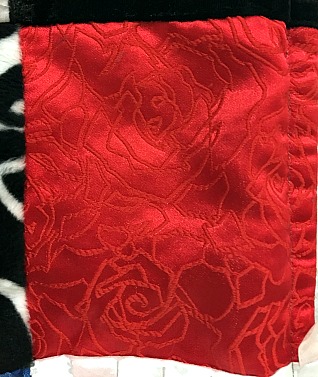
I did some research on fidget quilts but ultimately I decided to keep mine really simple. He isn't looking for things to do, so much--in other words, buttons, velcro, ribbons, and the like usually included on fidget quilts. He just crumples and smooths, picks and pokes. So I went for physical texture through using very touchy-feely fabrics and good visual texture and contrast in color. (Gallery of fabrics below.) He's a life-long Buffalo Bills fan, so that was my thematic jumping off point. 

It finished to about 36x36", give or take. It's as close to square as something with such a huge variety of fabric types was going to get without me making myself crazy. Also, I was trying to get it done quickly enough that I could get it to my father-in-law in the hospital so he'd have something more interesting than just the hospital blankets to mess with. I didn't mentally commit myself to giving it to him, though, until it came out of the wash as with so many different types of fabrics involved it could've turned into a hot mess. Different shrinking rates, possible color bleeds--the opportunities for it going horribly awry abounded. Fortunately, it's workable. Not my finest work from an accuracy perspective but it didn't need to be--just fun and functional. 

One of the nurses was walking by his hospital room when I gave it to my father-in-law, and she immediately popped in to see it, saying, "Oh, I just love these quilts!' So that was a nice unexpected affirmation. My mother-in-law called me yesterday to let me know that my father-in-law has been using the quilt exactly as I'd hoped and won't stop messing with it. He's also the one who keeps reminding her to take it home with her when she leaves the hospital each night so it won't get taken. I'm really glad it's meeting its purpose and has brought some joy although, as quilters understand, just the process of making it was therapy for me.

Next on the agenda: Getting out the vacuum. That red furry fabric made my sewing room look like a teddy bear crime scene. 

Craftsy Class Review: Bead Embroidery with Myra Wood

I'm digging this one out of memory a bit because I actually finished this class several months ago. However, it goes to show the value of Craftsy classes that I was able to review material in it again this past week when I was doing some beadwork on my crazy quilt block!

For those of you doing our crazy quilt slow stitch-a-long, you will definitely want to pay attention to this review. For the rest of you--it's still really good stuff, even if you're not playing in our sandbox right now!

Bead Embroidery with Myra Wood is an excellent class for learning how to add some bling to your projects. I'm not interested (at least, at this stage) in doing a bead-encrusted-something-or-other, but I do like a little subtle shine here and there on the right projects. I'd bought and watched Bead Embroidery last summer when I was plowing through every hand embroidery class Craftsy had going at the time, even though I didn't really know at that moment what I might throw beads onto. But when I was doing my first bit of embroidery on my first crazy quilt block last week, I realized that a touch of beadwork was exactly what was called for. 

"I know how to do that!" I exclaimed in my head. Or it might have been out loud. I'll never tell.

It's really hard to get a decent picture of bling but trust me, there's a little sparkle going on here!

It's really hard to get a decent picture of bling but trust me, there's a little sparkle going on here!

I'm now going back and referencing the class more fully again--I could easily recall the basics that I used in this particular instance, but I have plans for more complex beadwork coming up and have been reviewing Wood's tips and techniques. I also bought more sequins. Because everyone needs more sequins in their lives, apparently. (Although I've now learned that sequins are a lot like working with glitter--they end up everywhere. The Doofus was looking quite festive as he slept on the floor next to the table where I was working.)

I got so much out of this class that when her sequel class went on sale, Bead Embroidery: Beyond the Basics, I bought that too, though I've not started watching it yet. I want to be able to work my way through more of the techniques in the first class before I get ahead of myself!

Anyway, back to the first one...

There is a project for this class that was tempting, but I decided to stick to using the techniques on my own projects. I will say that it's definitely worth taking a cruise through the photo gallery of class projects because there is some beautiful work represented! I found Myra Wood's presentation style very comfortable--straightforward but not stilted. This class is the one that convinced me to buy a new style of embroidery hoop that I love. Although I use other hoops and (gasp) even go hoopless at times, the combo hoop is definitely good for beading.

The class materials, while predominantly geared at the class project, do include useful information about supplies in general. In terms of the class project, the materials include the design to trace as well as a stitch guide if you want to follow the design exactly--it's all very clear to follow.

So...I'm off and running! Just watch my future crazy quilt posts to see the benefits of this class!

The Basics

  • 8 lessons, ranging from 13 to 25 minutes, although the vast majority of them are over 20 minutes long.
  • The first lesson is some introductory material and information about needles, hoops, threads, and beads.
  • Lessons two through six are a wide variety of stitches and designs. The classes are organized as categories, but each class has several types of stitches and/or variations on the basic stitch. If you're doing the class project, she'll show where each stitch shows up in the project. (Even if you do the project, there's a high level of variability in the project design so you can still very much make it yours.)
  • Lesson 7 covers ways to add that perfect finishing touch to your bead design--assessing gaps and adding just a little extra something. It also includes a gallery of inspiration.
  • Lesson 8 gives the final information about putting together the class project. If you're not doing the project, you'll still want to watch this lesson as she addresses some issues common to most embroidery/bead projects such as pressing out hoop marks in the fabric and such.

I can't wait to dig my needle into more beadwork, so to speak. I highly recommend Bead Embroidery with Myra Wood. Keep an eye out--although it'll be awhile--for my review of her sequel class as well!

(Transparency statement: As a Craftsy and Amazon affiliate, using the Craftsy and Amazon links in this post help support my podcast and blog. Thank you!)


Craftsy Class Review: Building Better Bags--Interfacing and Structure with Sara Lawson

I admit: I can get obsessive sometimes.

Yes, I'm so determined to get more comfortable with bag-making that I bought Building Better Bags: Interfacing and Structure with Sara Lawson (of Sew Sweetness).

Nope, still really don't like making bags. Probably never will--it's just not my bag (ar ar ar). For some reason, though, I'm feeling a bit stubborn about making myself get better at it. As I think I've mentioned in previous reviews, one of the big issues when it comes to following patterns and tutorials for bag-making is that I didn't come to sewing from garment-making, I came to it from quilting. I had to learn how to stitch in a straight line and keep an accurate 1/4" seam and that was about it.

So, one of my weaknesses when it came to sewing bags has been a lack of knowledge about interfacings. One doesn't run into interfacings much in the quilting world. I'm figuring it's lucky I had even absorbed the definition of the word from my Mom's years of garment-sewing when we were kids and before we rebelled against wearing homemade clothes--a rebellion, however, that had a happy ending as it's what propelled her into the world of quilting. But I digress.

When I saw Building Better Bags: Interfacing and Structure with Sara Lawson pop up on sale, I decided that although it would probably be a bit like watching paint dry, it was information I should probably have. Plus, I do really like Sara Lawson's bag designs--I'd like to get comfortable enough in my skills that I could tackle some of her more interesting patterns and not end up wanting to throw things or swearing a blue streak through the entire process.

My goals are small, really. Less throwing and swearing. That would be good.

I have to say--the class did have really good information. I do feel like I have a much better understanding now of the variety of interfacings and stabilizers that are available and what each one of them brings to the table. I feel like I could more easily approach some bag patterns and perhaps substitute different innards if I want a different result. So that's all really good--and I'm glad I have the class for reference in later bag-making endeavors. I would have liked Sara Lawson's presentation style to be a little more relaxed in the class, but she did give the information very clearly and in a very easy-to-understand manner. 

I immediately felt the benefit of the class, by the way, when I started watching again the Crazy Quilt class with Allie Aller and she referred to the interfacing/stabilizers she used. I knew what she was talking about now!

This is purely an informational/reference class: There are no class projects, although she shows tons of examples from her really wonderful bag designs. (Hence, no pictures to share with this post.) The class materials include an excellent reference chart for stabilizers and interfacings that I'm going to hang on my wall to check whenever a pattern calls for a particular brand that I can't find, or just says the type and I have no idea what they mean. 

If you're an old-hand at this kind of thing, you could probably bypass it. But if, like me, you have only passing reference to the fact that there even is such a beast called "Interfacing," you will find this class tremendously helpful. If also, like me, you're a relative newbie on the bag-making scene--take advantage of this class earlier in your journey down this path than I was able to. This information would probably have lessened my frustration level somewhat in my prior bag-making endeavors. 

The Basics

  • 8 classes, ranging from 10 minutes to 23 minutes, although most are about 12-15 minutes.
  • Lesson one is simply a brief introduction of Sara Lawson and Sew Sweetness designs.
  • Lesson 2 gives the foundational information about what interfacing is, how to choose and purchase the best one for the job, and how to test it before committing your project to it.
  • Lessons 3 through 5 cover the different weights and types of stabilizers in categories, and she gives very helpful tips for how to use each with the most success (tips for sewing, fusing, and so forth).
  • Lesson 6 is entitled "Structured Reinforcements" and covers the other types of materials you can use as a stabilizer, how to do a false bottom, and reinforced handles.
  • Lesson 7 is about creating and attaching bias binding for seams and how to make and install piping.
  • Lesson 8 offers great finishing touches appropriate for any bag design, and how to care for your bags long-term.

So, while not the most exciting class I've ever taken, in terms of the information Building Better Bags: Interfacing and Structure with Sara Lawson presents it's a solid addition to my repertoire. I do recommend it if you've had the same questions swimming in your head as I have!

(Transparency statement: As a Craftsy affiliate, using Craftsy links in this post help support my podcast and blog. Thanks so much!)


Craftsy Class Review: Cook Smarter--Solutions for Weeknight Dinners with Sara Moulton

Craftsy

I'm a bit behind in my class reviews as I've had a little time to actually complete a handful in the last several weeks, but not enough time to write about them! So I'm going to try to catch up with myself this week. 

First up--cooking! 

My husband and I used to really enjoy Sara Moulton's first cooking show that was on years ago. It's a rare cooking show that we'd both sit and watch, at least those that aren't of the competitive variety, but there was something about Sara's style that we both enjoyed. When I saw recently that she had a Craftsy class available, I'm not sure it would've mattered what the topic was as I'd probably have bought it anyway. But the fact that I first noticed it at a time when I was bemoaning the fact that I rarely had time to actually cook anymore, it seemed particularly fortuitous. 

And so, for today's post, we're talking about Cook Smarter: Solutions for Weeknight Dinners with Sara Moulton.

As I've been cooking for...well, let's just say "awhile" and not anything else that will emphasize how long I've been around...I can't say that I learned a whole lot of new techniques or information from this class. However, I did pick up a few good ideas about how to organize myself better in my shopping trips so I could more easily cook a meal on the fly during the week. My husband won't eat leftovers at all--even disguised as other meals--and our freezer isn't big enough to stock up on freezer meals. (He also won't eat casseroles, so that knocks out another whole category of the "plan ahead" method.) For years, I've planned out a menu that would then become my shopping list and would leave myself notes all over the kitchen about what needed to get done when. In other words, I was basically doing everything "right" by all the usual methods. However, if something happened that I wasn't able to follow that particular menu, it became a bit of a catch-as-catch-can once the week got rolling. And that happened more weeks than not. Sara has a simpler method that allows for a lot more on-the-spot decision-making that's still fast and easy. She also got me thinking more about what convenience foods I could keep on hand (in what little freezer space I do have) that might make weeknights a little less stressful but still provide a home-cooked meal rather than yet another sandwich, salad, or pizza. 

Fish with Mustard Tarragon Sauce

Fish with Mustard Tarragon Sauce

I've only made one of her recipes so far: The Fish with Mustard Tarragon Sauce was very good and that sauce would be equally good on chicken, so that's a definite keeper. This class isn't really about the recipes themselves, however, so much as it is about ways to think about meal planning and certain types of techniques and tools that make things move much faster. I've definitely shifted the way I stock my pantry, freezer, and refrigerator a little bit now, so although we're still not at 100%, I can say that we're eating actual cooked meals a couple more times a week than we had been. 

If you're a new cook, I think you'd get a lot out of this class. If you're a cook with experience, you may still want to give it a whirl like I did. And, of course, there's Sara. I'm a fan. 

The Basics

  • 7 lessons, 15 to about 30 minutes in length.
  • Each lesson has one or more recipes used for teaching the tips or techniques of that lesson, but she spends a lot of time in each talking about variations and jumping-off-points for other uses as well.
  • The first lesson lays the foundation with discussions about what to stock, how to plan, and what she refers to as "homestyle Mise en Place"--in other words, how to set yourself up realistically (not chef-style) to speed the cooking process up.
  • Lesson 2 focuses on side dishes as well as how to do grains (rice and such) ahead of time; I plan on trying out her freezer technique here as it wouldn't take up much room.
  • Lesson 3 addresses several recipes that can be sped up simply in how you prepare the ingredients--another lesson that provides all sorts of options and adaptations.
  • Lesson 4 is "Salad for Supper," and I found her information about homemade salad dressings particularly useful.
  • Lesson 5 is all about eggs for dinner. There are some really interesting suggestions here. Positive my husband wouldn't go for any of them, but I may keep them in mind for times I'm on my own for a meal.
  • Lesson 6 has a vegetarian emphasis and good information about making compound butters--a fast way to throw some special flavor on a very basic meal.
  • Lesson 7 is how to cook once  for two different meals--again, techniques that could be adapted in a lot of ways.
  • The class materials are worth it themselves: 16 pages of recipes!

My final review of Cook Smarter: Solutions for Weeknight Dinners with Sara Moulton is, of course, two thumbs up. I'll be returning to this one often!

(Transparency statement: As a Craftsy affiliate, using the Craftsy links on this post help support my podcast and blog. Thank you very much!)

Crazy Quilt Slow Stitch-A-Long: My first crazy quilt block done!

I poked away at this a little bit off and on all weekend in between working on my paper. (Makes a nice change of pace.) The only thing that actually took any time was choosing my fabrics as I was trying to pay attention to which ones looked good next to each other, balancing color and design across the block, etc. Once I got everything cut and ready to go, the piecing was super-fast.

The picture doesn't do justice to the fabrics, of course. You really oughta see it in person. The cool thing to me is that this is a very international block:

  • The solids are, for the most part, cross-wovens from Indonesia that I bought from a vendor in Houston a few years back.  
  • The one with the diamonds in the lower right is a cross-woven scrap that the tailor in Myanmar had given me--it's green and purple cross-woven. It's gorgeous in person.
  • The textured in the upper right is also from Myanmar.
  • The dark bronze solid towards the upper left is a scrap from fabric I bought in Thailand. (The camera made it go all moire-like but it's really another crosswoven of brown and gold.)

The piece of lace is not the antique lace I've been talking about in my podcast. I wanted to use something I didn't care as much about for my first try, so this is a scrap of a hand-dyed lace whose origin I don't remember--it's either lace I bought at a sewing guild rummage sale and tossed into a dye bath just to see what would happen, or it's a dyed lace from a scrap bag I got a year or so ago from an art quilter who was destashing some of her experiments. In any case...I thought the mottled color was interesting with the rest of the fabrics in this block, so I spray basted it to a background silk that I'd stabilized with lightweight woven fusible interfacing (as per Allie Aller's method). It's pretty solidly basted down but I'll still be embroidering it down to be sure. BTdubs, I have a lot of that lace, so it may well be showing up again.

The four long pieces around the outside are insurance. The block came a bit short of 8 1/2" square even though I thought my printed pattern matched Allie Aller's measurements. But that's the wonderful thing about crazy blocks--just slap some more fabric on there and call it a day! Most of those strips will be buried in the seams (it's an 8" finished block), but even if part of them shows it just becomes part of the overall design.

Can't wait to dig my embroidery needle into this puppy!

Are you doing the Crazy Quilt Slow Stitch-A-Long with me?

My first block deadline is this coming Saturday (forasmuch as we're even sticking to deadlines). I got mine done a bit early. Yay for me. Don't forget to join QFTRUcrazyquilts group on Flickr and post a pic of whatever block you're working on!

Finally--a Finish! Butterflies are Free to Fly

Finally, it's done!

This is my completed project from Sue Spargo's Craftsy class Embroidering Texture and Dimension by Hand. Click here for my review of the class and a couple of pictures of the project in progress.

I'm not loving the final product but that has nothing to do with Sue's design or class--I love her work and the class was great fun. 

No, the issues are all "user error." So--if you take her class or use one of her patterns or books, follow her directions! She knows what of she speaks. I didn't, and it bought me all sorts of trouble.  (I went into more detail on that on my last podcast episode, so check it out if you want to avoid the same difficulties.)

Still n' all, I had a lot of fun for most of the process. I question a couple of my design choices but I did achieve my overall goals, which were (1) learning embroidery, and (2) using as many different types of threads as possible. I even threw some beads on there.

Mostly--yay, it's done!

Meanwhile, you can tell I've been bitten by the embroidery bug hard--here's a picture of more pretty mail I got this week.

Check out www.colourcomplements.com. Hand-dyed embroidery threads tastiness. She's also got a great blog to follow. She ships from Canada, by the way, but it came fast!


 I love these threads. So much so that I couldn't wait to put them to work so I added a bullion rose to my free-form sampler piece I've got working. 

Not too shabby for my first attempt at one of those roses. But that thread-gorgeousness makes anything look good. Yums.