Needle recommendation

You may recall that I've recently discovered Tulip embroidery needles from Japan. They really are my favorite needles now. It's hard to describe, but you really can feel the difference in how they slide through the fabric. Love love love them.

I was reminded of them when I was following links and found the YouTube video below. I've only seen these needles in one LQS but got some at a vendor at the AQS Syracuse show and you can buy them online. 

I'm not commissioned by Tulip to do this--I just love these needles and wanted to recommend them to my hand-quilter and embroidery buddies. (I may not be doing much needlework myself lately but I can live vicariously through enabling the rest of you!)

Craftsy Class Review: Slow-Cooker Savvy with Michele Scicolone

For awhile there, the only Craftsy classes I had time to do were the cooking ones. After all, a girl's gotta eat even in the midst of writing papers! That being said, this is another class I finished awhile back while snow was still on the ground.

Let me clarify, since we had snow on the ground well into April. I finished Slow-Cooker Savvy: Make Your Best Meals with Michele Scicolone in early February. Just the [normal] season for slow-cookers. Nothing like smelling your dinner cooking all day long when the snow is falling outside your window. (Although by mid-April even the smell of dinner couldn't make me feel any better about that snow. But I digress.)

This was a good class, and I tried several of the recipes out of it. I do have to give you fair warning, though: These are not your typical "dump it in, turn up the dial, walk away" recipes. Some of them take a fair amount of work either before the slow-cooker does its job or after. The Beef and Beer Stew, for example, took me about half an hour to get everything ready just to go in the slow-cooker. (That also didn't turn out to be my favorite recipe, but you may enjoy it.)

IMG_0001.JPG

I made her White Beans with Sage recipe, although I didn't have any sage so I did thyme and rosemary instead. I used them as a side dish with some other ingredients here and there over a period of days. I intend to use the techniques again with a variety of other beans as I like the idea of having beans on hand to use in other ways.


The Peking Chicken recipe was quite good. My husband even liked it, which is saying something since he approaches any slow-cooked meal with suspicion, plus I used the chicken thighs the recipe called for and he is not a fan of dark meat. This recipe is definitely a keeper. (That being said, I may do chicken breasts next time to cut him some slack.)


For me, the Beef and Beer Stew recipe, maybe not so much of a keeper. I've got other stew recipes I like better. Still, there are several other recipes in this class that I'm looking forward to trying, now that I have time to cook again. (Even the "dump and cook" recipes take too long when I'm on the road more than I'm home!) For example, there's a pulled pork recipe that's intriguing--I want to try it out to see if it beats my others. Hmmm. Maybe this weekend--more time for sewing if the slow-cooker is working for me!

Michele Scicolone is a polished instructor and has written twenty cookbooks--if you dig this class, you can pick up some of her cookbooks and have all sorts of slow-cooked recipes in your repertoire.

The first lesson talks about the varieties of slow-cookers on the market, and gives pros and cons to several of them. I already own three slow-cookers of varying sizes and after watching this lesson, I've started thinking about getting a fourth for some of the very handy features I don't have on any of the others. She also shares some cautions about using older slow-cookers, such as ones you might find at a garage sale. Michele goes through safety concerns and caring for your slow-cooker, as well as how to calibrate the temperature settings.

The rest of the classes walk through different types of meats, side dishes, and "fast slow-cooking" (frittata and creme caramel). In each, she not only talks about the one recipe used to show the technique but also shares substitutions and basic information about considerations you need to keep in mind for cooking that particular type of food using this method.

I don't tend to use my slow-cooker as much in the summer, for some reason, but I think this class may make me adjust my usual habits. After all, there are some great summer salads using beans, and a frittata would be a nice brunch dish. Something to consider, anyway!

The Basics

  • 7 lessons ranging from 16 to 30 minutes
  • Lesson 1 is an introduction and includes lots of fantastic information about slow-cookers
  • Lesson 2 is cooking a whole chicken (which includes good information about how volume affects cooking)
  • Lessons 3-5 are various types of meet: chicken pieces, beef, lamb, and pork
  • Lesson 6 is side dishes--mashed potatoes, beans, and polenta
  • Lesson 7 is "fast slow-cooking," including an egg dish (frittata) and a creme caramel. 
  • The class materials include a brief list of some of the slow-cookers she talks about in the class, as well as 12 recipes. 

I did find Slow-Cooker Savvy: Make Your Best Meals with Michele Scicolone very helpful. Recommended!

(Transparency: Using Craftsy links in this post help support my podcast and blog. Thank you!)

Craftsy Class Review: The New Chicken Dinner with Ian Knauer

Time to kick in with the Craftsy class reviews again! This one will make you hungry (unless you're a vegetarian like my daughter: sorry!). If you're a carnivore and are looking for better ways to cook chicken, you really need to check out The New Chicken Dinner with Ian Knauer. I finished this class a few months ago but it's one that I definitely keep going back to the well on. In fact, I just did the rotisserie-style roast chicken again last week (pictured below) and am likely to do it again in the next few days. It's probably become my favorite way to do a roast chicken now. 

For the most part, Knauer addresses fairly common techniques for chicken but he teaches different approaches that just have wonderful results. The rotisserie-style chicken (lesson 2) is really the best dang roast chicken I've ever had, and I've made a lot of roast chicken a lot of different ways! It's incredibly moist with a wonderful crispy skin.... Huh. I may make it for myself for dinner tonight even though no one else will be home. It's pretty easy to do and you can change up the flavors of his recipe really easily.

But let me move on. There's more to the class than an incredible roast chicken. (Although it's worth it just for that!)


Well, wait--let me just do one more picture to make you really get hungry: here's the rotisserie-style chicken cut up and covered with a pan sauce from the class recipe. Wowzer. 

I know I made another recipe from this class but I don't know that I took a picture of it. I remember thinking it was also really good. There are a handful of other recipes and techniques I also want to try. If I could only get that roast chicken out of my head. 

Knauer is an enjoyable teacher to watch--very straightforward, offering lots of great information about substitutions or variations on the techniques in each lesson. There are eight recipes in the class materials but, again, with variations there are dozens more possibilities. The ingredients are all quite normal ingredients, easy to find, and the flavor profiles run from fairly traditional American to Italian to Asian. However, again, the techniques are key: Although he uses an Asian recipe to teach poaching, for example, you can do any flavors you want. 

I highly recommend this class--it'll elevate your every-day chicken to make it feel new!

The Basics

  • 8 lessons, ranging from 9 minutes to about 20 minutes
  • Lesson 1 gives good information for what to look for in the supermarket and how to store chicken safely.
  • Lesson 2 is that really wonderful (have I already said that?) rotisserie-style roast chicken. It also includes information on compound butters and a pan sauce, as well as tips for trussing and carving.
  • Lesson 3 is deep-frying. He almost made me want to try it. (I avoid deep-frying for health reasons as well as to avoid a messy clean up!)
  • Lesson 4 is searing both bone-in and boneless chicken (this is the one I did but didn't photography--it was great!)
  • Lesson 5 is a salt-baking technique that I definitely am going to try at some point; it also includes how to salt-bake vegetables as well.
  • Lesson 6 is spatchcocking (or butterflying the whole chicken and grilling with bricks)
  • Lesson 7 is braising, using a recipe that creates a ragu for pasta
  • Lesson 7 is poaching and torching, with information about cooking rice.
    • Many of the lessons also include carving and plating suggestions.
  • The materials include eight recipes, as mentioned above.

The New Chicken Dinner with Ian Knauer is probably one of my top three favorite cooking classes from Craftsy now. (Artisan Bread Making with Peter Reinhart and Homemade Italian Pasta with Giuliano Hazan are two others, although ask me on different days and I'd probably name different ones!) In any case, I definitely, wholeheartedly, recommend this class!

(Transparency: Using Craftsy links in this post helps support my podcast and blog. Thank you!)

Craftsy Class Review: Love Your Vegetables with Anna Bullett

Time for another food class review: Love Your Vegetables with Anna Bullett. It's been awhile since I've done a foodie post. However, for this one, I don't have any photos of dishes I've made from the class since I'm holding off trying the recipes until my CSA begins in another couple of weeks. So you'll be hearing more about the recipes themselves later.

I decided to do this class because of the aforementioned CSA, or Community Supported Agriculture. If you're new to my blog, just a short backstory: I've subscribed this summer to a CSA, and deliveries start the second week of June. I've done CSAs two other years but skipped last year because I travel a lot during the summer and was having problems juggling the schedule. This year, I found a CSA much closer to me so doing the weekly pick-up will be a lot easier, and I think I'm getting a smaller share, so it should be easier to keep up with the produce. I don't have time for canning and I have limited freezer space so I really do need to be able to use the produce up the week I get it, as much as possible. That means collecting a ton of vegetable-focused recipes. This class seemed just the ticket.

One of my 2013 CSA pick-ups

One of my 2013 CSA pick-ups

Anna Bullett reminds me a bit of Rachel Ray in terms of perkiness. If you love Rachel Ray, you'll probably really enjoy Anna Bullett. 

As a learning experience, it was a good one. Each lesson focused on a particular family of vegetables and, through the recipe or recipes covered in the lesson, Anna gives rationale behind different types of preparations for the vegetable in question. She also gives all sorts of good tips for washing, slicing, and storage. There are several recipes that I'm looking forward to trying when my produce starts rolling in.

Another ghost of CSAs past

Another ghost of CSAs past

Additionally, every lesson except the last includes a "Chef's Tip," or a brief tidbit of additional information about something else you can do with that family of vegetables. These were nice little additions--one of them helped me understand why my attempt at Kale chips a couple of years ago failed miserably. I think I'll be better prepared for the inevitable influx of Kale from the CSA this year. 

If you're looking to expand your repertoire for vegetable dishes--either as a side or a main--I do recommend this class. Just be prepared for the perky.

The Basics

  • 8 lessons, ranging from 15 to about 30 minutes; most are in the 15-20 minute range.
  • The first lesson starts right out with one of my all-time faves: butternut squash. Generally I want to rush my CSA through to get to fall so I can get my hands on the various forms of winter squash. I'm a fan of pretty much all of them.
  • Lesson 2 is root vegetables, lesson 3 "hearty greens" (aka Kale and the like), lesson 4 is Cabbage & Friends (including the very Dr. Seussian Romanesco broccoli)--and included a very helpful tip on keeping your cole slaw from going watery; lesson 5 may convince me to give eggplant another try; lesson 6--the beautiful tomato (yum); lesson 7 is about fava beans which I will likely never buy raw because I don't see myself putting that much work into a bean; and lesson 8 ends with a couple of ways to make easy, quick refrigerator pickles that will definitely be happening in my kitchen at some point this summer.
  • The class materials are extensive: 26 pages including 30 recipes. You're basically buying a cookbook with this class. The recipes are all quite do-able, too--only a couple have ingredients you may not already have in your pantry (depending on your fave styles of cooking).
  • The recipes are mostly side dishes but there are quite a few that either are, or could easily be, main dishes if you're going meat-free. In my case, there were a couple that I thought we could make vegetarian so my daughter could eat it, and then I could just throw in some diced cooked chicken in my portion to meet my more carnivorous needs. 

Two thumbs up. Basically, Love Your Vegetables with Anna Bullett is just increasing my yearning for Tuesday, June 9, when I get to do my first CSA pick-up of the season. I can't wait to dig in!

(Using Craftsy links on this website helps support my podcast and blog. Thank you!)

While I've Been Away...Playing with a New App

I left you in the good hands of my 5th Podcastaversary Giveaway and Rafflecopter, while I was off and traveling about. Meanwhile, I entertained myself with playing around with a few new apps on my phone. So far, the big winner--in terms of coolness and actual usability--is Steller. (And no, I'm not an affiliate, so this is just a straight-up review and introduction!)

Steller is a really super-cool storytelling app for smartphones. Steller allows you to create online photo books, of a sort, called stories. You can create pages with photos, videos, or text, or a combo package. It has several very nice templates and several layout options for pages within those templates, so it's pretty simple to learn. It also has a social-networking aspect in that you can follow and be followed by other Steller users, "like" a story, and leave comments. A lot of Steller users are professional photographers so just scrolling through all the Steller stories available is wonderful eye-candy. I'm a particular fan of the travel-related stories. Gorgeous. There are also a lot of stories that are recipes with step-by-steps included that may be useful, although I haven't tried any yet to know how well that works in the kitchen. 

When I first found it, I thought (of course), "This will be GREAT for documenting the process on quilts!" I've thereby got a Steller WIP on one of my quilty WIPs going on. Meanwhile, to learn the app and to entertain myself on my second trip that involved a ton of time sitting around in airports, here are the three Steller stories I've created to date.

Story #1:  I had pictures from our vacation to Washington D.C. handy on my phone still, so it was pretty fast to throw together. I was just learning the basics so I didn't get fancy with anything--it's pretty straightforward.

Click To Open

In Story #2, I had other photos on my phone from fibers I'd recently acquired. I messed around a little more with Steller layout options on this one.

Click To Open

For Story #3, I had to wait until I could get on WiFi and download a few photos from one part of my trip to Burma. I only did a little photo editing and for some reason I couldn't download a couple of the videos I have related to this, so this one is still fairly straightforward at this point. I might edit it later to make it a little more whiz-bang.

Click To Open

Finally, Story #4 is the one that kept me entertained in airports. I decided I may as well kill time messing around with all the various photo and video apps I have on my phone--and I have a lot. So you'll see at the end I listed which ones I used in this particular Steller story.

Click To Open

Super-cool, right? Love this app. It's probably my favorite new app find of the year. I even got @carolewool hooked. Here's a link to one of her Steller stories. (She beat me to the punch on getting one done on a quilt process--mine's not finished yet! The project is taking me a lot of time to work through so it may be awhile...) I've found several people to follow--including one young man who is documenting his study-abroad semester in India, which is fascinating!

You can follow Steller on Twitter if you're not sure you want to actually sign up for the app yet--they tweet links to newly posted Steller stories (although only featured ones), so you can see what they're like. You can also set up a Steller account even if you never intend to create a story, and only want to be part of the network. It really is a beautiful app.

I use it on my iPhone (it's not available for iPad but I'm checking out similar iPad apps to decide if I like them as well); it's also available as an Android app. I really do suggest you check it out!

Keep an eye out for an upcoming post on my favorite photo editing apps. Like I said, I have a lot, but a few are standouts! 

Craftsy Class Review: Cut to It: Strategies for Smarter Quilting with Debbie Caffrey

Craftsy

I got talked into this class. Really--they really had to twist my arm. (Stop that laughing. I can hear you.) I love Twitter, but sometimes those #Twilters, they can be real enablers. Still n' all, in this case, it was a tremendously useful enable!

I was reading tweets about Debbie Caffrey's Cut to It: Strategies for Smarter Quilting at a weak moment: I'd just decided I should make a gift for someone that will involve a ton (a TON) of cutting of the same units, over and over. I wasn't looking forward to it, so anything that sounded like it might help me be faster and more accurate at the same time seemed like it would be worth a try. 

I loved this class. It's not the kind of class that I can post pictures of projects I made because of it, nor have I really been able to put into use most of the techniques taught in the class...yet. I've not been doing that kind of quilting recently. However, watching her did convince me to finally pony up for something I've thought about for awhile--I used a Joann's coupon to buy a second large cutting mat for my cutting table. I keep one mat upside down so it's just a plain surface to make it easier to see ruler lines without the competing lines from the cutting mat beneath, just like she suggests in the class. And it really is nice to have both surfaces available to me. I can still flip either over as I need, but it's nice to have one of each to go back and forth.

I used a double-sided poster-hanging tape to hold both cutting mats steady in place. It just made me fall in love with my cutting table all over again. 

I have also started holding my ruler differently based on this class. I've always done the, well, let's call it the Spider Grip--that I was taught early on: fingertips splayed on the ruler (palm lifted up) with the pinky on the mat next to the ruler to hold it in place while cutting. It works well enough, but my hand gets tired after awhile. Debbie has a slightly different hold that works as well in terms of steadiness--if not better--and is more comfortable for long sessions of cutting.

Some of the techniques she's teaching made me almost want to do the "Doh!" forehead slap: Why didn't I think of that before? Such a simple, seemingly small change to how I approach my cutting, but how much more quick and potentially much more accurate it could be. Her charts and graphs in the downloadable materials, which she goes over in good detail in the lessons, may seem confusing at first but once you get the concept, they will make things go much more quickly in the future. 

I particularly liked the lessons on jelly rolls and fat quarters because I have a lot of them and she offers a lot of helpful tips for dealing with issues they can sometimes bring with them. I tweeted after watching some of those lessons that I wanted to run right into my sewing studio and start slicing away! I may not be much of a traditional quilter these days, but I loved the blocks from Lesson 4, especially when she laid three of them out side-by-side. I immediately thought, "Boy, I wouldn't mind using that for a holiday table runner." 

There aren't really projects related to the tips she teaches per se, but she does include a quilt pattern that does use the tips if you want to do it. However, it's not emphasized in the lessons--she references it here and there, but there's not really a step-by-step instructional piece just on that project. This is truly a technique class. 

She also shows both right-handed and left-handed positions for different techniques,how to use rulers in lieu of templates (something I'm going to start trying on my Jinny Beyer Block of the Month which is Template Central), working on the bias, trapezoids, and so forth. Lesson 6 is a really interesting look at how to figure out how many pieces you can slice one unit into for very different results. Fun stuff!

So, in other words, this was an incredibly useful class. It's one that, even though I watched it all the way through, I'm sure I'm going to keep going back and watching individual lessons or parts of lessons to refresh my memory before I start certain types of projects. Including that gift I mentioned. Yikes. 

The Basics

  • 7 lessons, ranging from 20 minutes to 34 minutes, mostly in the 30 minute range. (She doesn't mess around!)
  • Lesson 1 gets through the basic introduction stuff pretty quickly; she then dives right into some foundational guidelines for holding different types of rulers and the most efficient way to approach some standard cutting tasks--strips, cross-cutting, diamonds, chevrons, and so forth.
  • Lesson 2 is all about strips; lesson 3 is half-square triangles (HSTs), quarter-square triangles, and trapezoids; lesson 4 is fat quarters and templates; lesson 5 is squares into Delectable Mountain blocks of various types;  lesson 6 also addresses squaring up, and slicing simple blocks up to form more complex units; and lesson 7 is doing bias HSTs. 
  • Class materials include a 15-page reference for everything she talks about in class, plus another PDF with the quilt pattern. Even if you don't want to make the quilt, it's worth downloading this PDF as she does address the pattern specifically at one point to demonstrate how to calculate for cutting and you may want to be looking at it for reference as she does.

Debbie Caffrey's Cut to It: Strategies for Smarter Quilting was a great purchase. This is definitely reference material for some time to come. She has a second class available that I'm now eyeing: Clever Cuts for Efficient Quilting. I'll probably be picking that one up once I knock out another class or two that I already own.

(Using Craftsy links in this post helps support my podcast and blog. Thanks so much!)

Craftsy Class Review: Learn to Sew: Simple Bags with Nicole Vasbinder

Craftsy

So, if you've been listening to my podcast or following my blog for awhile, you'll know my intense dislike for fiddly bits and anything that even vaguely smacks of garment sewing. 

I love seeing other people's completed fabric purses, totebags, and duffle bags. But let's just say that my own brief forays into the field haven't been stellar. I made one totebag years ago that I still use frequently but I can still see the places where seams didn't match up and I didn't quite box the bottom correctly. Still, it's pretty functional and nice fabric so I live with it. I had another attempt at a purse that ended up in the trash. My biggest issue? I'm not a garment-sewer, and a lot of purse/tote/duffle patterns are written with the assumption you are.

Foldover tote completed

Foldover tote completed

While toodling through Craftsy classes a week or so ago to see what was new, I saw Learn to Sew: Simple Bags with Nicole Vasbinder. I thought, maybe that's the ticket. Maybe if I take a step back and put myself in garment-sewing school (just the basics, ma'am), I'd grow more comfortable and wouldn't find these kinds of projects as frustrating. 

I completed the class in one weekend. It wasn't too painful, and I completed both projects in a reasonable length of time and with only a few curse words here and there (all while working on the dang boxed bottom of that pouch when my machine decided to throw a hissy). Enough background. Here's the review:

Demonstrating the pockets on the front (1 pocked subdivided into 3 parts)

Demonstrating the pockets on the front (1 pocked subdivided into 3 parts)

This class would be great for someone who's never touched a machine before. It really does start out with how to sew, as per the name of the class, "Learn to Sew." The first lesson walks through parts of a sewing machine (in brief), how to thread machine and bobbin, and so forth. There are some neat graphics in the first lesson about how the sewing machine works. The second lesson is sewing seams--of course, this class is doing it "garment-style" so seams are generally wider than this quilter is used to. I was proud of myself that I only went to default-mode of 1/4" seams twice--for the most part, I remembered to do those gargantuan 1/2" seams she uses. 

The third lesson had a little information about fabric in general, as well as some suggestions for picking fabric for the totebag. From there, it goes directly into the projects with some "teachable moments" interspersed. 

Showing the interior pocket and lining

Showing the interior pocket and lining

True confessions: I watched most of the lessons on 2x speed, until I got to parts I felt I needed to watch more carefully. I did get frustrated a few times because the video doesn't always completely match the written instructions in the downloadable materials, and the instructions sometimes leave out key information about placement and so forth. I had to keep referencing the video over again to make sure I was doing things correctly. It's not a huge issue in this case, but I would have wished for more accuracy in having the written and verbal instructions match. I made notes on the written instructions just in case I ever go back to use them again and don't want to have to watch the whole lesson over.

Zipper pouch completed

Zipper pouch completed

My suggestion is, if you're new to sewing or new to this kind of sewing, watch each whole lesson first, and then back up and start doing the steps with her. In some things it's confusing until she gets to later steps and finally explains how she's got things laid out or why she's doing something the way she's doing it. 

I can't say this class has made me all gung-ho to run out and start churning out purses and bags. But I think it did increase my comfort level with the differences between garment-sewing and quilting to a degree. The totebag and zippered pouch are cute, but if I were to make either of them again there are several adjustments I'd make to them to have them work better for me. I'm just not committed enough to either design to poke at them like that. I already own a lot of patterns for totes and purses; I guess this is something I can just keep plugging away at when I get in the mood...once in a blue moon.

Interior

Interior

The Basics

  • 7 lessons, ranging from 11 minutes to nearly 30 minutes
  • The first two lessons are introductions to the basics of your sewing machine and sewing in general. Lesson 3 includes some more of that introductory information, but then goes into the cutting of pieces for the tote.
  • Lessons 4 and 5 are the foldover tote, and lessons 6 and 7 are the zippered clutch. 
  • The class materials give some troubleshooting information about sewing on your machine, and then supply lists, instructions, and templates for the two projects. As noted above, I was disappointed that there were some discrepancies between the materials and the video lessons. Just have the materials in front of you while you're watching the lessons so you can make notes to yourself as you go.

This is a tough one for me to rank because it's a topic that I come to having a bit of an attitude already. In the grand scheme of learning how to do garment/accessory sewing rather than quilting, I guess I can give Learn to Sew: Simple Bags with Nicole Vasbinder my usual thumbs up. But I'm still not an enthusiastic garment/accessory sewist. 

Don't forget, Craftsy is having a Valentine's weekend sale--lots of great classes to check out. I'm working on another one I just picked up this weekend that's just chock-full of great information and much more in my wheelhouse...but more on that one in a later post!

(Using Craftsy links in this post helps support my podcast and blog. Thanks so much!)


Craftsy Class Review: Small Changes, Big Variety with Angela Walters

Craftsy

I'm celebrating Valentine's Day weekend by writing up another Craftsy class review!

Yep, another free motion quilting class. At this point I'm just looking for inspiration for designs. And this class was chock-full of that! So, here's my review for Machine Quilting: Small Changes, Big Variety, with Angela Walters.

Do I have to say again that Angela Walters is an enjoyable teacher to watch? I've lost track of how many of her classes I've reviewed on this blog now. And although I've done several of her classes and own several of her books, I have to give her props for not noticeably repeating herself. This class really felt like all new material. Sure, I'd already done spirals before, for example, but getting a few ideas for how to change it up to look like an entirely different design was very helpful.

As always happens with every FMQ class I take, just watching the teacher do the design helps me grasp more easily how to travel from one section to another, how to work my way back out of the corners I almost inevitably end up in, and how to ignore the couple of bobbles here and there and simply drive on. After all, as Angela Walters continually points out, for the most part I'd be using a thread that blends and those little bobbles would be completely unnoticeable. 

I decided to practice some of the designs on a practice quilt sandwich, but to make it interesting for myself I used one of my [less favored] hand-dyes to make the sandwich and then played with a lot of my funkier threads while I was quilting. I intentionally used contrasting thread so I could see what I was doing, so it's clear where my brain and hands periodically refused to play nicely together. But still n' all, I can definitely see the improvement in my FMQ skills after a full year of so many classes and practice. And that's nice. 

In any case, this class is just jam-packed with designs. Packed. I think I counted up something like 32 total designs, and that's just to get you started. Once you see her suggestions for variations it gets your mind running with "What ifs". 

Detail of practice 

Detail of practice 

If you've never free-motion quilted before, you'll need to start somewhere else because she really doesn't spend any time teaching about how to set up your machine, basting, tensions, threads, or any of that. But if you at least know the basics, you'll have no problem doing this class. Each lesson goes from a fairly simple version of the design to increasingly more complex variations. 

The Basics

  • 7 lessons. The 1st is a short introduction; the rest range from 19-27 minutes long.
  • The main designs include pebbles, swirls, ribbon candy, feathers, squares, and clamshells. For each design, she gives between four and six variations, plus ideas for additional variations you can try. 
  • The downloadable class materials are set up like her Free-Motion Quilting Workbook, with a drawing of all of the designs, each with a blank box next to it for you to do your own practice drawing before trying to stitch it on the machine. Although part of me struggled a bit with printing off so much blank space, I have to admit it was useful having the reference drawing directly next to the space I was drawing in rather than on a computer screen or something where I'm bouncing my eyes back and forth.

So, all in all, two thumbs way up for Machine Quilting: Small Changes, Big Variety, with Angela Walters.. I got a lot out of it, I'm still practicing some of the designs, and I'm brewing ideas for some of them on current projects.

By the way, it's on sale this weekend, too! Just click any of the Craftsy links on this blog and it'll take you to the sale.

(Using Craftsy and Amazon links on this post helps support this podcast and blog. Thanks so much!)


#BFSI Craftsy Class Review: A Modern Take on the Mother Sauces with James Peterson

Craftsy

Yes, it's Black Friday, and once again I'm refusing to shop. However, I'm also not really hosting my usual #BFSI (Black Friday Sew-in) because I dropped my machines off for cleaning/tune-ups already--since I'll be gone three weeks, I figured this was the best time to do without. Unfortunately, I ended up with more time on my hands today than I thought I would and I'm really missing those machines!

However, it did give me time to finish up a Craftsy class, and I figured I'd quick post the review today since Craftsy is having a big Black Friday sale with all classes $19.99 or less. So grab the ones you've been looking at now!

This morning, sans machine, I took the time to finish A Modern Take on the Mother Sauces with James Peterson. To a certain degree I've been working on this class for awhile, watching lessons here and there, waiting until I had the time to try out one of the techniques. This one was a little trickier to decide what to try than the other sauce class I took awhile back, Homestyle Pan Sauces with Martha Holmberg (see my review here). Homestyle Pan Sauces is geared more at simple and relatively quick sauces you can make even on a weeknight when time is short. Mother Sauces take more investment of time, and willingness to wash a few more pots and pans afterwards. To tell the truth, some of what I learned from this class is, "Unlikely to make that one at home!" But that's part of the learning process--discovering what your limits are. None of the sauces are difficult, really; it's just a matter of time and, again, being willing to wash a bunch of pans. 

Holding steady...

Holding steady...

However--one of his lessons that I was willing to take on: I made myself a cranberry rosemary mayonnaise this morning to use on my leftover turkey sandwich for lunch, it being the day after Thanksgiving and all. I've made homemade mayo before, but I wanted to try his technique. I've used my food processor for this before; this time, I did it by hand. I picked up a nifty technique from him for keeping the bowl in one place on the counter while you're whisking--wrap a damp cloth around the base. My bowl was so lightweight it still bounced around a little unless I held onto it but it did make it wander a lot less than usual. He made some great suggestions for mayonnaise variations and how he serves them at barbecues that I may need to call on sometime over the summer when we've got a crowd over--they sound tasty!

I may do his aioli technique at some point--it's in the same lesson, and takes the same time and number of bowls (one) that the mayo takes. I could see myself doing a Hollandaise sometime, on a weekend or for a brunch. I thought all of the other sauces looked quite wonderful, really, but they're mostly going to have to wait until I have a stay-cation or retire.

I enjoyed James Peterson's teaching style quite a bit. He's very laid-back and can come out with some very funny expressions here and there--he referenced stealing the soul of a particular ingredient, for example, which tickled me. I did find that some of the lessons I was able to watch on 1.5x speed because he speaks relatively slowly, so if I was just wanting an overview of the technique to determine if it was something I'd do again, speeding it up a little was great. Besides, it's fun to watch someone whisk that quickly. Once I decided I wanted to use a technique, I went back and watched it again at regular speed to make sure I hadn't missed anything. Plus, of course, I took lots of notes--one of my favorite parts of the Craftsy platform.

Cranberry Rosemary mayo--tasted far better than it looks.

Cranberry Rosemary mayo--tasted far better than it looks.

The lessons are very comprehensive--in addition to teaching how to make the basic sauce, he gives several variations (sometimes demonstrating them, sometimes simply talking about them), and in most of them he also gives one quick recipe or demonstration of how you'd use the sauce--a cauliflower gratin, for example, or poached fish, and so forth. 

If you're a foodie and are willing to invest some time in getting great results, this would be an excellent class for you. Even if you're not into cooking, I actually found it very interesting to learn what goes into sauces I like to order at restaurants--now I finally know what they're made from and what makes them special, even if I don't ever tackle making them at home. 

The Basics

  • 8 lessons; the intro is 3 minutes, but the remaining 7 lessons range from 20-30 minutes long.
  • Lesson 1, the introduction, does the usual teacher introduction, but then explains what a "Mother Sauce" is and why they're good to learn how to make.
  • Lesson 2 is Béchamel Sauce; Lesson 3 is Beurre Blanc (another one I'm likely to try at some point); Lesson 4 is tomato sauces, although not necessarily "your grandma's Italian pasta sauce cooking on the stove all day," but other types of sauces using tomatoes; Lesson 5 is Brown Sauce, Demi-Glace, Glace de Viande, and Bordelaise; Lesson 6 is Velouté (this was a new one on me!); Lesson 7 is Mayonnaise and Aioli--inclduing a brief discussion of why much of what you see called aioli in restaurants isn't actually aioli; and Lesson 8 is Hollandaise and Béarnaise sauces.
  • The class materials are also very comprehensive. Not only do they include the recipes he demonstrates in class but a ton of variants on a lot of the sauces, and a glossary of terms at the end. 

Even though, the day after Thanksgiving, I'm watching this class and saying, "Nope, not gonna wash that many pots again," the likelihood is that once I'm a few weeks removed from kitchen chaos I'll decide on some relaxed weekend that spending a few hours making a really wonderful, fancy French sauce for dinner sounds like a lot of fun. I would definitely take other classes from James Peterson. Two thumbs up.

Again, that's A Modern Take on the Mother Sauces with James Peterson. And yes, it's on sale today!


A Not-So-Random App Review (with Quilty Implications)

This is random, but not entirely off-topic as I can definitely see quilty (and dye-y) implications from this.

The very first experiment.

The very first experiment.

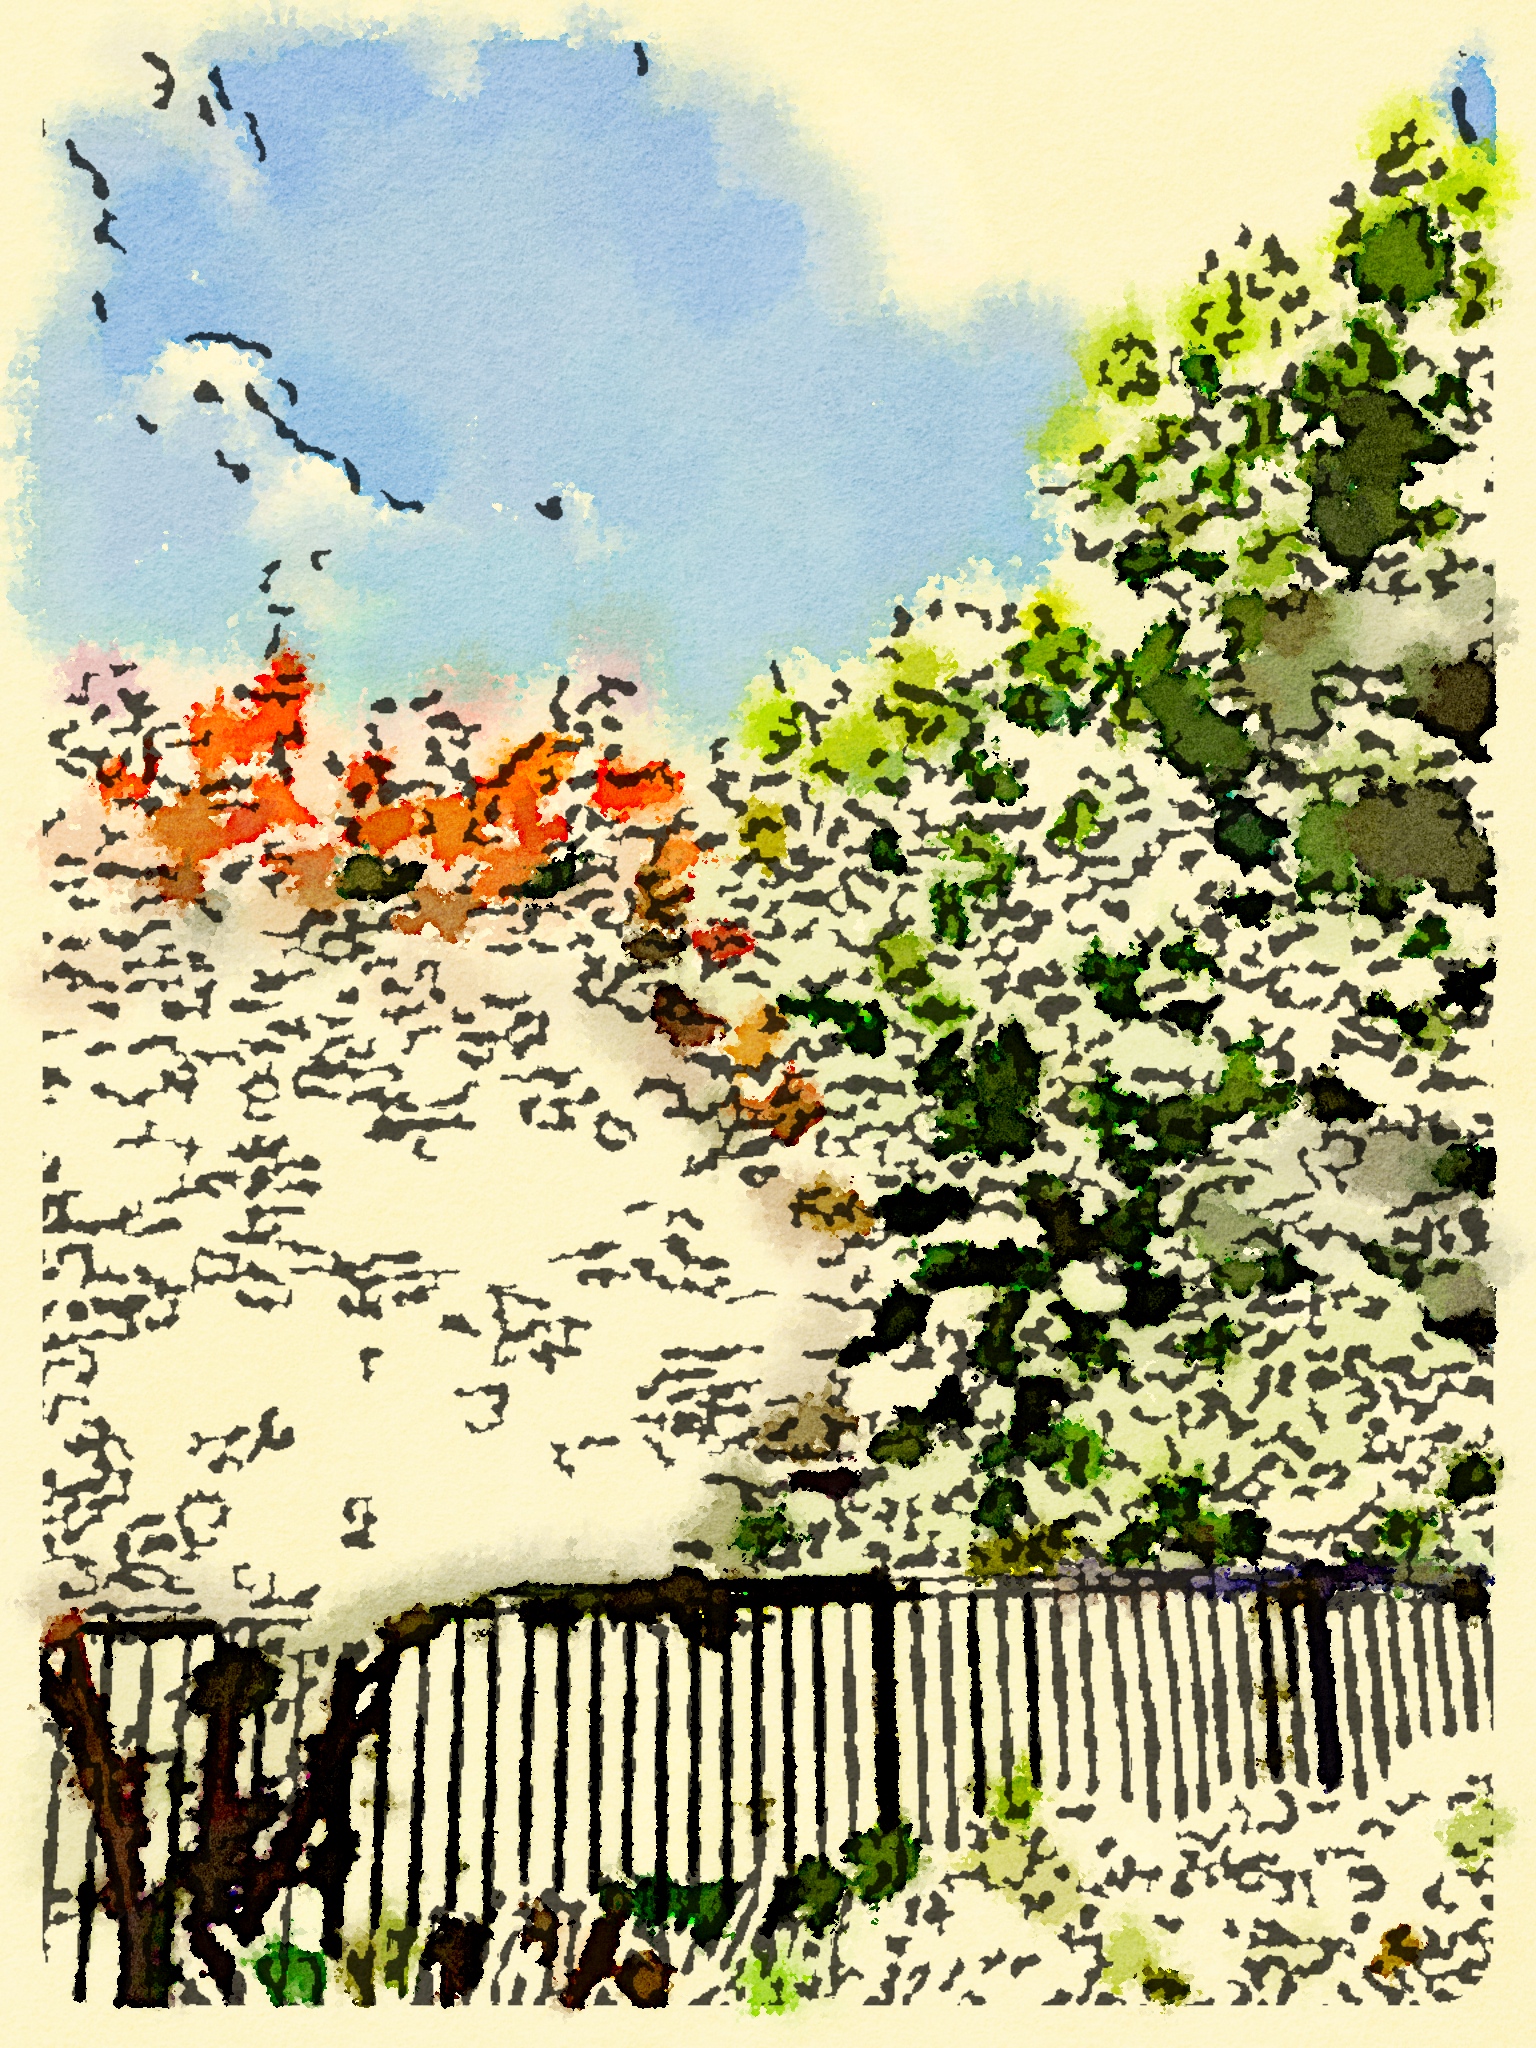
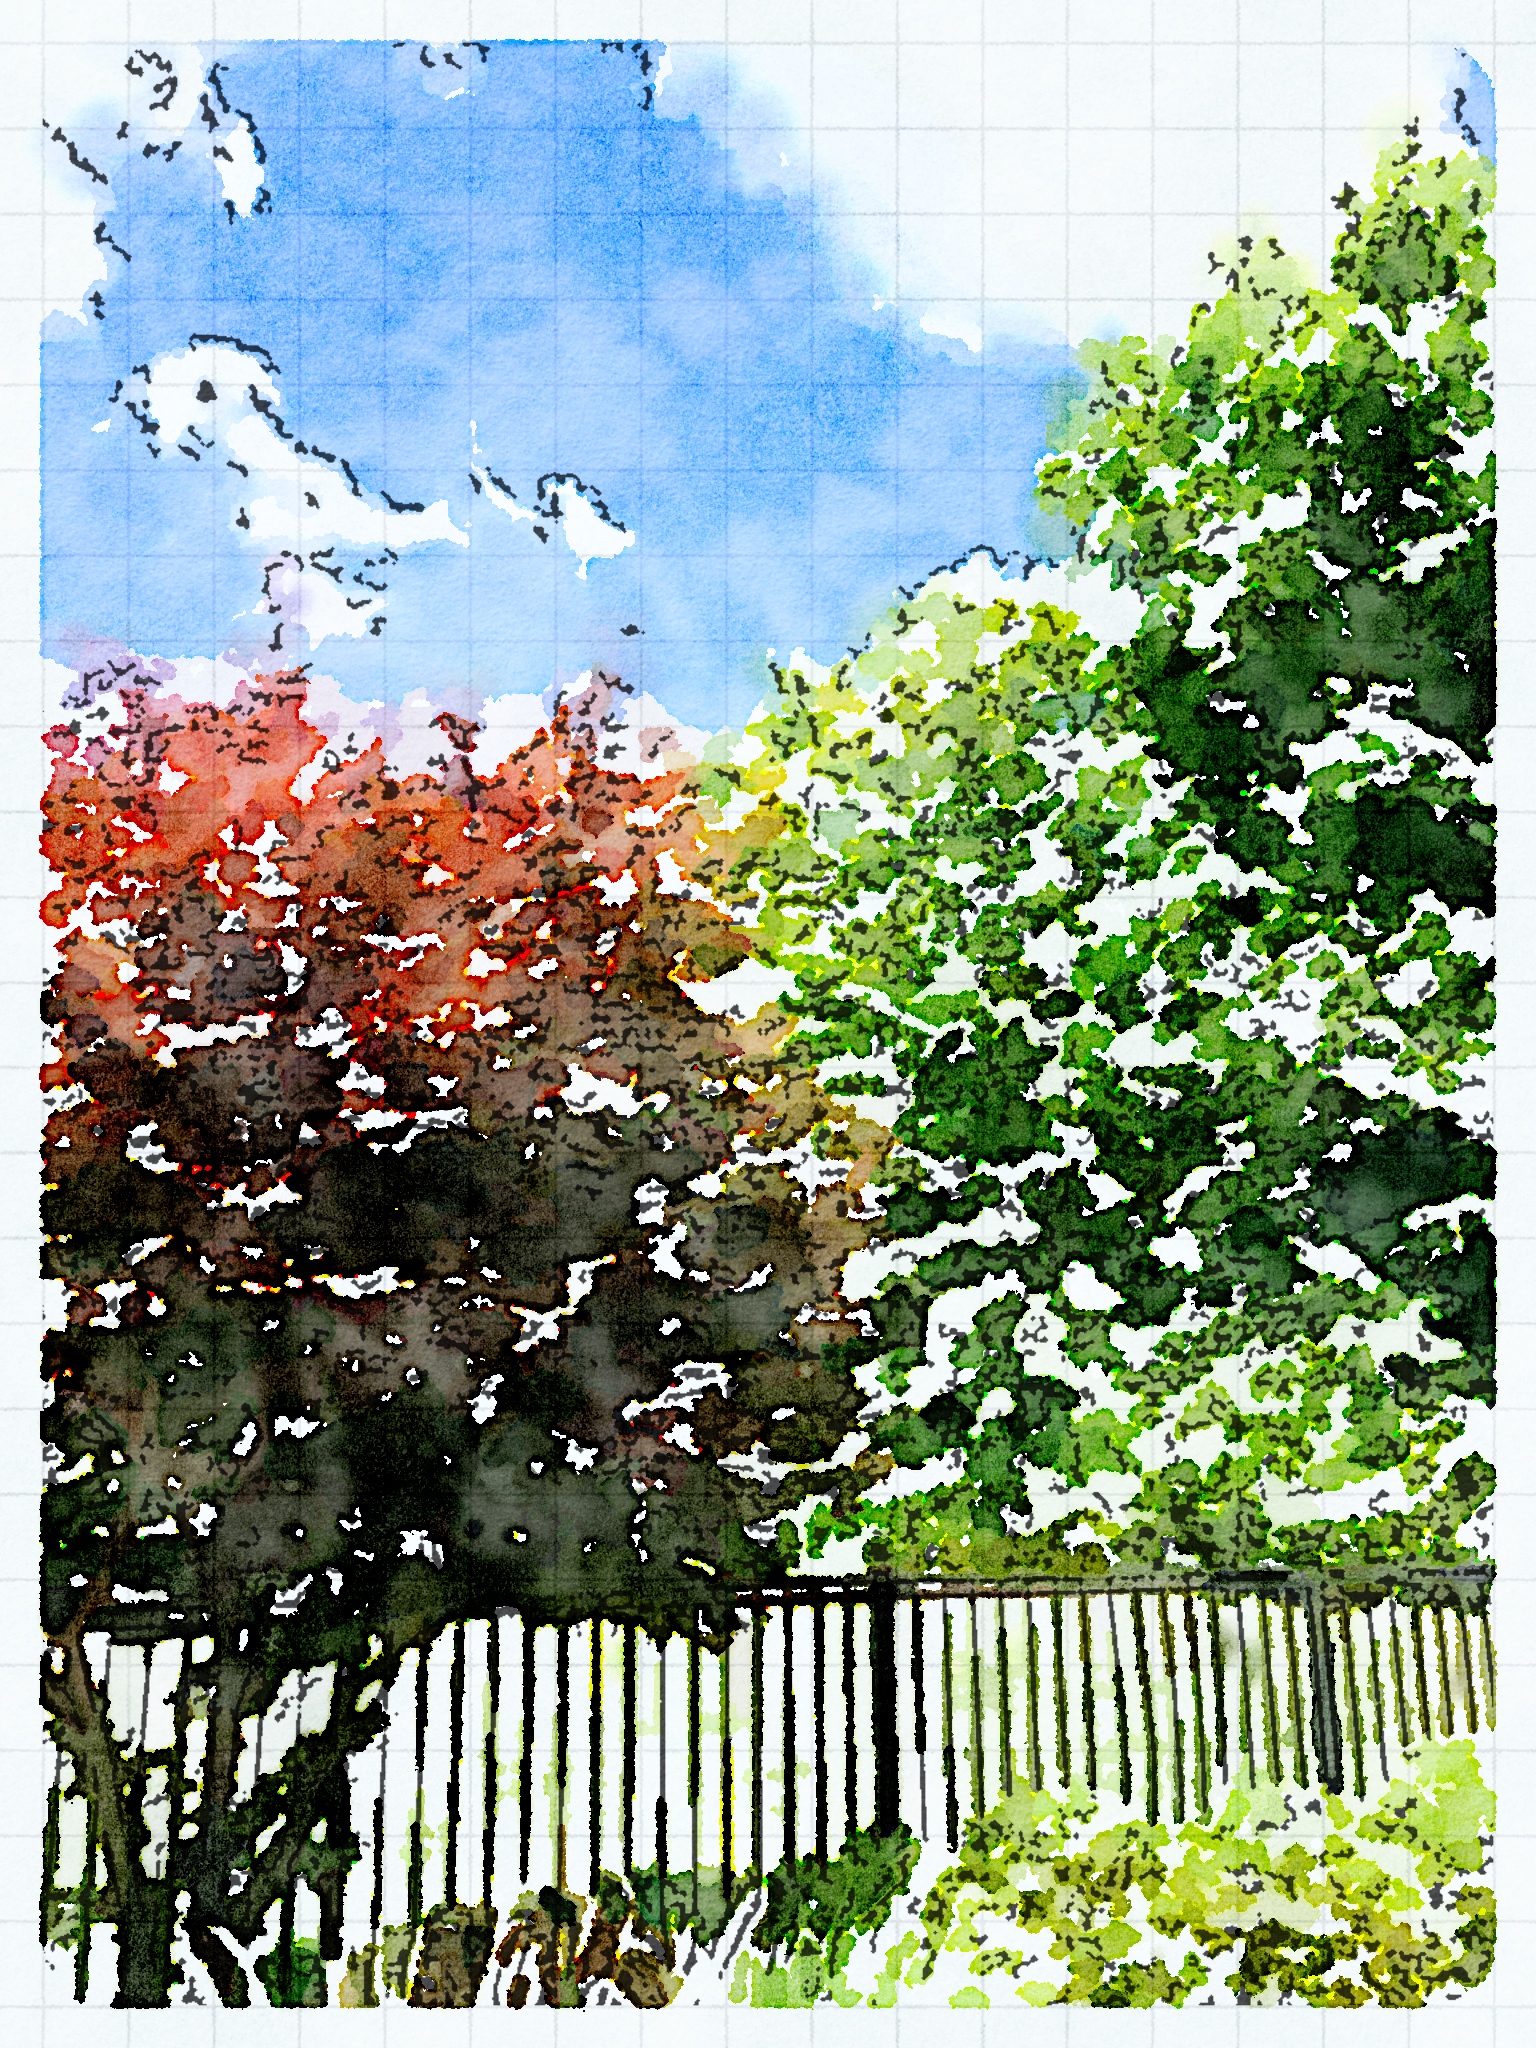
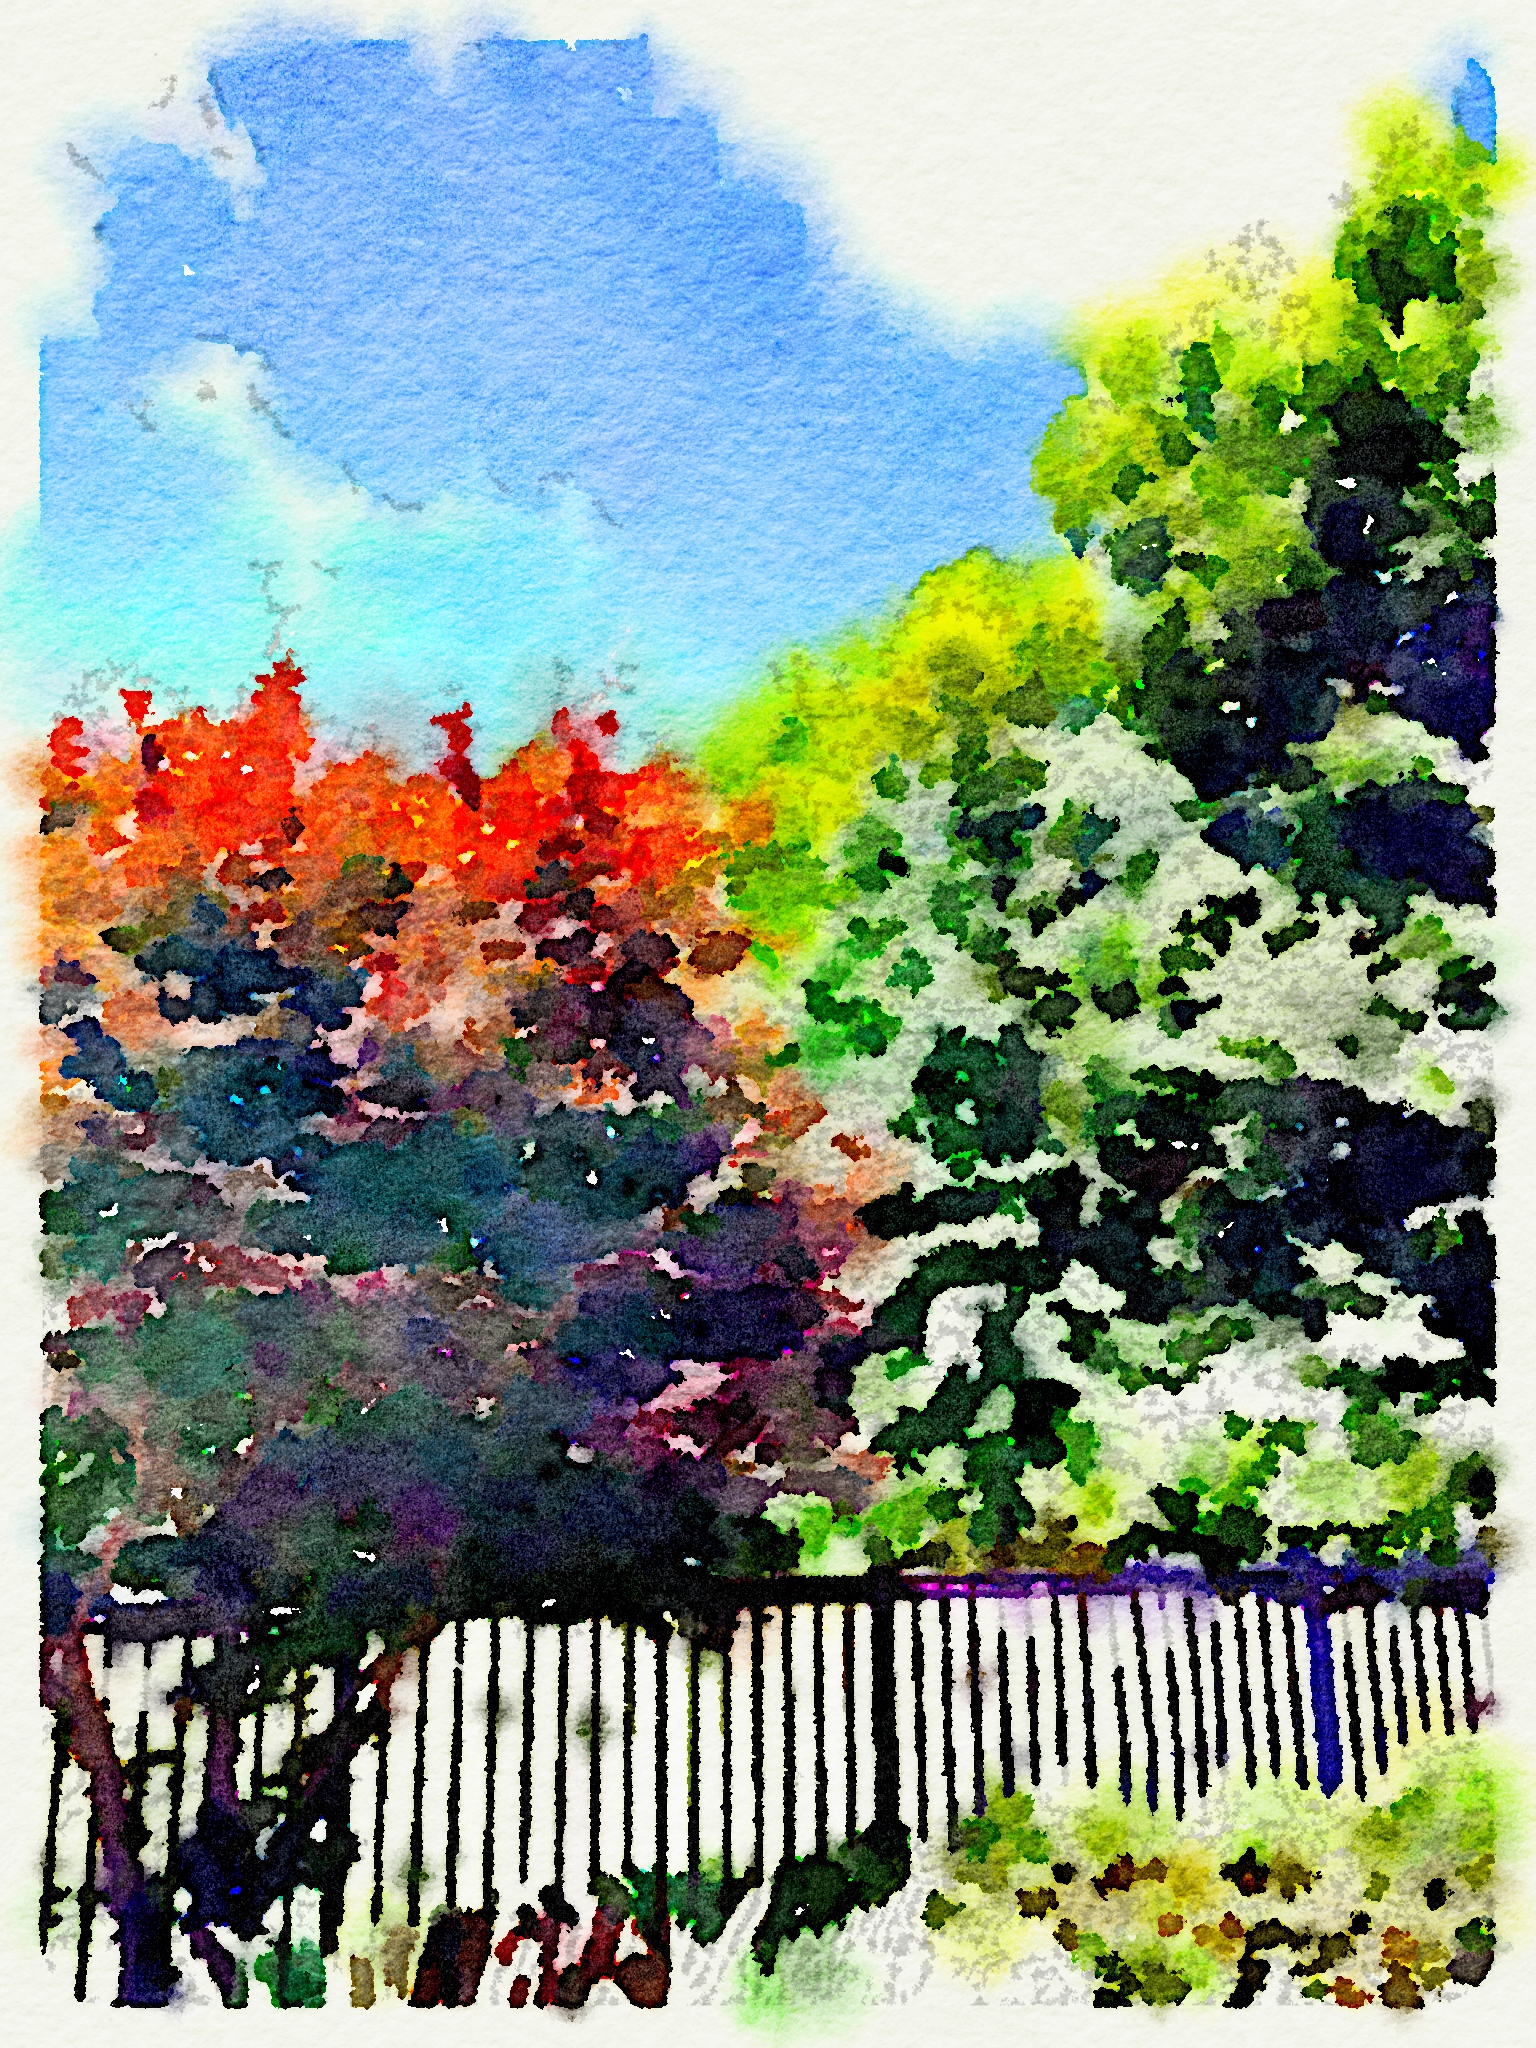
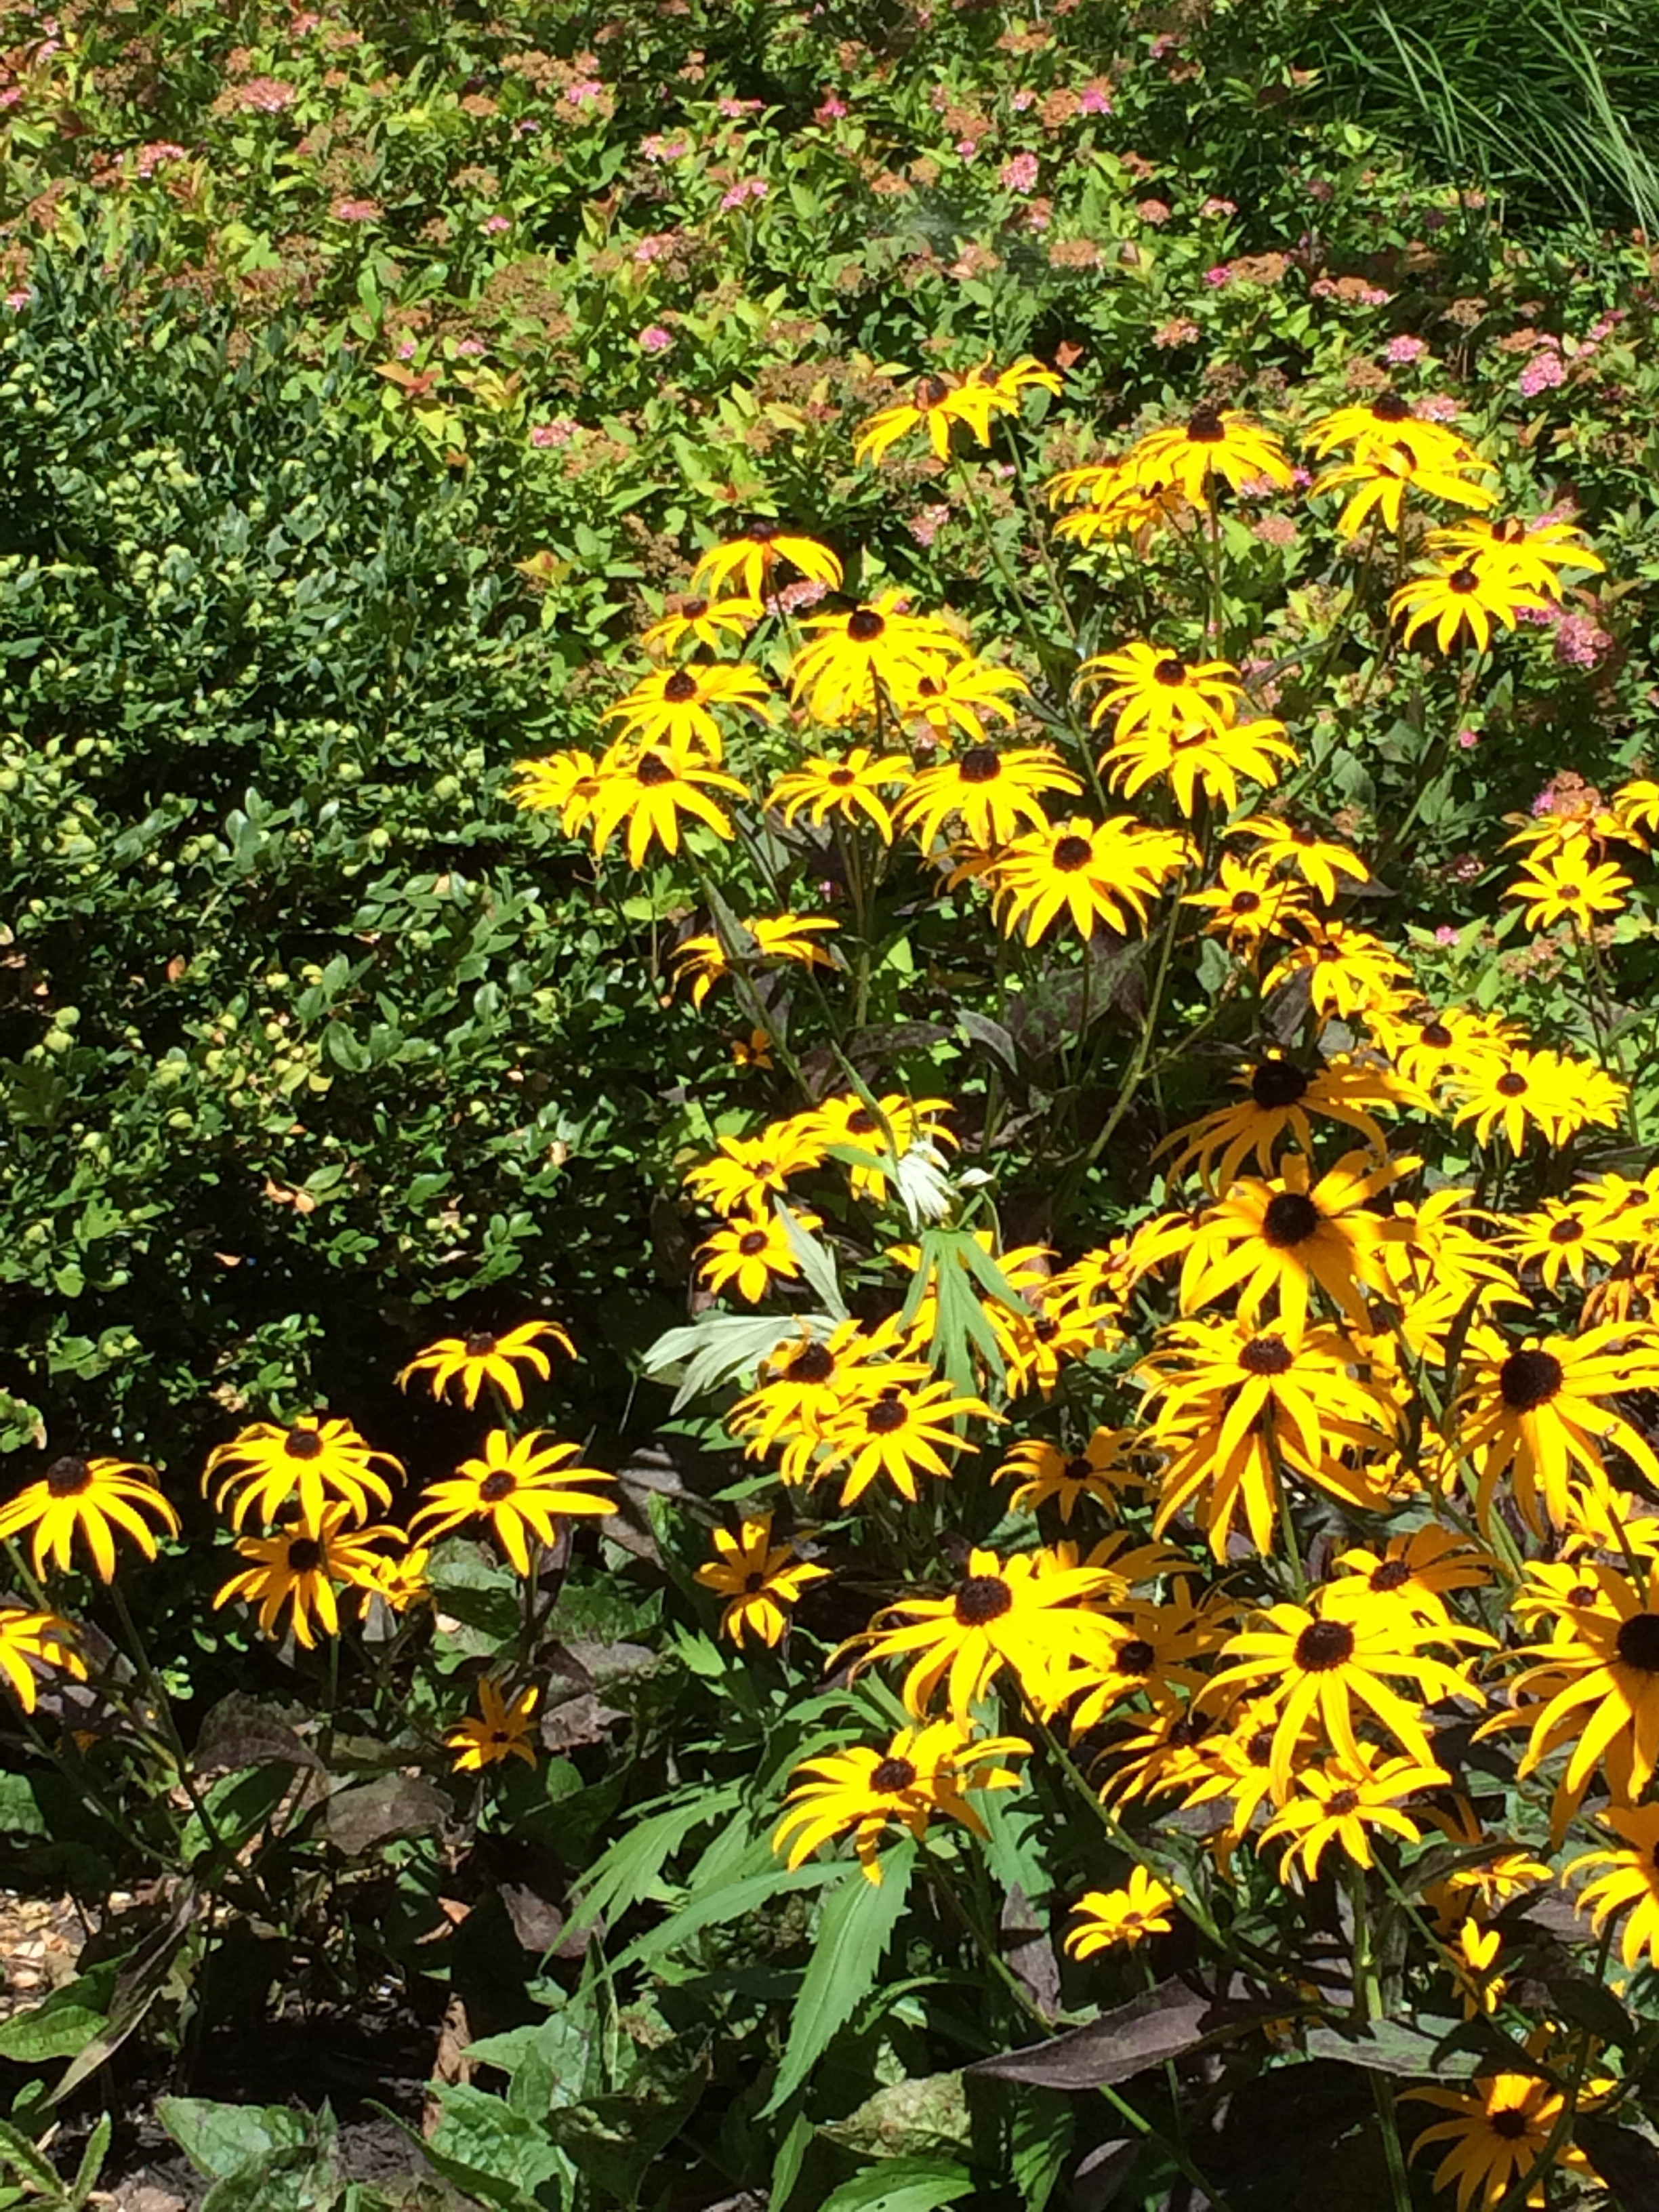
I follow Lyric Kinard's blog, and this morning she posted about an app she'd started playing with, named Waterlogue. I immediately downloaded it and started messing with it myself. 

O. 

My. 

I love this app. 

Mind you, I've got several photo-editing apps and most have some sort of watercolor filter effect but I've never seen any of them work as well as this one. 

I was posting these images to Twitter and a couple of folks checked out the app and have since downloaded it themselves. Unfortunately, we also discovered it's only available for iPhone/iPad, but not Android*. Sorry about that!  

My favorite Happy Sam photo.

My favorite Happy Sam photo.

It has 12 different filters with very different effects--my photos here only include three or four of them. It's fascinating to watch how each filter interprets your original photo. You definitely get a lesson in line and color as each filter breaks your photo down into component parts. 

Other than just good, clean fun, what are the quilty and hand-dye-y applications? Well, gee, let me count the ways. At the simplest, you could print the resulting image onto fabric and thread-sketch or quilt it up for a nice art quilt. You could use the watercolor image as a guide for an applique version: It breaks complicated colors from a photo down into much simpler color splotches (which is a very technical artistic term) that would make it easier to interpret those colors into fabric. You could use the outlines it creates in some filters as a guide to hand-draw the image onto your fabric. For hand-dyeing/painting, the benefits are pretty obvious: It gives you a clear view of what colors appear in the photo that you could easily use as a guide for creating a project. 

(I stole this photo from one that @sewexcitedquilts tweeted this morning of sunrise on a lake. Thanks, Jackie!)

(I stole this photo from one that @sewexcitedquilts tweeted this morning of sunrise on a lake. Thanks, Jackie!)

The app is $2.99. I'd say I've already had about $3.75 worth of fun and I've only had the app for about four hours. When I start using it as a way to create a quilt design? Priceless.

I'll close this blog out with a gallery of the original photos with their filtered counterparts. I've got it set in autoplay to change images every two seconds, but you have controls on the right and left to move forward and back if you want to see something again. If you can't see the gallery in whatever way you're receiving this blog, just go straight to my website.  

*The Waterlogue blog explains that they have no plans to release it on Android. They're a small, independent iOS developer and Android is much harder to program with reliable stability as it's used on such a wide variety of devices. If you want to read the whole blog post, go to their blog.  (You may have to scroll down to find the pertinent post.)

Craftsy Class Review: Perfect Pizza at Home with Peter Reinhart

Craftsy Logo

Yes, I got another class completed this month! I introduce you to... Perfect Pizza at Home with Peter Reinhart.

(Before you gluten-free folks out there think, "Pizza? I can't eat that, I'll stop reading this post right now...." Stick it out. You'll get rewarded at the end!)

This is a quick little freebie class--one of the freebies that Craftsy offers to rope you in...I mean, to introduce you to the Craftsy platform. I chose it because we're big fans of pizza in our house, especially grilled pizza, and because I really like Peter Reinhart as a teacher. (Click here to see my review of his Artisan Bread Making class.) He's really good at what he does! It's been waiting for me on my list of classes for a long time, only because making pizza from scratch takes time I don't often have these days. But I found myself with a little time available this past weekend so bumped it up to the head of the pack.

Fri PM pizza--using Reinhart's sauce recipe with my own dough recipe (for speed). Standard toppings: tomato sauce, sliced Roma tomatoes, fresh basil from my garden, shredded mozzarella.

Fri PM pizza--using Reinhart's sauce recipe with my own dough recipe (for speed). Standard toppings: tomato sauce, sliced Roma tomatoes, fresh basil from my garden, shredded mozzarella.

The lesson on pizza dough felt pretty familiar to me, having already done his bread class. Other than the process of making dough, however, he goes through four different recipes for dough, depending on what style of pizza you want, and talks about the slight difference in baking and results given the different doughs.

The catch here: These dough recipes all require refrigerating overnight, which I hadn't realized when I set out Friday afternoon to make pizza for Friday night dinner. So I stuck that dough in the fridge and then went back to my usual pizza dough recipe that only needs to rise about an hour or so. But I did use his sauce recipe for the Friday night version. The sauce recipe is very simple, requires no cooking, and was exactly the kind of sauce we like! Definitely a keeper.

After doughs, he talks about sauces and toppings--pesto, tomato sauce, herb oils, and then options for what goes on top of the sauce. Again, recipes are included in the class materials, and he does a nice job talking through considerations for ingredients, possible substitutions, and what each ingredient brings to the table. By the way, if you're a fan of cheese--he spends several minutes talking about different cheeses, fat contents, moisture contents, and flavor profiles, including a couple of cheeses I'd never even heard of!

Saturday Lunch pizza--his dough, his stretching method. It looks more pale in this picture than it was. I always brush olive oil with herbs and garlic on the crust right before and immediately following baking, so that's what you're seeing on the cr…

Saturday Lunch pizza--his dough, his stretching method. It looks more pale in this picture than it was. I always brush olive oil with herbs and garlic on the crust right before and immediately following baking, so that's what you're seeing on the crust. This version: Parmesan cream sauce, caramelized onions, spinach, and goat cheese. Yum!

The lesson on making and baking pizzas includes a demonstration of how to stretch the dough with your hands--not the tossing-in-the-air-and-spinning technique (and he explains why that wouldn't work with these dough recipes), but a gentle turning around your fists to make it stretch evenly and in a neat circle. I tried it for the first time making both pizzas and it worked well, but I had problems getting them round. Fortunately, geometry has no impact on flavor.

Finally, he walks through the making and baking process for each style of pizza, offering lots of great tips and what to watch for along the way. When the demo pizzas come out of the oven, he then discusses several options for finishing touches and presentation.

Focaccia prepared for second rise, doused in herb oil. I used an Italian seasoning blend with garlic powder and a little salt for the two that are green; the third is the same blend with some paprika added just for fun.

Focaccia prepared for second rise, doused in herb oil. I used an Italian seasoning blend with garlic powder and a little salt for the two that are green; the third is the same blend with some paprika added just for fun.

One of the pizza dough recipes is a focaccia recipe, so when my MIL asked me to bring an appetizer for Father's Day dinner at her house, I jumped at the chance to make that one too. You refrigerate it overnight in the cake pans, so on baking day you just add your herb oil, do another "dimpling" with your fingers, give it a second rise (1-3 hours depending on a lot of factors) and bake. It seems like an impressive dish to other people but the dough is super-simple and does most of the work itself while you're off doing other things. Note here: I had to go back to the Artisan Bread class for more complete information about making focaccia; in the pizza class he uses the focaccia dough for making pizza and gives only cursory information about the baking.

Focaccia complete. And very yummy, too.

Focaccia complete. And very yummy, too.

The catch with the freebie classes is the course instructors don't necessarily participate in the conversations the way they do on their for-sale classes, but there's always an active conversation among students. So you should still feel free to ask questions--surely someone will answer! It's also worthwhile to read through others' questions and the responses to see what tips you might pick up.

One thing I've learned from doing a few cooking classes on Craftsy--print off all the materials first and have them at your side as you're watching the lessons. Often the course instructor gives extra information or clarification in the video lessons that's not on the materials. Yes, I take video notes, but I often prefer to have the printed version at my side while I'm actually cooking, so it's helpful to write the info from the video lessons on the print materials for reference later. (For example, in the pizza class, you won't find the information about baking in the print materials--that's in the video lessons.)

Is it the perfect pizza? Depends on your definition of perfect but I have to say, it's pretty dang good. Being able to do a nearly side-by-side comparison between his dough recipe and method and my usual one: his had a nicer texture, I think. Flavor-wise, hard to tell as I added herbs to my usual recipe and didn't when I did his recipe--I probably will do that in the future; I love herbs baked right into my crust. The pizza dough recipe made enough that my daughter and I each had a "personal sized" pizza for lunch, and I froze five more personal-sized balls of dough for later. (I didn't cut them completely evenly--probably could've gotten six if I'd weighed them out.) The focaccia recipe makes three pans full, if you're using round cake pans or, in my case, two cake pans and a deep dish pie plate.

The Basics:

  • It's free!
  • 6 lessons, ranging in time from about 5 minutes to nearly 40 minutes
  • The first lesson is the usual less-than-one-minute introduction to Craftsy. if you're an old hand like me, you can just skip that one. Lesson 2 starts the class proper with a discussion of the class and then a little more about the Craftsy platform.
  • Lesson three is about dough, lesson four about sauce and cheese, lesson five about making and baking the different styles of pizza. And then some of you will be thrilled to see lesson six: Gluten-Free Pizza. Yep, there it is, gluten-free folks--your reward! I didn't test that recipe out so I can't speak to it. But I trust Peter Reinhart!

I highly recommend this class. Why? First of all--ummm...it's free? Why not? Second, I'm a fan of Peter Reinhart, as I said before. You can tell he's been teaching for awhile--very smooth, easy to watch and easy to follow, knows how to fill time with more great information while waiting for things to bake, and shows his enthusiasm for his topic. Plus, even though I've been making homemade pizza for awhile, using a few different methods, I still learned a lot from this class!

Again, that's Perfect Pizza at Home with Peter Reinhart, and it's free!

(Usual transparency statement: Clicking on Craftsy links in the blog help support this blog and podcast. Thanks!)

Craftsy Class Review: Homestyle Pan Sauces with Martha Holmberg

Craftsy Logo

Yum.

Somewhere along the way, from some Food Network cooking show or another, I picked up the little tidbit that a simple sauce can go a long way towards making a basic piece of meat seem just that much fancier. I've mostly only waded in the gravy pond when it comes to sauces, but have always wanted to learn more. This class is definitely the way to go!

I actually started this class late last fall and did several of her recipes back then. A couple of days ago when I was tooling through my class list trying to decide what to do next, I looked at this one and realized how close I was to finishing it. Apparently I'd gotten distracted by the holidays. So, now...done!

Homestyle Pan Sauces with Martha Holmberg walks you through the steps of making several sauces, from simple to slightly more complex, though all of them are things you can do pretty easily on a weeknight. As usual in Craftsy food classes, there are several recipes available but each recipe is used as a way to teach different techniques that you can apply across the board.

The class begins with some basic information about pans, tools, and supplies, then the best techniques for seasoning and browning meat. I've been browning meat for years, and still picked up some good information. After laying this foundation, the rest of the lessons work through various types of sauces and techniques that you need to know in order to pull them off with success.

Again, none of it's complicated!

Blue Cheese-Stuffed Strawberries with Balsamic Reduction

Blue Cheese-Stuffed Strawberries with Balsamic Reduction

The first sauce she teaches is a balsamic reduction. I'd done reductions once or twice before, and rarely with confidence that I was doing it right. But after watching her do it, I created a balsamic reduction that weekend to use in an appetizer for a party I was hosting--and it turned out beautifully! (Have you ever had Blue Cheese-Stuffed Strawberries? Yum. I used what I'd learned about balsamic reductions in this class to make the strawberries and it was beautiful.)

Lesson two works with additional kinds of reductions, as well as doing some teaching around aromatics. (She spent a lot of time talking about chopping and sauteing garlic--again, something I've been doing for awhile but still learned something.) As she talks about the reductions, she explains different types of liquids you can use, things to be aware of with each, and what you're trying to accomplish in the cooking process. I loved the amount of information she gives behind each step. She also gets into using cream and cheeses in sauces.

The rest of the lessons are different types of sauces, gravies, and jus, each again teaching several techniques within the lessons. Even if you're not interested in the recipe or type of sauce she's talking about in that lesson, it's worth watching anyway just to see what other techniques and information you might pick up. I'd also made her recipe for Chicken with Meyer Lemons and Capers last fall (never took a picture--sorry!)--it all went fine as per her technique, but we only very rarely see Meyer lemons in these parts, and using regular lemons instead made the sauce too sour for our tastes, even though she said you'd use the same amount either way. I'd still make the recipe again, I'd just cut way back on the amount of lemon I use. In another lesson she has a Lemony Cream sauce for pasta with vegetables--I made that recipe too (again, no pictures--sorry!) and liked it quite a bit.

Martha Holmberg is, as I've said about so many other Craftsy teachers, very good at what she does. You can tell she's got a lot of experience teaching. She's very easy to follow, easy to watch, and she occasionally throws in a little humor--nothing rip-roaring, but enough to make me chuckle.

And she has a way of talking about food that can turn one's head. No one in my family likes caramel sauce but I still sat and watched her bonus lesson on salted caramel sauce and found myself thinking, "Hmmm. Maybe I would like it if I made hers!" Probably no time soon. We really don't like caramel here. But still, she's that good.

The Basics:

  • 7 Lessons ranging in time from about 15 minutes to around 40 minutes.
  • The sauces start right out in the very first lesson--she takes just a few minutes to introduce herself and the course, and then gets right down to business. The lessons include  working with multiple reductions, butter, cream and parmesan, vegetables and herbs; reduction sauces--base liquids, spices and herbs, more about aromatics, a lemon cream sauce, using sauces on pasta and vegetables; gravy; jus; and the aforementioned salted caramel sauce.

I did like her recipes--or will, once I adjust for missing ingredients--but even beyond that, I learned quite a bit from watching the lessons even if I hadn't made those specific recipes.

So I highly recommend this class. A quick sauce can make the difference between the same-old-same-old on a weeknight, and something that feels just a bit more special!

That's Homestyle Pan Sauces with Martha Holmberg. Yummy stuff.

(Transparency: Clicking on Craftsy links in this blog post helps support this podcast and blog. Thanks!)


Craftsy Class Review--Beyond Basic Machine Quilting with Ann Petersen

Craftsy Logo

...And so, I've decided I'm done. I didn't finish off the details of the class project, but I've done about 80% of it at this stage and have tried out every stitch design she demonstrates. Since I've got a multitude of other machine quilting classes in my queue, I decided it was time to move on.

I really liked this class quite a bit. This is the second machine quilting class I've completed on Craftsy. (Click here for my review of the Wendy Butler Berns Machine Quilting class.) WBB's class is a little more free-wheeling, "whimsical," which is a great way to get yourself started. Beyond Basic does get a little more complex, but I'd rate it, as they say, Confident Beginner. Or Rank Beginner if you're just a little adventuresome. I think she assumes you've already done some machine quilting and doesn't spend a whole lot of time talking about setting yourself up for quilting, although she does some--and talks about threads. Although she also does get into more complex designs than I recall in WBB's class, Petersen works you up to them by starting at an easier level and getting progressively more complex.

Through the course of the first several lessons, Petersen demonstrates a few ways of creating quilt designs, including no-mark methods. She starts by teaching you how to create a stencil by sewing (without thread) through the quilt design on paper. I've done this technique a few times before so I did well at this step. The difficulty I had was keeping my stitch length long enough that I wasn't just slicing the paper on the lines. Just have to keep my hands moving faster!


After you perforate the paper with the needle, you then rub some pounce powder or chalk dust through the holes of the paper to mark your quilt. She  gives a different technique for how to apply the pounce powder so I was able to try that out. Because I'd over-perforated some areas, I got a few globs of powder that obscured the line a bit. Plus, I was using white powder on a very light blue background, so I did have problems seeing where I was going. I do have blue powder but was a little concerned about how easily it would come off. Not sure why I was concerned with that small detail when I knew for darn-tootin' this wasn't going to be a show quilt anyway. Apparently sometimes I do sweat the small stuff. Go figure.


And so, my first flower looks a bit like a 3rd grader drew it. Actually, lots of 3rd graders would've done better. That being said, I think I started with the hardest one.


They got better as I went along...

One of the main things I learned in this class is that the first lines you quilt are not always the most important. Although none of these flowers are even close to being what I'd want to have showing up on a quilt for public use, those first wavery lines tended to fade into the background as I added more layers to the quilting later.


And then we move onto feathers and feather variations. The variations include whether you're marking them first and, if so, how you're marking them (she demonstrates a couple of different methods), as well as different shapes and sizes of plumes, and also adding some funky extra touches here and there. She also has you go through straight feathers and curved feathers, and later you go back and embellish the feathers with different kinds of veins. I did okay on the feathers after the first few plumes; at least, I got more confident about just diving in. Still need lots of practice. This picture is one of my better ones.

I'm right-handed, but I was far better at the plumes on the left side. Does that make sense or is it bass-ackwards?


And then there's the dragonfly. He's cute. Apparently mine got into a bar-room brawl at some point and broke his tail and it never healed correctly. That's my story and I'm sticking to it.

(That's a different feather in the background. I had been dissatisfied with my first take on the plumes on this one so, knowing that sometimes the best thing to do when something is off is to just keep doing it over and over until it looks intentional, I went back over all the plumes a couple more times. It actually worked! Definitely improved.)

She also has you embellish all the flowers and leaves with various designs as well. I'd never given a whole lot of thought about the order in which you quilt your designs--I always just work center out. She has a different approach that makes a whole lot of sense. But you'll need to take her class to find out. I'm not giving away the farm, here.


And then there were the cornerstones and borders. I'd bagged adding cornerstones when I was putting together my project so I just drew them in and pretended they were there for quilting purposes--which worked just fine. Let's just say that I stink at pumpkin seeds. Yep, definitely lots more practice needed there. I also discovered the downside to using variegated thread on pumpkin seeds: You completely lose the design. Which was fine in my case since I'd lost the design several times along the way anyway. (Working backwards that small? Yikes!) My borders were a hot mess but her design options here aren't really my style, so nothing I'd likely use anytime soon. So I did it as-is in one border using one of her design options, then just used the rest of the borders to practice more feather plumes, echo stitching, and the like.


I did decently well on the echo quilting and practiced some of the background filler as well, but used a thread that blends. So it looks good, but who knows? You can't actually really see it that well--bonus!

To completely finish this, I'd have had to spend a lot more time on the borders and filler background--and I've just got too many other projects I need to get cranking on! Therefore, I decided I'd learned what I needed to learn and it was time to move on.


Therefore, now you've seen all the bits and pieces, here's the as-finished-as-it'll-ever-be class project.

In summary: Even though I didn't finish the project, I did get a whole lot more comfortable with machine quilting during this class. I got some good ideas for how to fill things in, and picked up a few new tricks along the way.

Ann Petersen is a very good teacher. She's calm, doesn't have any annoying mannerisms or habits; she's not a laugh-a-minute but feels like someone you could sit and have coffee with. I enjoyed her presence. I would definitely recommend this class if you're just starting out or looking for a few more designs to practice.

The basics:

  • 13 lessons, ranging from about 13 minutes to close to an hour in length. (You really get your money's worth in this one--lots of content!)
  • Lessons include supplies, basting and marking, starting to stitch, three lessons on feathers of various types, embellishing your designs (with stitching, not with beading or anything), the dragonfly, border treatments, quilted "lace" design, echoing and background stitches, and the final lesson is on blocking your quilt and dealing with ruffly edges.
  • You don't need to do the class project, of course, but it is kind of a fun one; although, as I said earlier, to finish it will take time. I have another project I'm working on for which some of these designs and techniques directly translate so I'm definitely getting the bang for my buck!

Again, that's Ann Petersen's Beyond Basic Machine Quilting, definitely recommended! And now, on to my next class!

(Usual transparency statement: Clicking on Craftsy links in this blog post help to support this blog and podcast. Thanks!)


One of my favorite quilt books is available again...

I don't have time to do a full-on review this week, but I wanted to get the word out that one of my favorite quilt design study books, which had been out of print for a year or so, is now available for sale again. Woohoo!!!

Check out Heather Thomas' A Fiber Artist's Guide to Color and Design. It's available on Amazon (in paperback) or through Landauer Publishing (in print or ebook).

It should suffice as enough of a review to say that my quilt design study group has used Thomas' book for the last year and it has been far and away our favorite book to work with. To whit: we're nearly finished with all the workshops in the book. When we have completed them, we have decided to "wing it" by each member of our group taking a month and choosing a topic to lead the rest of the group through, still using this book as our foundational text. We'll pull in other resources as well based on whatever the challenge is that month, but we all really like this book and feel there's more we can get out of it if we spend even more time with it.

It really is a great book--good content, good layout, good explanations in the workshops (practice sessions)...all around very useful resource. You should definitely check it out!

Retreat Report with Pics!

To listen to my report on last weekend's guild retreat, check out the latest episode of my podcast. Meanwhile, here are a few pics! This isn't the complete photo-report as some projects will be photographed later.

So, for now, here are the blocks I finished on my jelly roll sampler, a project that's been in the works for a few years.

Jelly Roll Sampler block 10

Jelly Roll Sampler block 10

Jelly Roll Sampler block 11

Jelly Roll Sampler block 11

Jelly Roll Sampler block 12

Jelly Roll Sampler block 12

And, ta da, all 12 blocks together. Approximately three years of piecing. (Well, okay, three years of a couple of hours at a time on retreats.) As you can see, it's mostly a low-volume quilt although that dark burgundy fabric really jumps out in these pictures. It's not quite that stark in real life. I'm going to let these blocks brew on my shelf for a bit until I have time to get them to a quilt shop to find the perfect sashing/border fabric. 

Sorry, I really don't remember the name of the jelly roll. By 2011 when I started this it had already been on my shelf for awhile, and I may have inherited from my Mom. So who knows hold old the line is now?

Here's the (in)famous scrap bag/pin cushion retreat project. And yes, true to what I said in my podcast that my friend would be able to finish the second one off right-quick, she's already emailed me that it's done.


Here's the electric seam ripper I talked about on my blog--this was my friend's (I took the picture at retreat). I immediately came home and ordered one for myself. I've got it in hand now, although haven't had to rip a seam out with it yet!

And you know what else I figured out? I've been thinking about getting one of those seam rippers that has the big eraser-like knob on the end that helps you get the broken thread pieces out of the seam after you're done ripping it. Well, I discovered on retreat that the end of my Fons & Porter stiletto works the same way!

I just held it like an eraser, rubbed it across the threads in the seam lines, and they brushed right off. O, joy! I just saved myself $7 or whatever that other seam ripper costs. Let's not do the math with what I just spent on the electric seam ripper, though.

And here's a general photo gallery of shots from around the grounds. A couple are panoramic if they work well in this gallery setting. Also, I discovered I could mess with the panoramic feature on the phone, so there are a couple of photos that I've entitled "When Worlds Collide" and "The Edge of the Earth." See if you can figure out which they are.

Craftsy Class Review--Creative Ways with Whole Grains

Craftsy Logo

I've finished watching the five lessons of the class "Creative Ways with Whole Grains," with Anna Bullett, executive chef at Cooking Light. I haven't done any of the recipes from the class (so I don't have any pics--sorry!) but certainly picked up a few tips for the next time I use quinoa or make a risotto. This is a freebie class so I figured I had nothing to lose and might pick up some healthy ideas along the way.

After the short introduction that assumes you don't know anything about Craftsy (that's why they offer these freebies, after all), there are four lessons that move from definitions and general information about whole grains, to pilafs and bakes, breakfast, and risotto.

I think I'm particularly intrigued by lesson four, which is using whole grains for breakfast. Beyond oatmeal, Bullett offers a few new ideas for some breakfast grains. Quinoa for breakfast? Definitely a thought! She cooks it in light coconut milk mixed with water, adds a bit of brown sugar and a little bit of salt. Throw some fruit on the top when it's done and you've got a healthy, filling breakfast with a tropical flare. I believe I'll be trying that out sometime in the next couple of weeks. She also talks about steel-cut oats in the slow-cooker--which I'm already a fan of! She suggests a tweak to my usual recipe, though, that I'm willing to give a shot--sounds tasty.

Anna is easy to watch, although I'd wish for just a little more of a natural feeling to her presentation. She's a good teacher, but it does feel a little overly scripted compared to some of the other food-related classes I've taken on Craftsy. Still, that doesn't take away from what you learn and...again...it's free!

So, if you're looking for a quick cooking lesson with some healthy new ideas, I'd definitely recommend this class. And...did I already mention...it's free?

The Basics:

  • Five lessons, from about 9 mins to 17 mins (absent the <1 min intro lesson).
    • Lesson 1: Intro to Craftsy
    • Lesson 2: About Whole Grains--great background information about what makes a whole grain a whole grain, what to look for on labels, why they're healthy, etc.
    • Lesson 3: Pilafs and Grain Bakes
    • Lesson 4: Whole Grains for Breakfast
    • Lesson 5: Whole-Grain Risotto

Again, that link is "Creative Ways with Whole Grains," with Anna Bullett. I'll post pics later on if I do the breakfast quinoa thing!

(Transparency statement: Clicking on Craftsy links or banners on this page helps support this podcast and blog. Thanks!)

Craftsy Class Review: Complete Knife Skills with Brendan McDermott

Another cooking class instead of a quilting class. Hey, a girl's gotta eat.

I've been wanting to do a knife skills class for years. I've picked up plenty from watching cooking shows, checking out YouTube videos, and iPad apps. But it seems that everyone has different techniques and often the demos were poorly done. I do decently well at slicing and dicing, but knew I could use some improvement.

When I saw that Craftsy was offering a class named Complete Knife Skills--and offering it for free, no less!--I spent only a millisecond thinking, "But I already have so many dang classes I need to get through," before I clicked the button and sent it flying into my account.

Photo Feb 27, 4 48 33 PM.jpg

I probably chose a somewhat awkward time to start watching it--I was waiting at my gate in the airport heading home from vacation. I likely gave a few wandering TSA agents pause. "Keep an eye on that woman--she's watching something about knives." They'd have worried even more if they'd seen the grin on my face.

Brendan McDermott, the course instructor, is an absolute hoot. He's a younger guy with tattoos up and down his arms, shaved head, and a very dry sense of humor that just never ceased to entertain me. I texted the link to my 23-year-old son and 27-year-old nephew and told them they both had to take this class--not only because actually learning how to use a knife is one of the best things a beginning cook can do, but because I thought they'd seriously dig the instructor. I confess to getting the giggles when McDermott would pepper his instruction with comments like, "Die, carrot!" and "You can even get into a good-sized watermelon without having to come at it like a Spartan warrior."

As fair warning to those who may be more sensitive to this kind of thing: Once in a great while his language can get ever-so-slightly off-color (he referred to a partially-sliced butternut squash as a "big-a** carrot" which cracked me up, and uses the "d" word once or twice), but it's infrequent and, in my opinion, pretty mild. But we all have different words that push our buttons so you'd need to make your own judgments on that.

Okay, so it was entertaining. But is it informative? Abso-positively! I learned more from this class than I have from years of cooking shows and YouTube. He's very thorough. First and foremost, he's a huge proponent of knife safety, so throughout his demonstrations he's focused on safety as well as efficiency. Although many of the knife skills demos I've seen before have said things like "This is a safer way to do this," Brendan actually explains why it's safer, what the risks are of other methods (interestingly, often other methods I've seen on the cooking shows themselves!), and has just a few guidelines that, if you keep them in mind, will help you figure out how to keep your fingers on every time even if you forget everything else he's demonstrated.

He talks about which knives are essential and what you can do without, tips about cutting boards, and always explains why certain cutting techniques are better than others. The lessons include various types of cuts, and techniques for a variety of foods. He even talks throughout about what remnants left on the cutting board when you're done with your prep work well for stocks and which don't. Each lesson also ends with a "Helpful Hint" (after the close of the lesson, so pay attention--there's more!).

I can't recommend this class highly enough. Unless you're a trained, professional chef, you'll likely learn something. And even if you're a trained, professional chef, the entertainment value is worth it. What do you have to lose? It's free!

The Basics:

  • 5 lessons total, though two of those lessons have a ton of segments so the length of each lesson (not counting the Craftsy promo lesson 1) varies from 8 to 43 minutes.
  • The first lesson is just a brief introduction to Craftsy since this is a free class--it's a promotional tool for them. If you know Craftsy, you can skip lesson 1.
  • Lesson 2 is the introduction--Brendan tells you about himself, and then goes right into choosing knives, the four basic knives you should have in your kitchen, and a few other useful tips.
  • Lesson 3 gets into specifics: how to hold the knife, a variety of cuts, each demonstrated on a particular item and tips about those items as well (what he says about onions was a highlight of the course for me!).
  • Lesson 4 goes into "short cuts" for cutting particular items that can often give people trouble or just ways to go about things more efficiently and effectively (citrus, bell peppers, jalapenos, etc.)
  • Lesson 5 is a shorter lesson on how to sharpen and hone your blade.

I really do encourage you to check it out. This is one of my fave Craftsy classes ever, and you know that's saying a lot! Again, that's Complete Knife Skills with Brendan McDermott. Two thumbs up. Two thumbs that I now feel like I run a far lower risk of slicing off at some point in my future!

(Transparency statement if you haven't seen it before: using the Craftsy links on this blog help support this blog and podcast. Thanks!)

Craftsy Class Review: Artisan Breads with Peter Reinhart

e.jpg

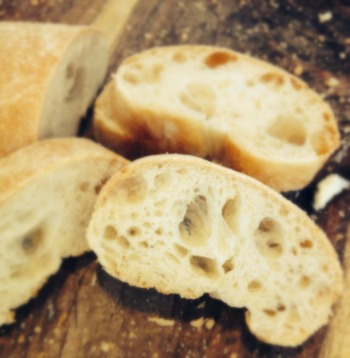
I know, I know. This is "OT" when it comes to quilting. But a quilter's gotta eat, right? And if she's eating, she might as well be eating really, really good bread.

I believe I've mentioned before that I grew up as a child of the Back to Nature Movement. In 1970, my parents moved our family from the city out to a house in the country on seven acres--a house Dad built himself (well, more correctly, "was building" himself as it was little more than a frame when we first moved out there--but that's a story for another blog). Dad lived by the Farmer's Almanac and Mother Earth News. I often joke now that Dad would mow the lawn and we'd get it for dinner: Lamb's Quarters are something vegetarians could eat, if you didn't know. Put enough butter on it....

But more than the canned-just-about-anything, the homemade maple syrup, and definitely more than the homemade wine (a subject for that same other blog), what I appreciated about my growing-up-hippie years was Mom's homemade bread. Every Saturday, 15 loaves. The woman had serious biceps. Kneading, punching down, putting in the oven to rise*, then baking batch after batch well into the dinner hour...it was a weekend ritual. My favorite moments were Saturday nights, when Mom would let us slice into one loaf fresh out of the oven and have a big, thick hot slice slathered with butter (well, those were the margarine years) and strawberry jam (usually also homemade).

As an adult, I rarely had time to bake homemade bread . I did it once or twice, using Mom's techniques and recipe, and the kids loved it. To try to fill the need, I owned a bread machine a couple of different times--until, well, see the rather tragic blog post about the demise of my most recent one.

Now that the kids are grown and my schedule has seriously eased up, I felt the desire to start baking bread again. Enter Craftsy and Peter Reinhart and Artisan Bread Making.

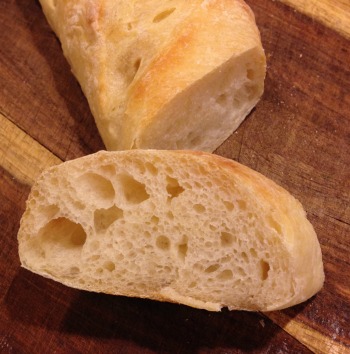
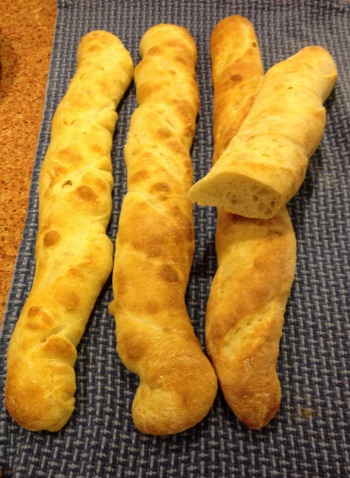
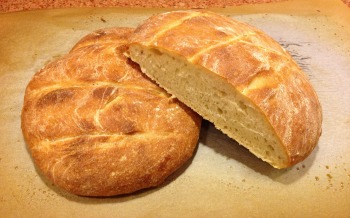
Mom's method was great...but oh, the bread I've been baking! Peter's method is quite different, and produces a very different type of bread. I've been making baguettes, boules, and batards (O My). I plan on making a chocolate babka for an upcoming guild meeting. I'm putting the information about marbled ryes in my back pocket for future reference. Great stuff.

But even beyond the bread recipes which, arguably, you can find on the Internet or in any of Peter's books, there's Peter himself. He's an excellent teacher. His passion for bread-making comes through so clearly that he makes you want to jump up and run into the kitchen as soon as you're done watching a lesson. And his statement that bread is a metaphor of transformation imbues each loaf you shape with your hands with a depth of meaning beyond just, "Hey, this tastes pretty dang good."

And yet, it does taste pretty dang good.

So, the basics:

  • 10 lessons in all, most 30-40 minutes (a couple are shorter, one is 47 mins).
  • The first lesson talks about baker's math and gives a tremendous amount of background information that lays an excellent foundation for everything that follows, the second talks about supplies, definitions, and the 12 steps of bread making.
  • In each lesson following, Peter gives very clear directions on how to measure and mix ingredients, shape, and rise the dough, bake the bread; as well as how to be ready to make adjustments based on your room temperature and relative humidity.
  • The lessons go from straight lean dough, to country variations, rustic breads, enriched breads, marble rye, and that amazing chocolate babka that I'm going to make this weekend.
  • The downloadable materials are excellent reference when you're actually in the kitchen and don't want to get flour or oil on your iPad. Ahem. (Don't ask how I know.)

I had to make a judgment call as to when I'd consider this class completed for the purpose of my tracking. If I had said to myself that I'd have to bake one of every type of bread he teaches before I call the class finished, I'd either be done in 2017 or I'd be the size of a house. I've now baked three batches of bread, using one method twice when the first results weren't what I'd hoped (second results turned out fantastic after I made a few adjustments as per his suggestions to take into account the cold snap we're now living in up in these parts). I'll be baking one more batch in the next couple of weeks--the aforementioned chocolate babka. I've watched all the lessons and made copious notes. Therefore, I've decided to call it done, knowing I'll keep going back and referencing this class for years to come.

I'm putting all the pictures into a gallery--just click on the picture to see the next photo in the gallery. If you're reading this by email, the gallery may not come through. If not, use this link to see it in Flickr.

Haven't tried out Craftsy yet? Use this link to find out more.

Want to check out Peter Reinhart's Artisan Bread Making class? Use this link!

(Full disclosure: Using those Craftsy links helps support this blog and podcast--thanks so much!)

*Backstory: Mom would put the huge batch of dough in a big plastic bucket in the oven to rise. We were all strictly warned never to turn on the oven without looking in it first. When I was somewhere around middle-school aged, one day my sister and I decided to bake a cake. "Flick," went the oven switch to bake, and "Swish" went the temperature control knob. About half an hour later, Mom came running up from the basement where she'd been in her quilt studio. "What's that I smell? What do I smell burning?" She raced into the kitchen and threw open the oven door, to reveal a mass of dough and melting plastic. I don't exactly remember what happened next. I don't, however, recall that my sister and I played any role in helping to clean up. My guess is that, in those moments, Mom didn't particularly want to even lay eyes on us so sending us to our rooms was likely the better option for her. Frankly, I'm surprised I lived to tell about it. To this day, I always open an oven door before I turn it on. Some lessons do stick.


Machine Quilting with Wendy Butler Berns (Craftsy class done!)
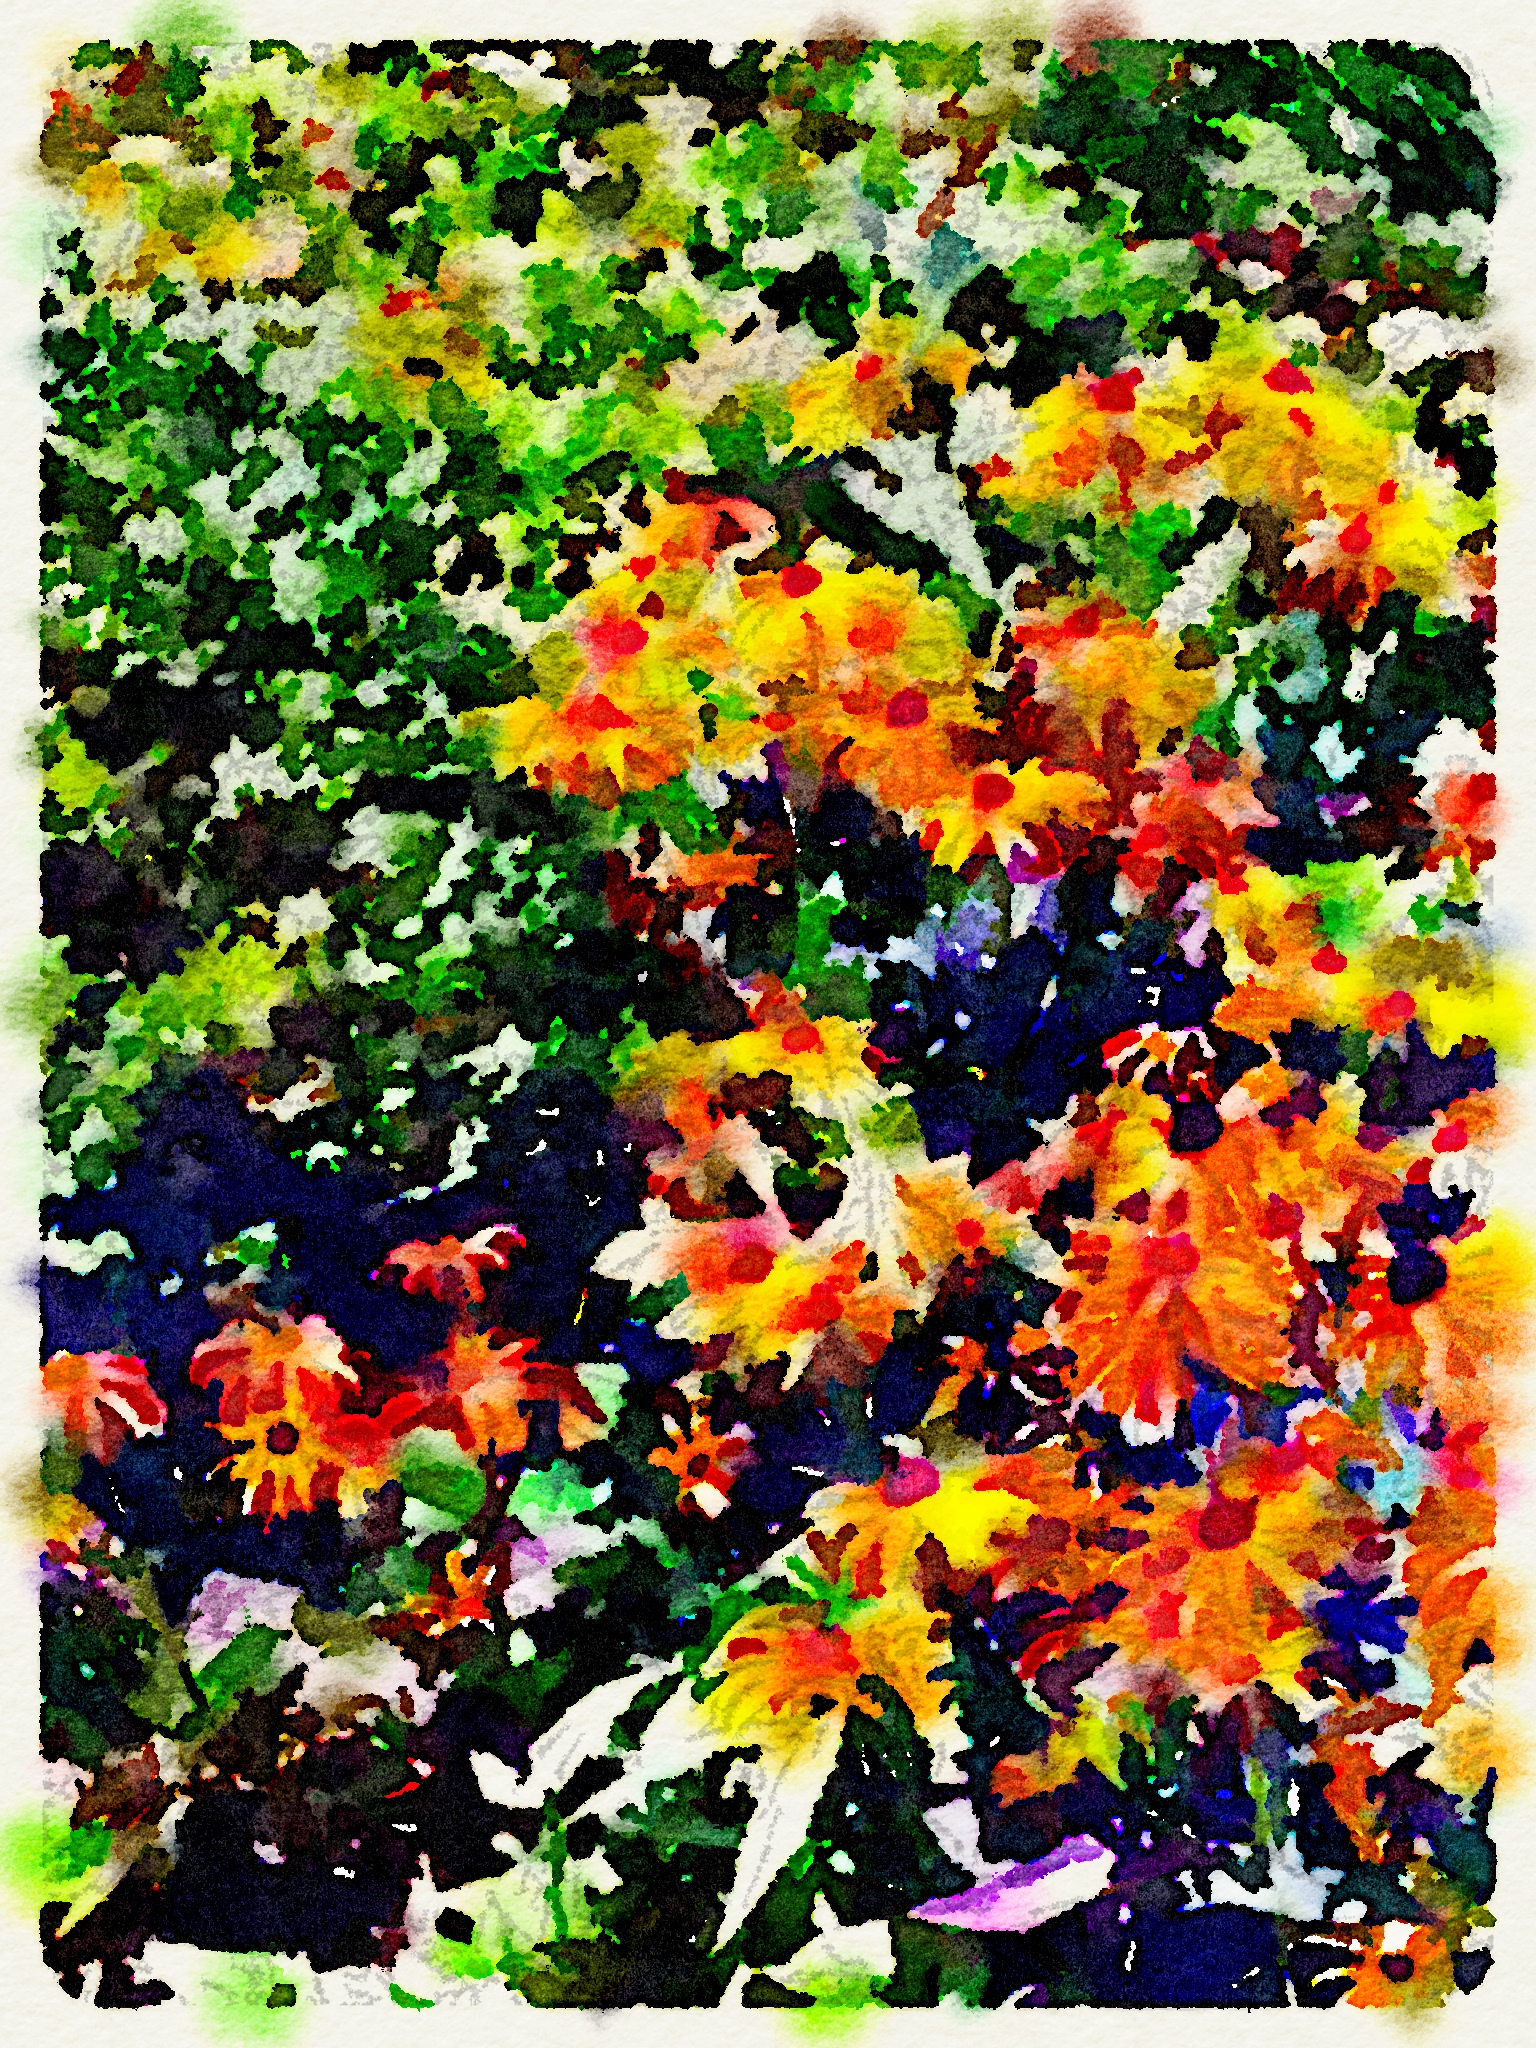
I've already reviewed this class in my podcast, but just to make it official for my 2014 Quilty Resolutions, I now consider myself to have completed Machine Quilting with Wendy Butler Berns.

I really enjoyed this class. Well, to be fair, I enjoy Wendy Butler Berns in general, which is a good thing because I own every one of her Craftsy classes. In any case, her style is very laid back, and she gives great tips and demonstrations. The class includes several designs, starting with simpler ones and building up to slightly more complex (although none of them are overly challenging); it also has lessons devoted to information about needles and threads, ideas for whole-cloth quilting, and troubleshooting. You won't get formal designs needing stencils or measuring or math here--it's very free-flowing and organic, the kind of thing you can (once you get the hang of it) just start rockin'-n-rollin' and having a ball.
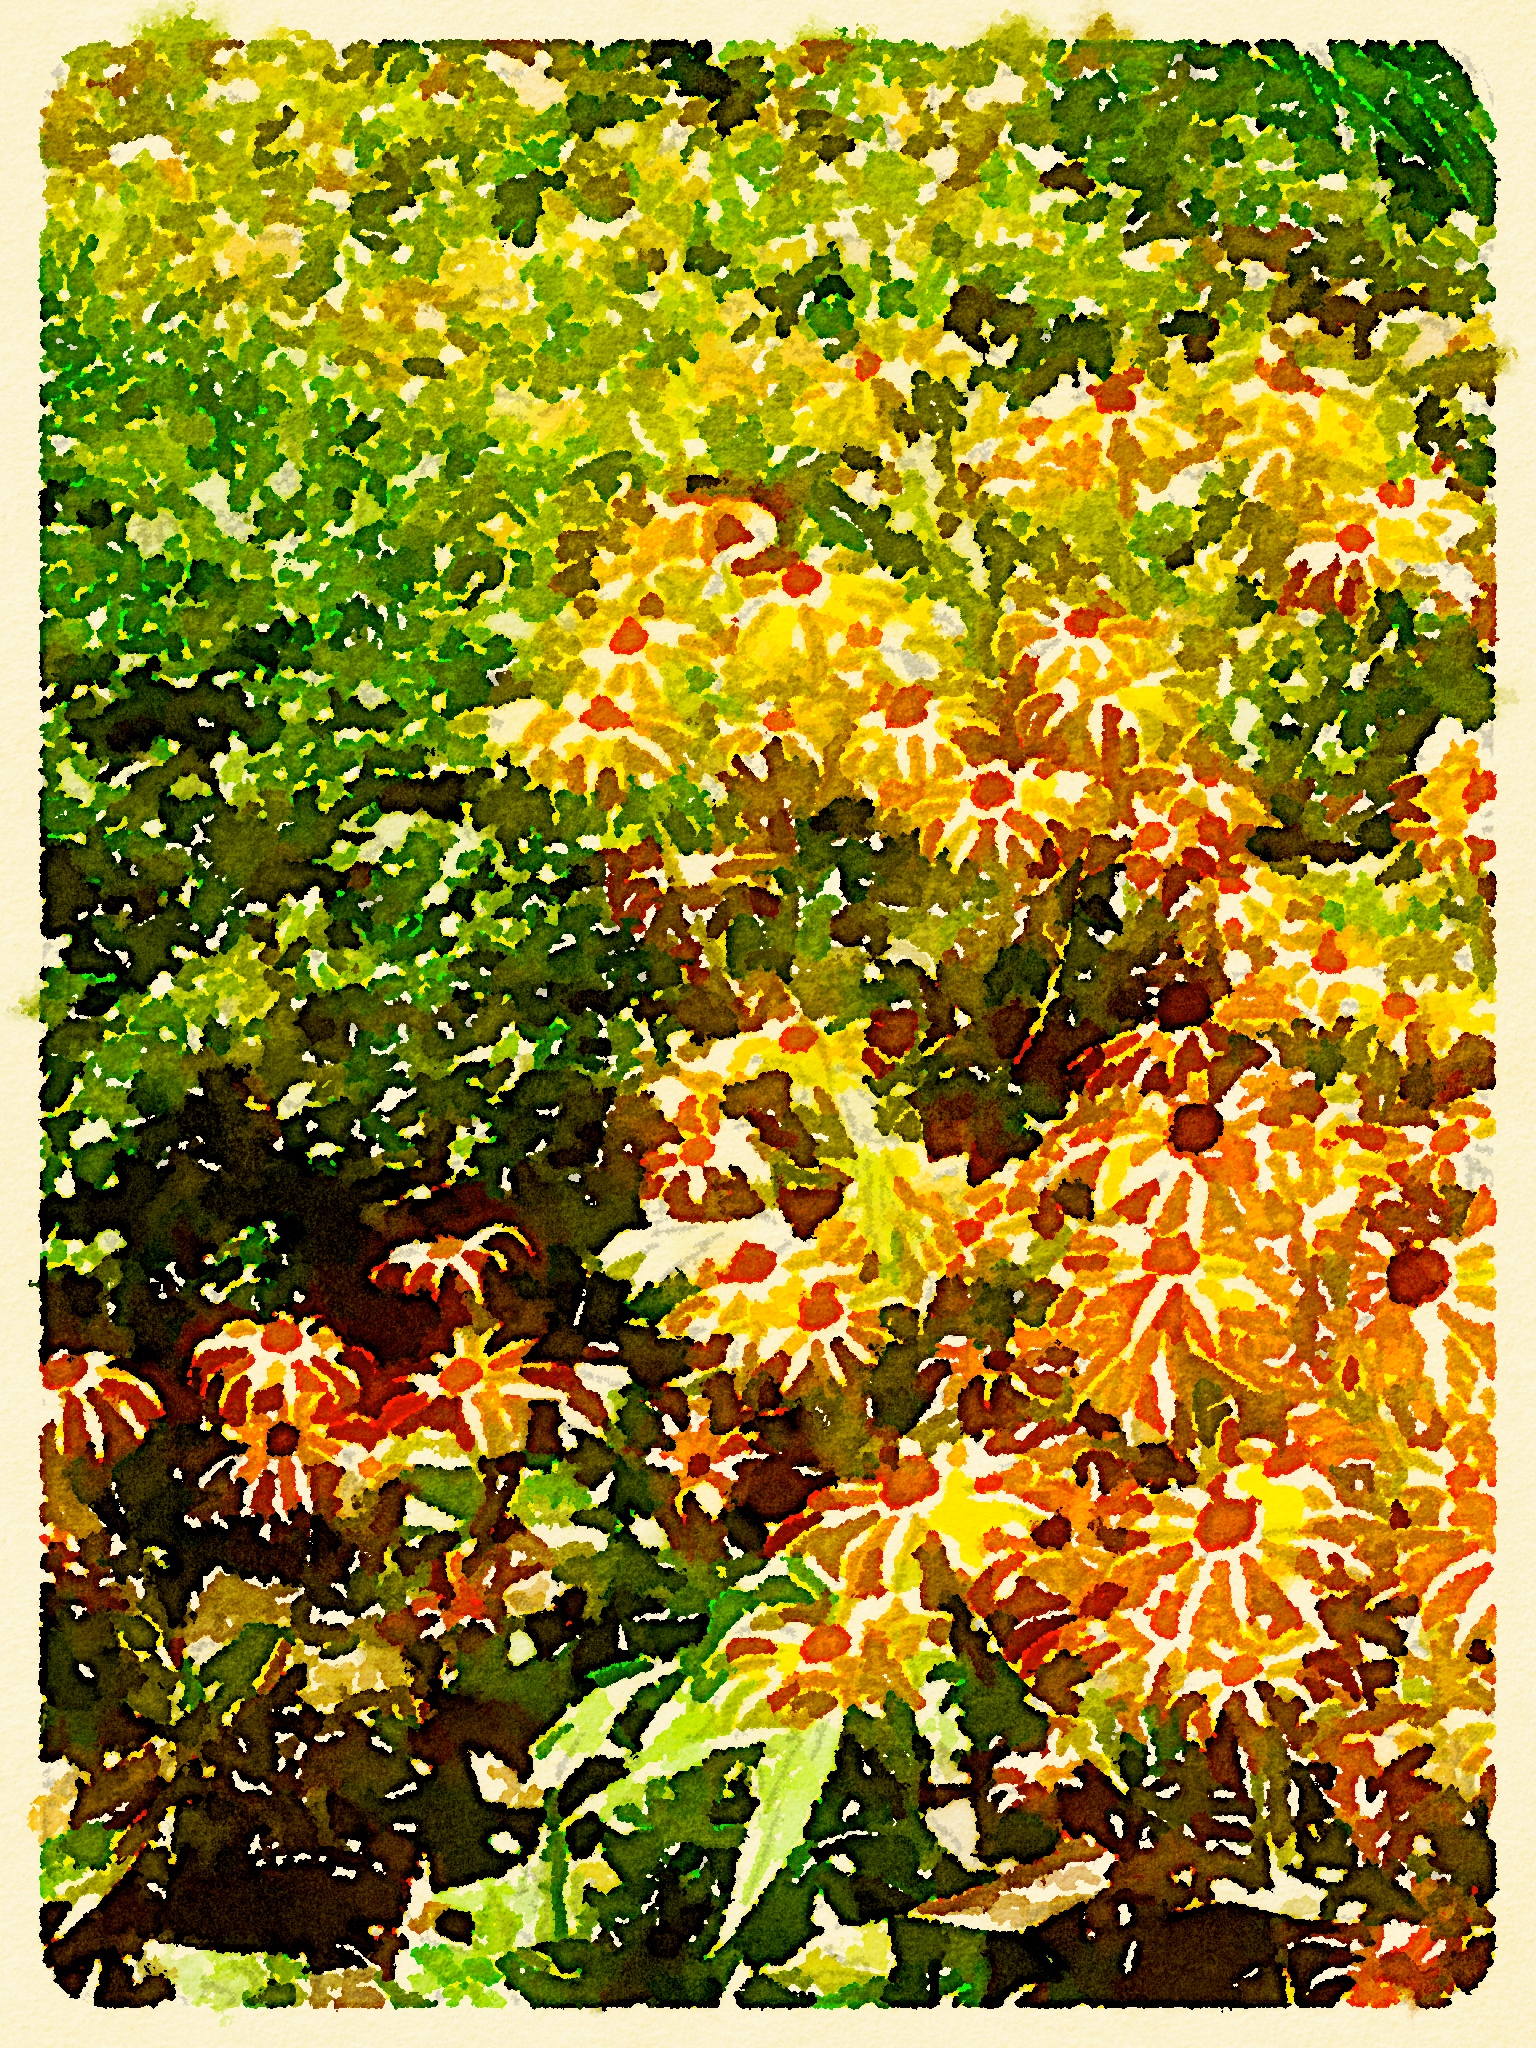
I'm not new to free motion quilting (FMQ). I've been poking away at it for years--including having watched all the lessons in Wendy's class when I first bought it maybe 18 months ago. The difference is, this time I actually practiced what she was teaching!

WBBsketchbook.jpg

I watched every lesson with a sketchbook in my hand. As she was describing each design, I'd sketch it out several times in pencil, and sometimes play around with different sizes, variations on the design, and how to tweak the designs into smaller filler designs.

When the lesson was complete (or as soon as I could manage to get to my sewing machine), I'd set my phone timer for 15 minutes and spend 15 minutes--or more, if I was really getting into it and had the time--to practice the designs from that lesson. Some designs came relatively easily as they were similar to things I'd done in the past. Some were trickier. Depending on the design, as is common, I often do better going in one direction than the other, and it's never the same direction from one design to the next! I've learned that half the battle is figuring out what direction you most naturally move in order to make the design work best. Sketching it out first does help, although in a limited way--it's a very different motion to move fabric under the needle. Still, every little bit of practice helps, be it with a pencil or fabric.

WBBFMQpractice.jpg

I'm very pleased to see that the back of my FMQ has improved tremendously over the years--nary an eyelash in sight! On the front, my stitches are generally pretty even*. I seem to have the rhythm between needle speed and hand speed mostly down now. I still have some work to do on hand-eye coordination and actually ending up where I'm aiming, but that's something only practice will help. If I were doing these designs right now on a real-live quilt with blending thread, most of them would actually look pretty decent from a galloping horse.

This consistent practice also gave me the chance to compare my open-toed FMQ foot with my closed, specialty FMQ foot and FMQ bobbin case made for my machine (Janome 6600) and sold as a set, I believe. I've owned that bobbin case and foot for a couple of years, purchased based on a recommendation on someone's blog or something along the way. I've discovered I really don't like it. The bobbin was spinning too fast or something and I kept ending up with thread knots on the top--you can sort of see them in the feathers at the bottom of the sample. Once I switched back to my normal bobbin case and open-toed foot, no more thread knots. So that's good knowledge, too.

FMQcolorsketch.jpg

Just for kicks n' giggles, I was also practicing the designs with colored pencil while watching TV at night. Those bubbles are now completely filled in and I'm playing with other filler designs in other parts.


I'm going to consider this class complete although it's a hard class to determine when you've actually "finished," as it has no project involved. But I will continue to practice the designs during my 15-minutes a day, and they're in my toolkit for future reference. I've got a couple of projects in the works in which I could easily imagine doing one of the designs from this class.

I highly recommend this class, especially if you are brand-spanking-new to machine quilting or free motion quilting. It's a great way to introduce yourself to a variety of designs and ideas.

Full disclosure: If you use this link to purchase the class, you will help support this podcast and blog. Still n' all, my review is honest-n-true; I'm not saying good things just to encourage people to use the link. If you're a podcast listener, you'll have heard past reviews of other things about which I'm not quite so positive!

Fiskars Fingertip Rotary Cutter photos

In episode 141 "In Which I Get Started on 2014," which I just posted yesterday (Sunday), I reviewed several things--most of which really don't need any pictures to explain them.

However, if you've not seen this one, my description on the podcast may not have been sufficient. Here are the photos to accompany my review of the Fiskars Fingertip Rotary Cutter.

The Fiskars Fingertip Rotary Cutter

The Fiskars Fingertip Rotary Cutter

It has a removable cover on the 18mm blade.

Close-up of blade with removable cover

It fits very nicely on your finger--even more comfortable than holding a pencil.

It fits nicely on your finger--even more comfortable than holding a pencil.

Here's a close-up of the grip--it really is like holding a pencil. (Sorry for the blurriness. Hard to hold a rotary cutter in one hand and a phone in the other and get a decent picture!)

fingertiprotarycutter4.jpg

And here's a close-up of me actually cutting with it. Yes, that turned into a real piece on a project I'm working on. Although the piece later got removed again but that had nothing to do with the rotary cutter....

fingertiprotarycutter5.jpg

I really do like this little gadget--I can easily see myself using it often in the future.