
Today’s was a much better class! I’d give it maybe an A-, but that’s only because there were long periods of silence while we were all doing our sewing. I joked in the chat room that our teacher should be telling us stories to keep us entertained but she didn’t see it. If we’d been in a classroom, you’d have heard some chatter and such, but it is what it is.
This was Curvy Log Cabin with Augusta Cole. Students had the option of using their regular rulers or using the Creative Grids Curvy Log Cabin Trim Tool. As I think I mentioned in a previous blog post, I have a thing for log cabin quilts and that includes curvy ones. My Mom made me a couple of different standard log cabins and then a curvy one as a college graduation/wedding gift, so some of it’s straight nostalgia. However, it’s mostly because I love a block that can create a completely different look depending on which way you twist it. (My other fave block is a Jacob’s Ladder for the same reason.)
I’d gotten a 4” Curvy Log Cabin ruler in a Sew Sampler box a few months ago and was quite excited about it, but wasn’t quilting at that point so didn’t ever play with it. I then decided to make a curvy log cabin quilt as a wedding quilt and designed it around an 8” block, so I went ahead and bought the 8” version of the ruler—I have a lot of trust in Creative Grids. This class used a 6” ruler. I dithered for awhile and then decided, “why not?” So I now own this same ruler in three sizes. I’m okay with that.

From a technological standpoint, today’s class went much, much better. Augusta knew how to use this platform to its advantage. She also had a couple of helpers present with her for managing, which was great. She began with a simple visual demonstration of the stages of the block.
However, as she had two groups of students—one with the curvy trim ruler, and one using standard rulers, she then used Zoom break-out rooms to separate the two groups. For each group, she had separate pre-recorded videos to show us within the appropriate break-out room.
Go, Augusta. Way to really leverage the utility of the platform!
The only thing I found myself wondering was whether the folks in the standard-ruler classroom got as much attention as we did, or if they were largely off in their own little world. There were only two of them, whereas there were 8 or so of us in the other room. We seemed to be seeing her most of the class, so I might have a different impression had I been in the other group.

We did one round of strips at a time, with a short video for each round and then sewing and trimming time with Q/A if we needed. It took me awhile to get the first round right. I had several reject blocks that I tossed aside and started with a new block as I wanted to get one block completely right before she got to the next section. It’s just one of those things that you need to logic out, and if you start off the wrong way you never get it straight. That, and the fact that twice I put the fabric wrong-way up while sewing. That was just distraction. I’ll be doing some seam-ripping and salvaging all those rejects but I didn’t take the time to do it during class. I had plenty of fabric to work with and just kept moving on.
BTW, at one point, I did sew a piece of fabric wrong-side showing, but as it was a light, and a very thin strip, you can’t even tell. That one stayed as-is. I’ll probably never even be able to find it once this whole thing is done.
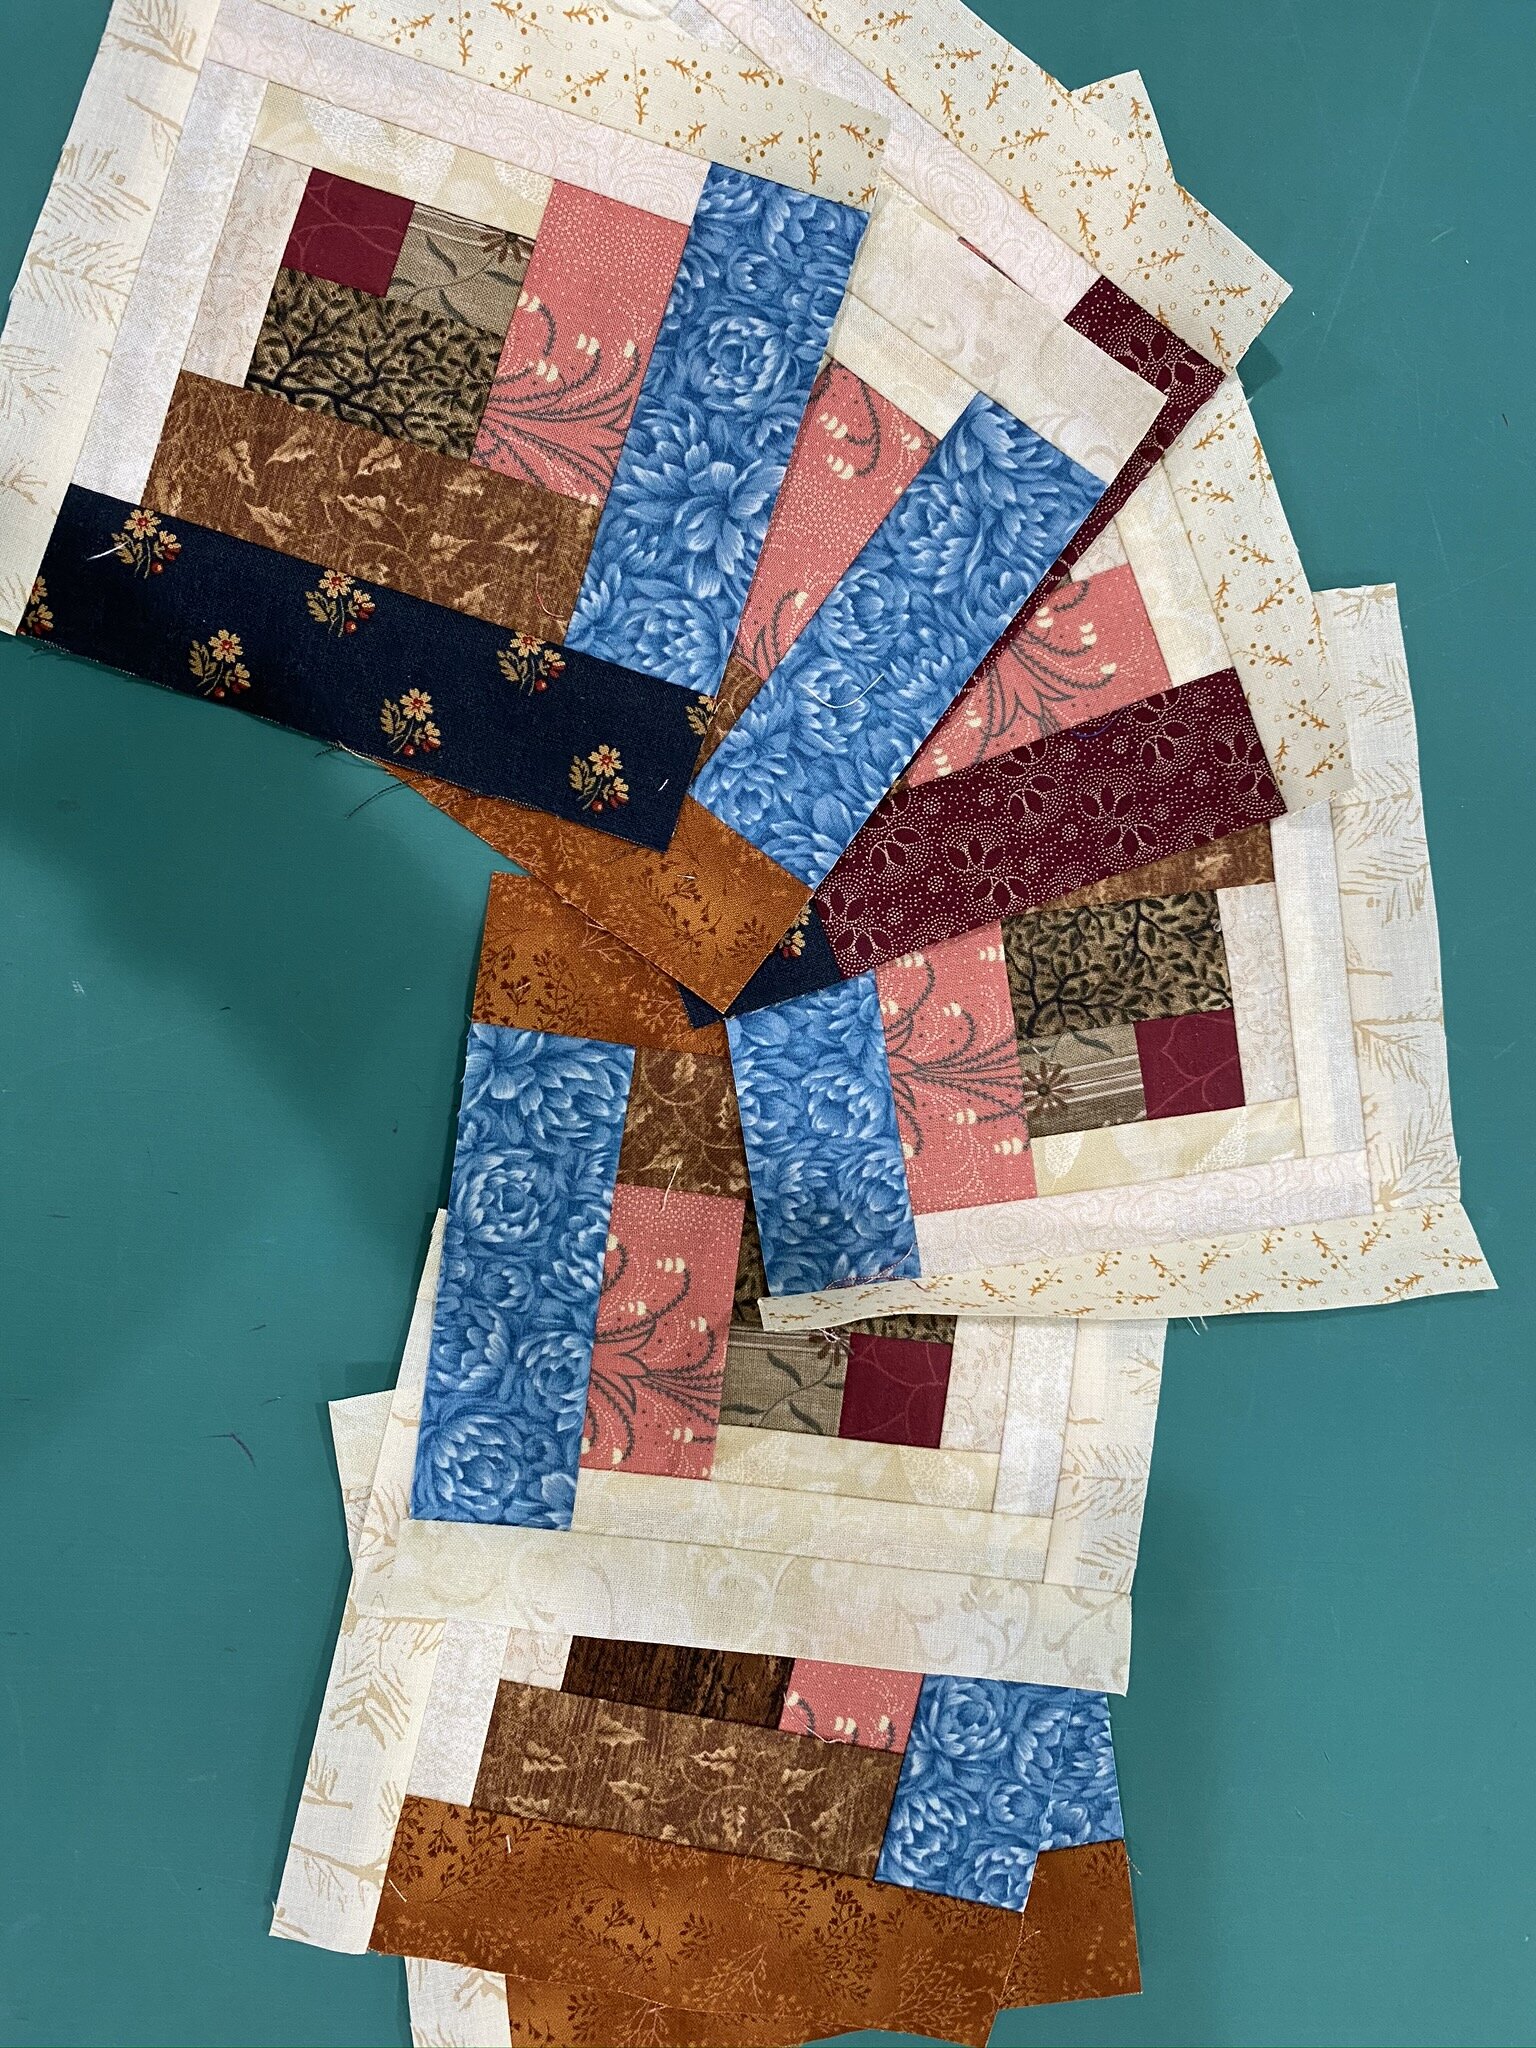
I’m going full-on scrappy, to use up as many of my 2 1/2” strips as possible. The beautiful thing about the trim tool is I didn’t have to precut anything other than the initial center square. It all gets trimmed as you go.
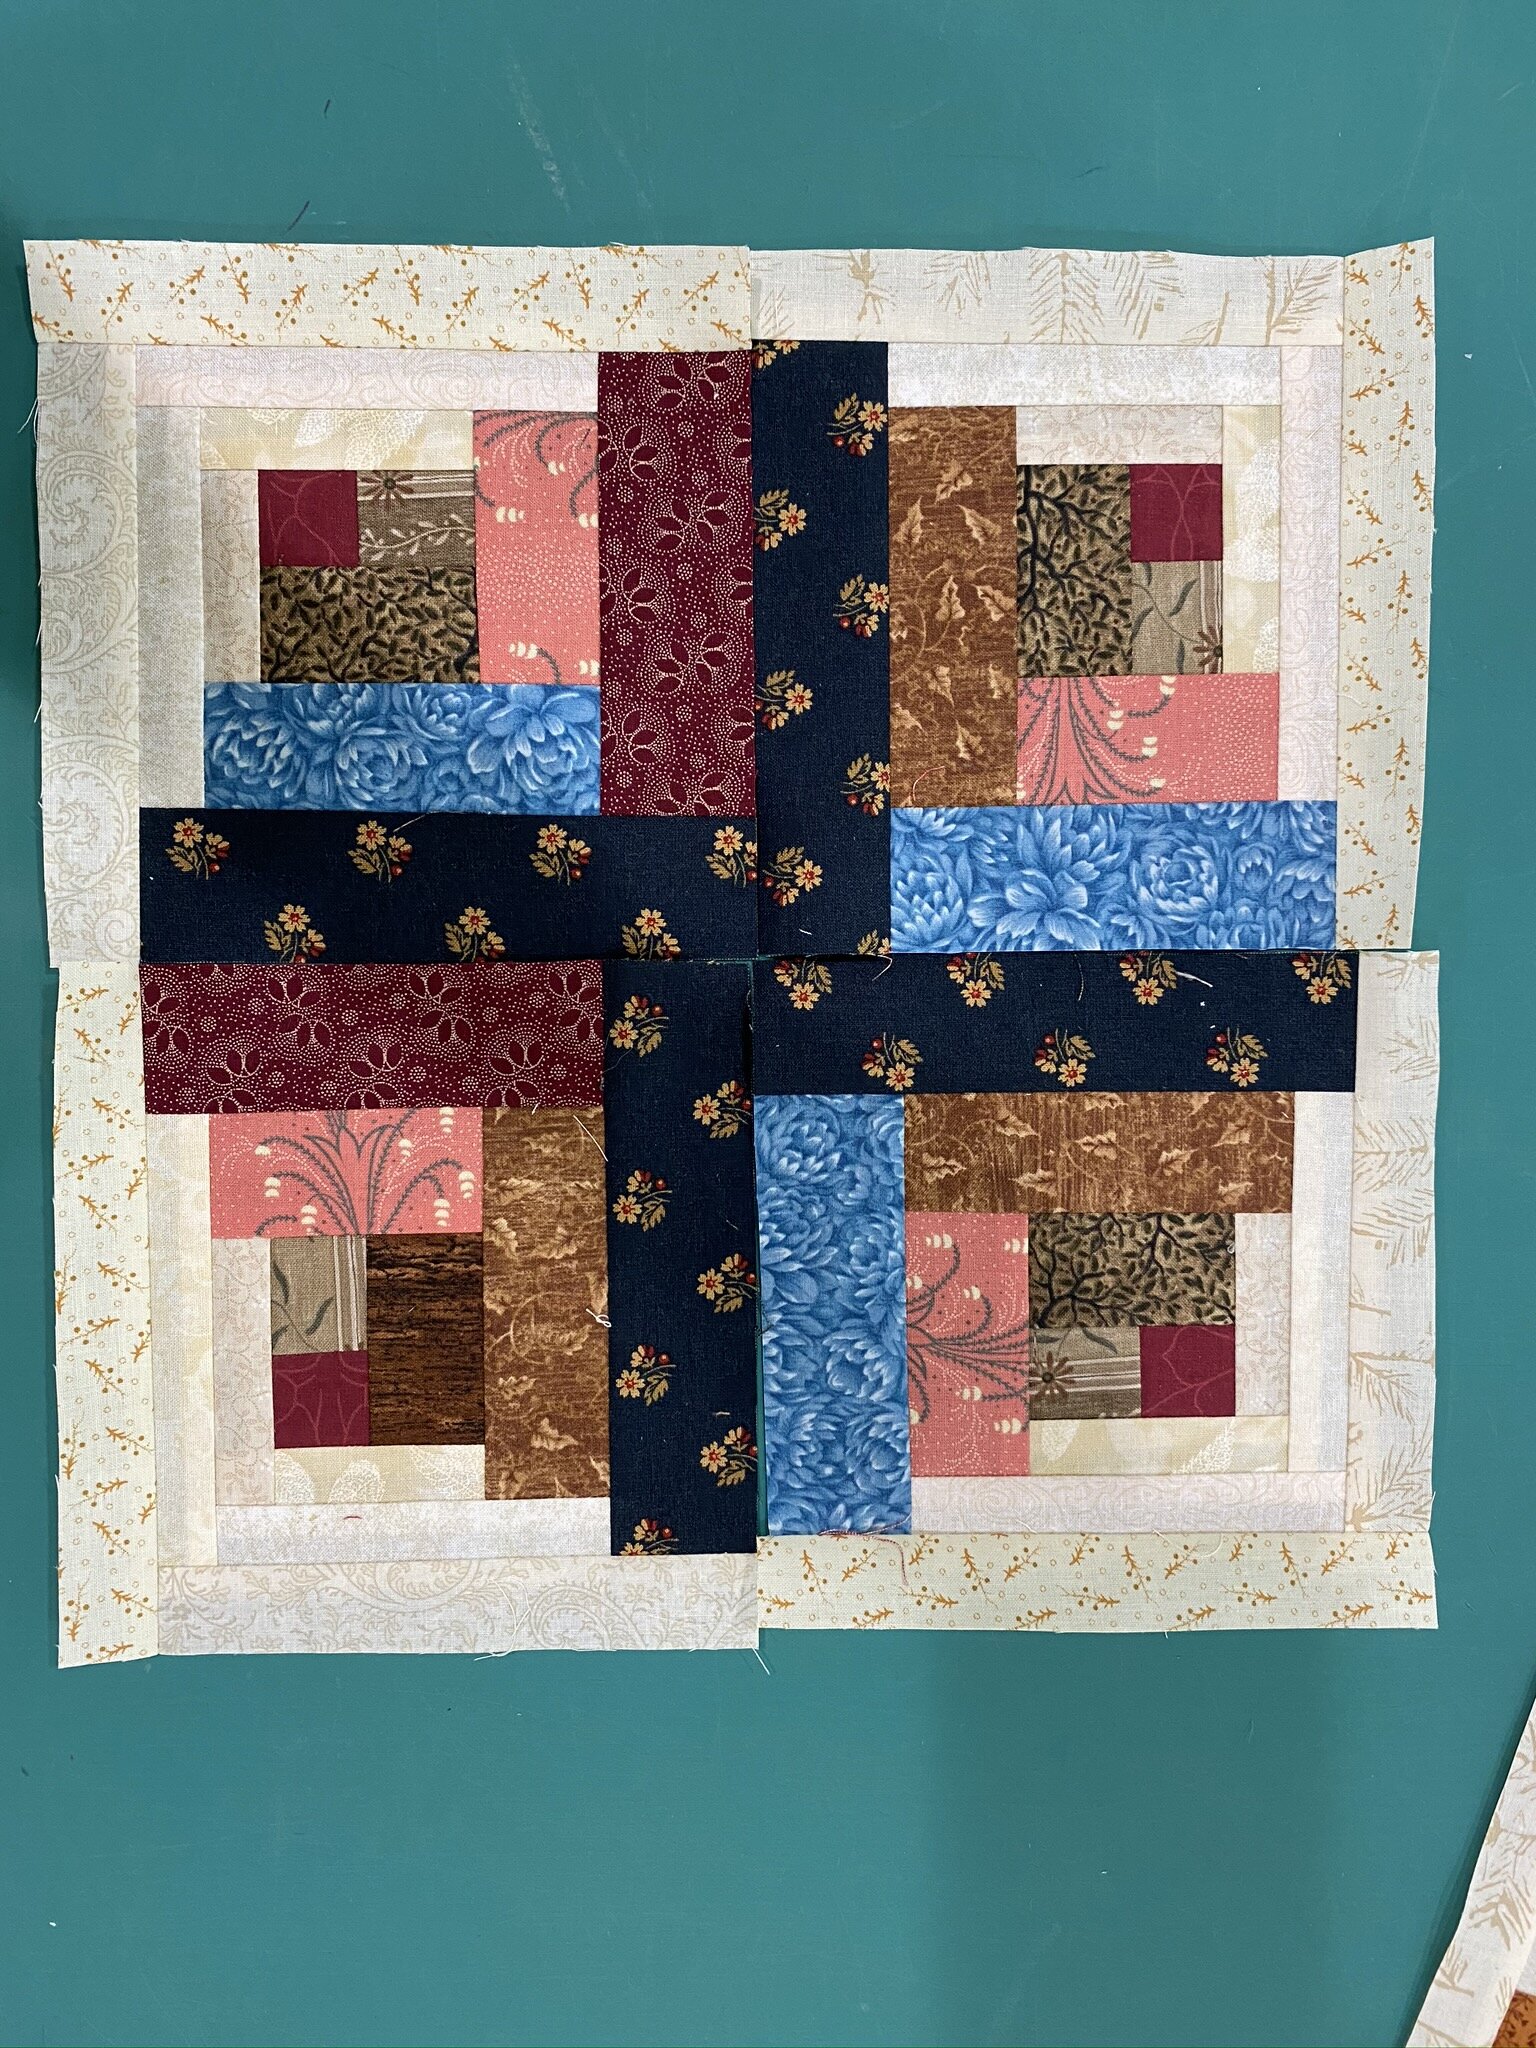
(Photos at left—the 10 blocks I got done during class; four of them together so you can see the curvy effect. I wouldn’t try to put four matching logs like that together in the middle—that would take a whole lot more planning than I’m putting into this. They’ll be far more random.)
Note to self: Never, ever again fold fabric twice (WOF) to get the whole thing into my Creative Grids Stripology XL ruler. Everyone says you can do it. Every time I do it, I end up with wonky squares. I was trimming up my center squares today as I went but I’m still not happy. The rest of these are going to get cut with my traditional ruler. Does anyone know what I’m talking about? Any tips? (I own the 2 1/2” Accuquilt Strip Die but I don’t want to buy other strip dies quite yet. Trying to give the die purchasing a rest.)
I loved using the curvy log cabin ruler so much, and love how easy it made it to have a square block, that I ended up going online after class and buying the Creative Grids Log Cabin rulers—the 8” ruler and then the 6”/12” (both in one ruler). I can see making a lot of Log Cabins and Courthouse Steps in the rest of my quilt-making career, and even if I do end up buying the Accuquilt strip dies in the future, this ruler still keeps everything from getting whacked mid-block.
Time to close out this Staycation Day with some time on my patio with a novel: The Ballad of Songbirds and Snakes by Suzanne Collins. Thoroughly enjoying it!