Catching Up...A Few Past Projects

As I mentioned in my podcast episode, I’ve had a few goings’ on. Here’s a quick gallery.

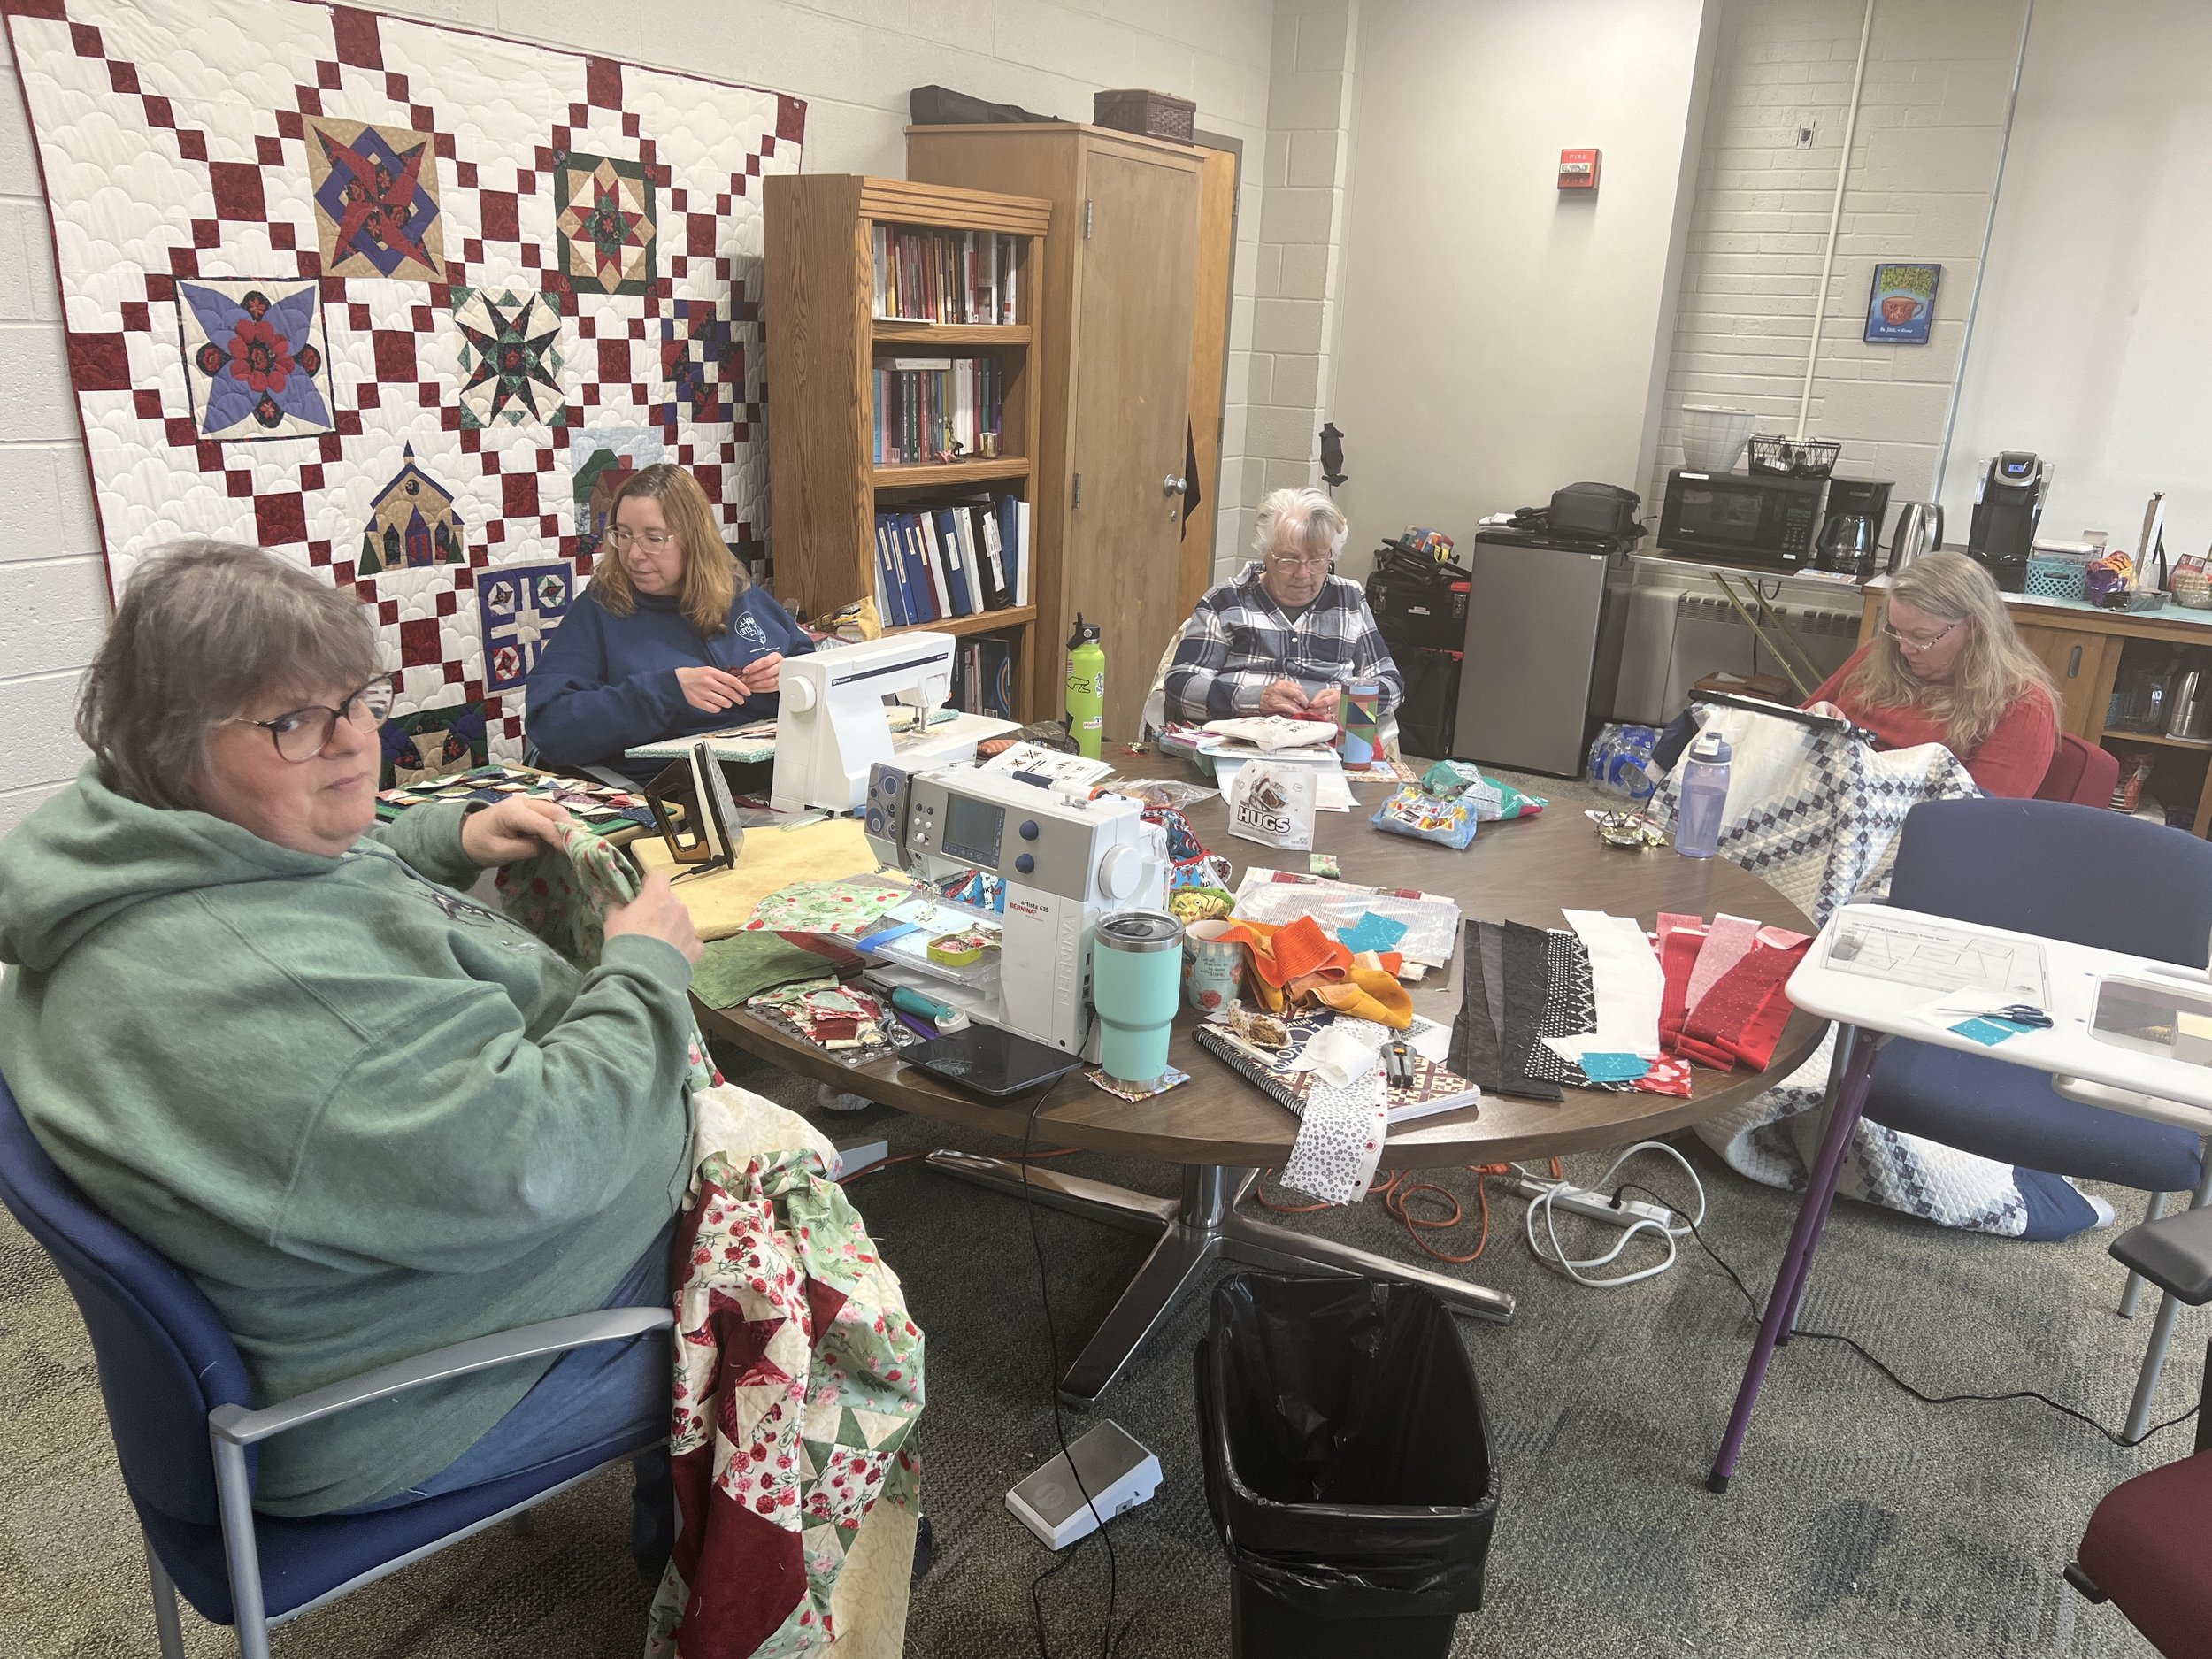
Photo 1: The sew day with friends in my office. The quilt hanging on my wall was made by my Mom—no idea what the pattern was, although it smacks of a block of the month kind of thing, or maybe a book of blocks or something. Anyway, because it has the church block it seemed appropriate for my region office. (If anyone recognizes the blocks/BOM/book, let me know!)

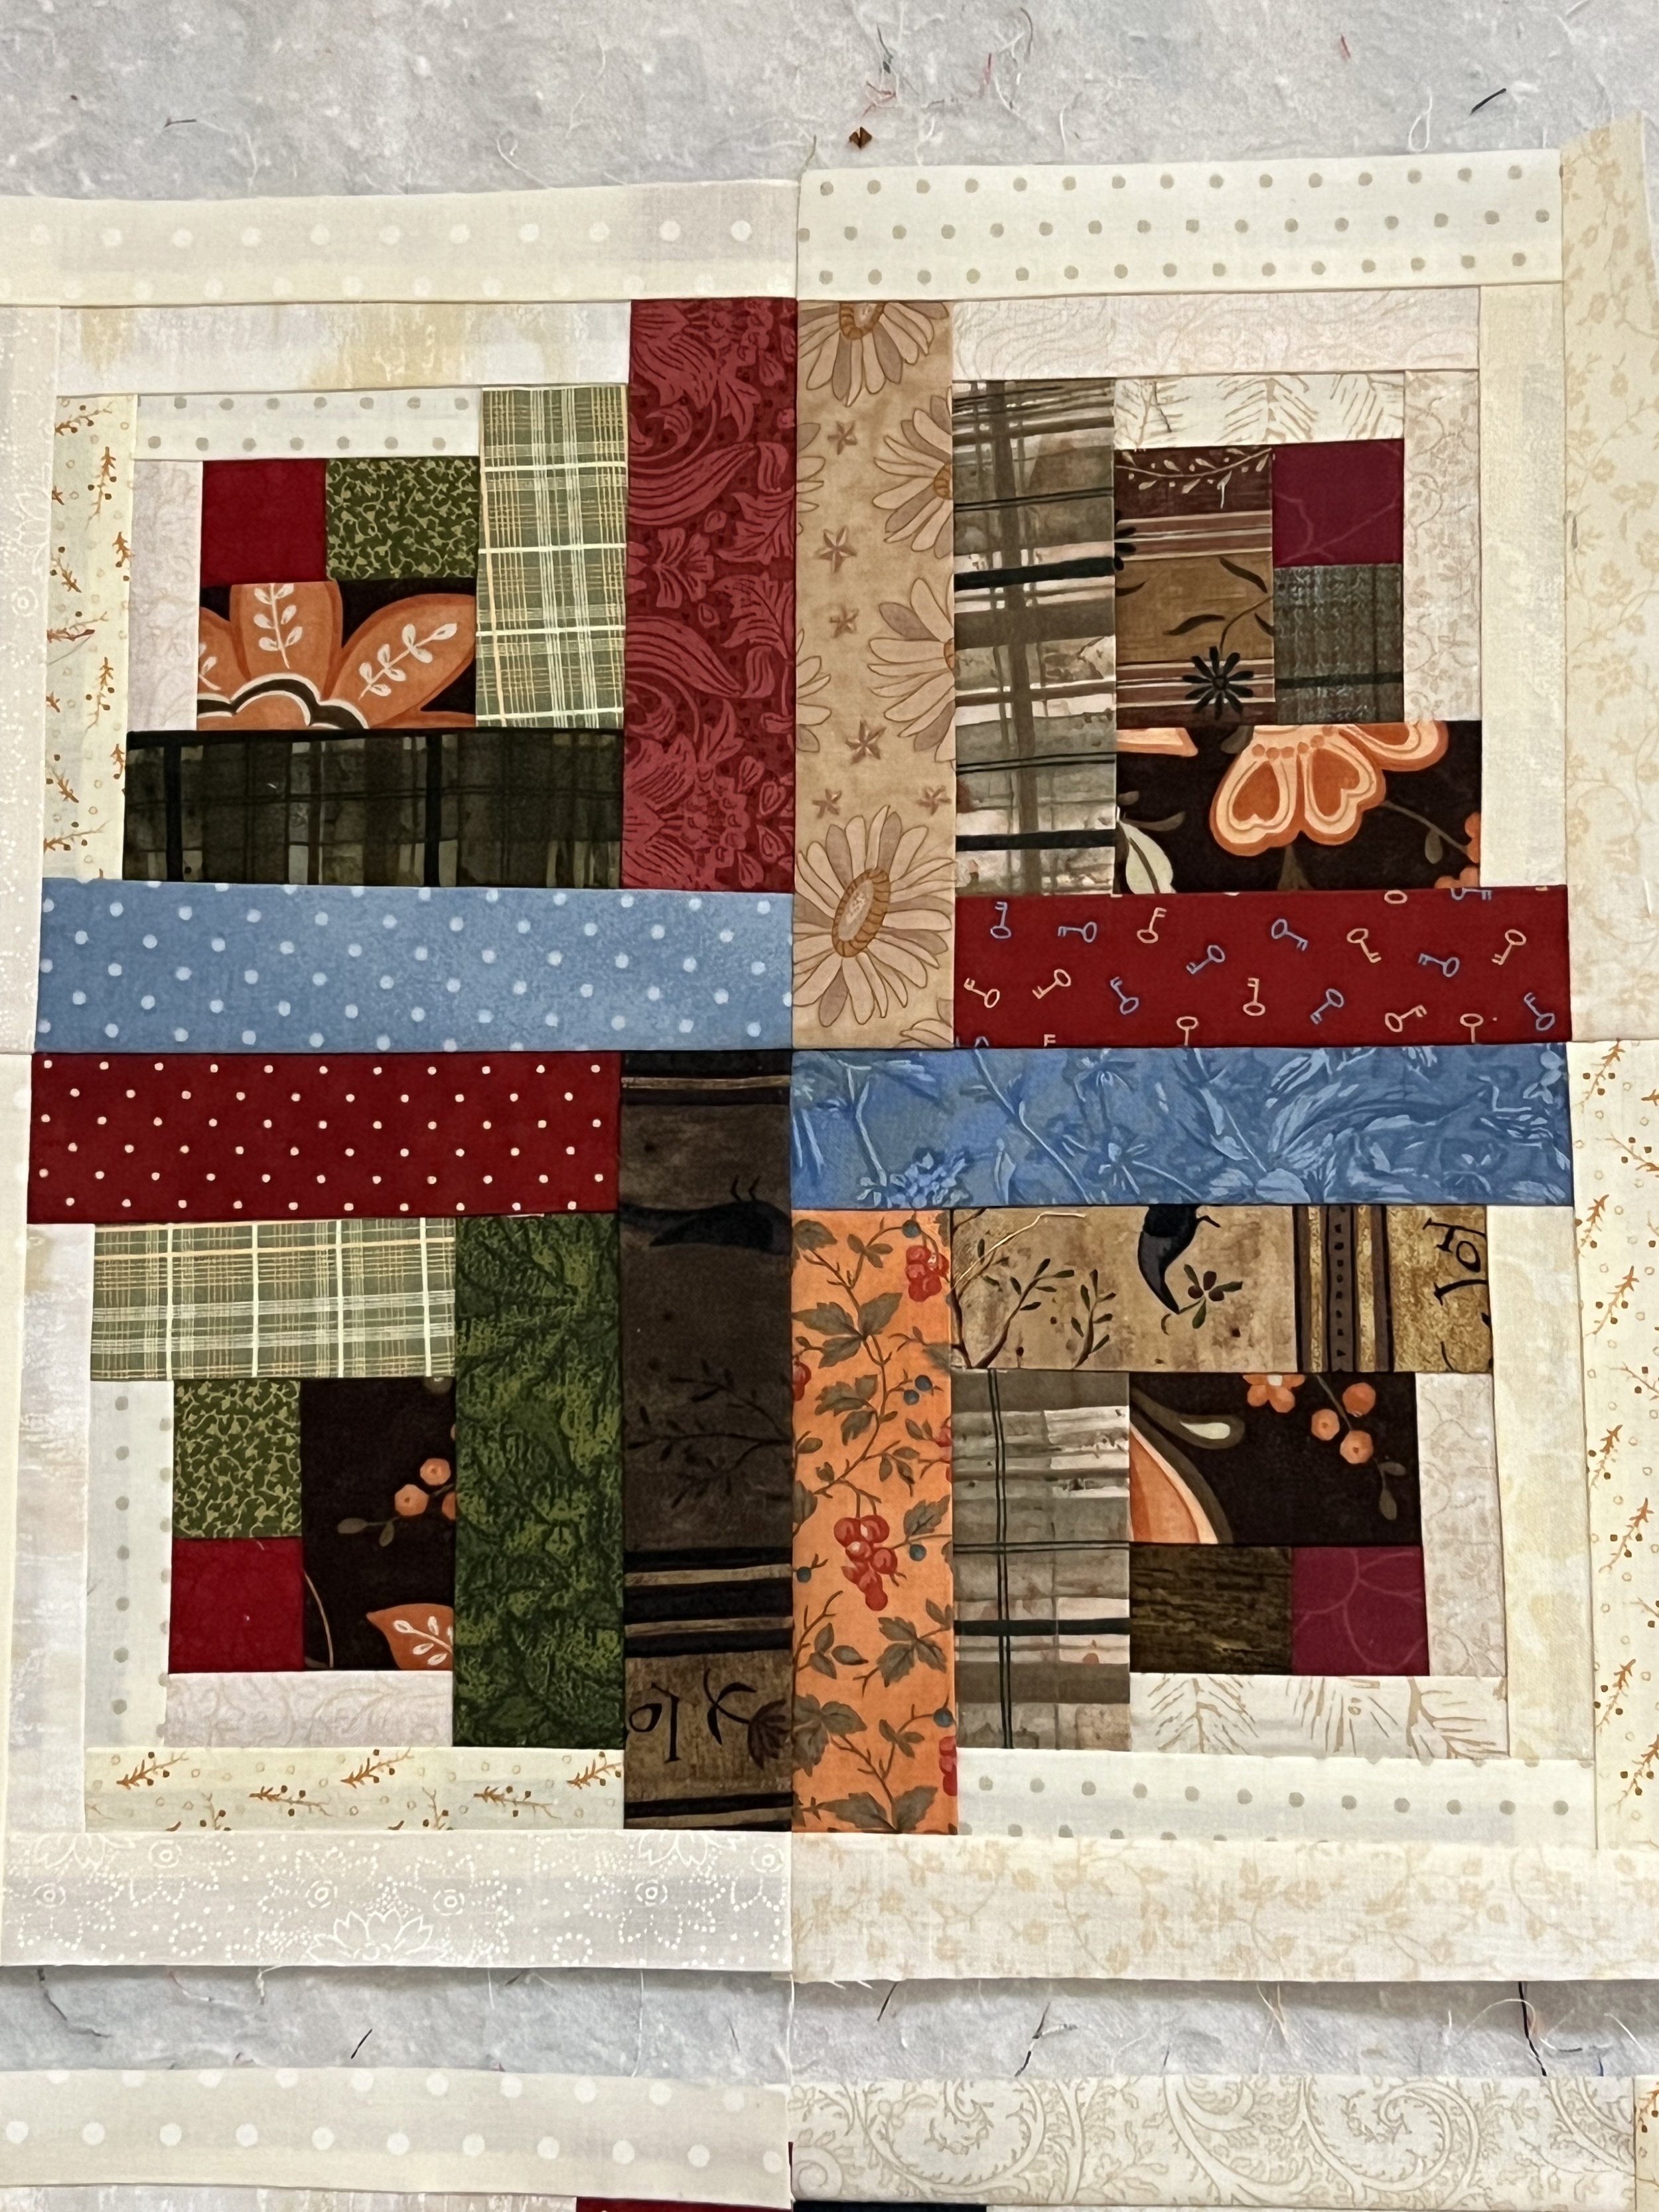
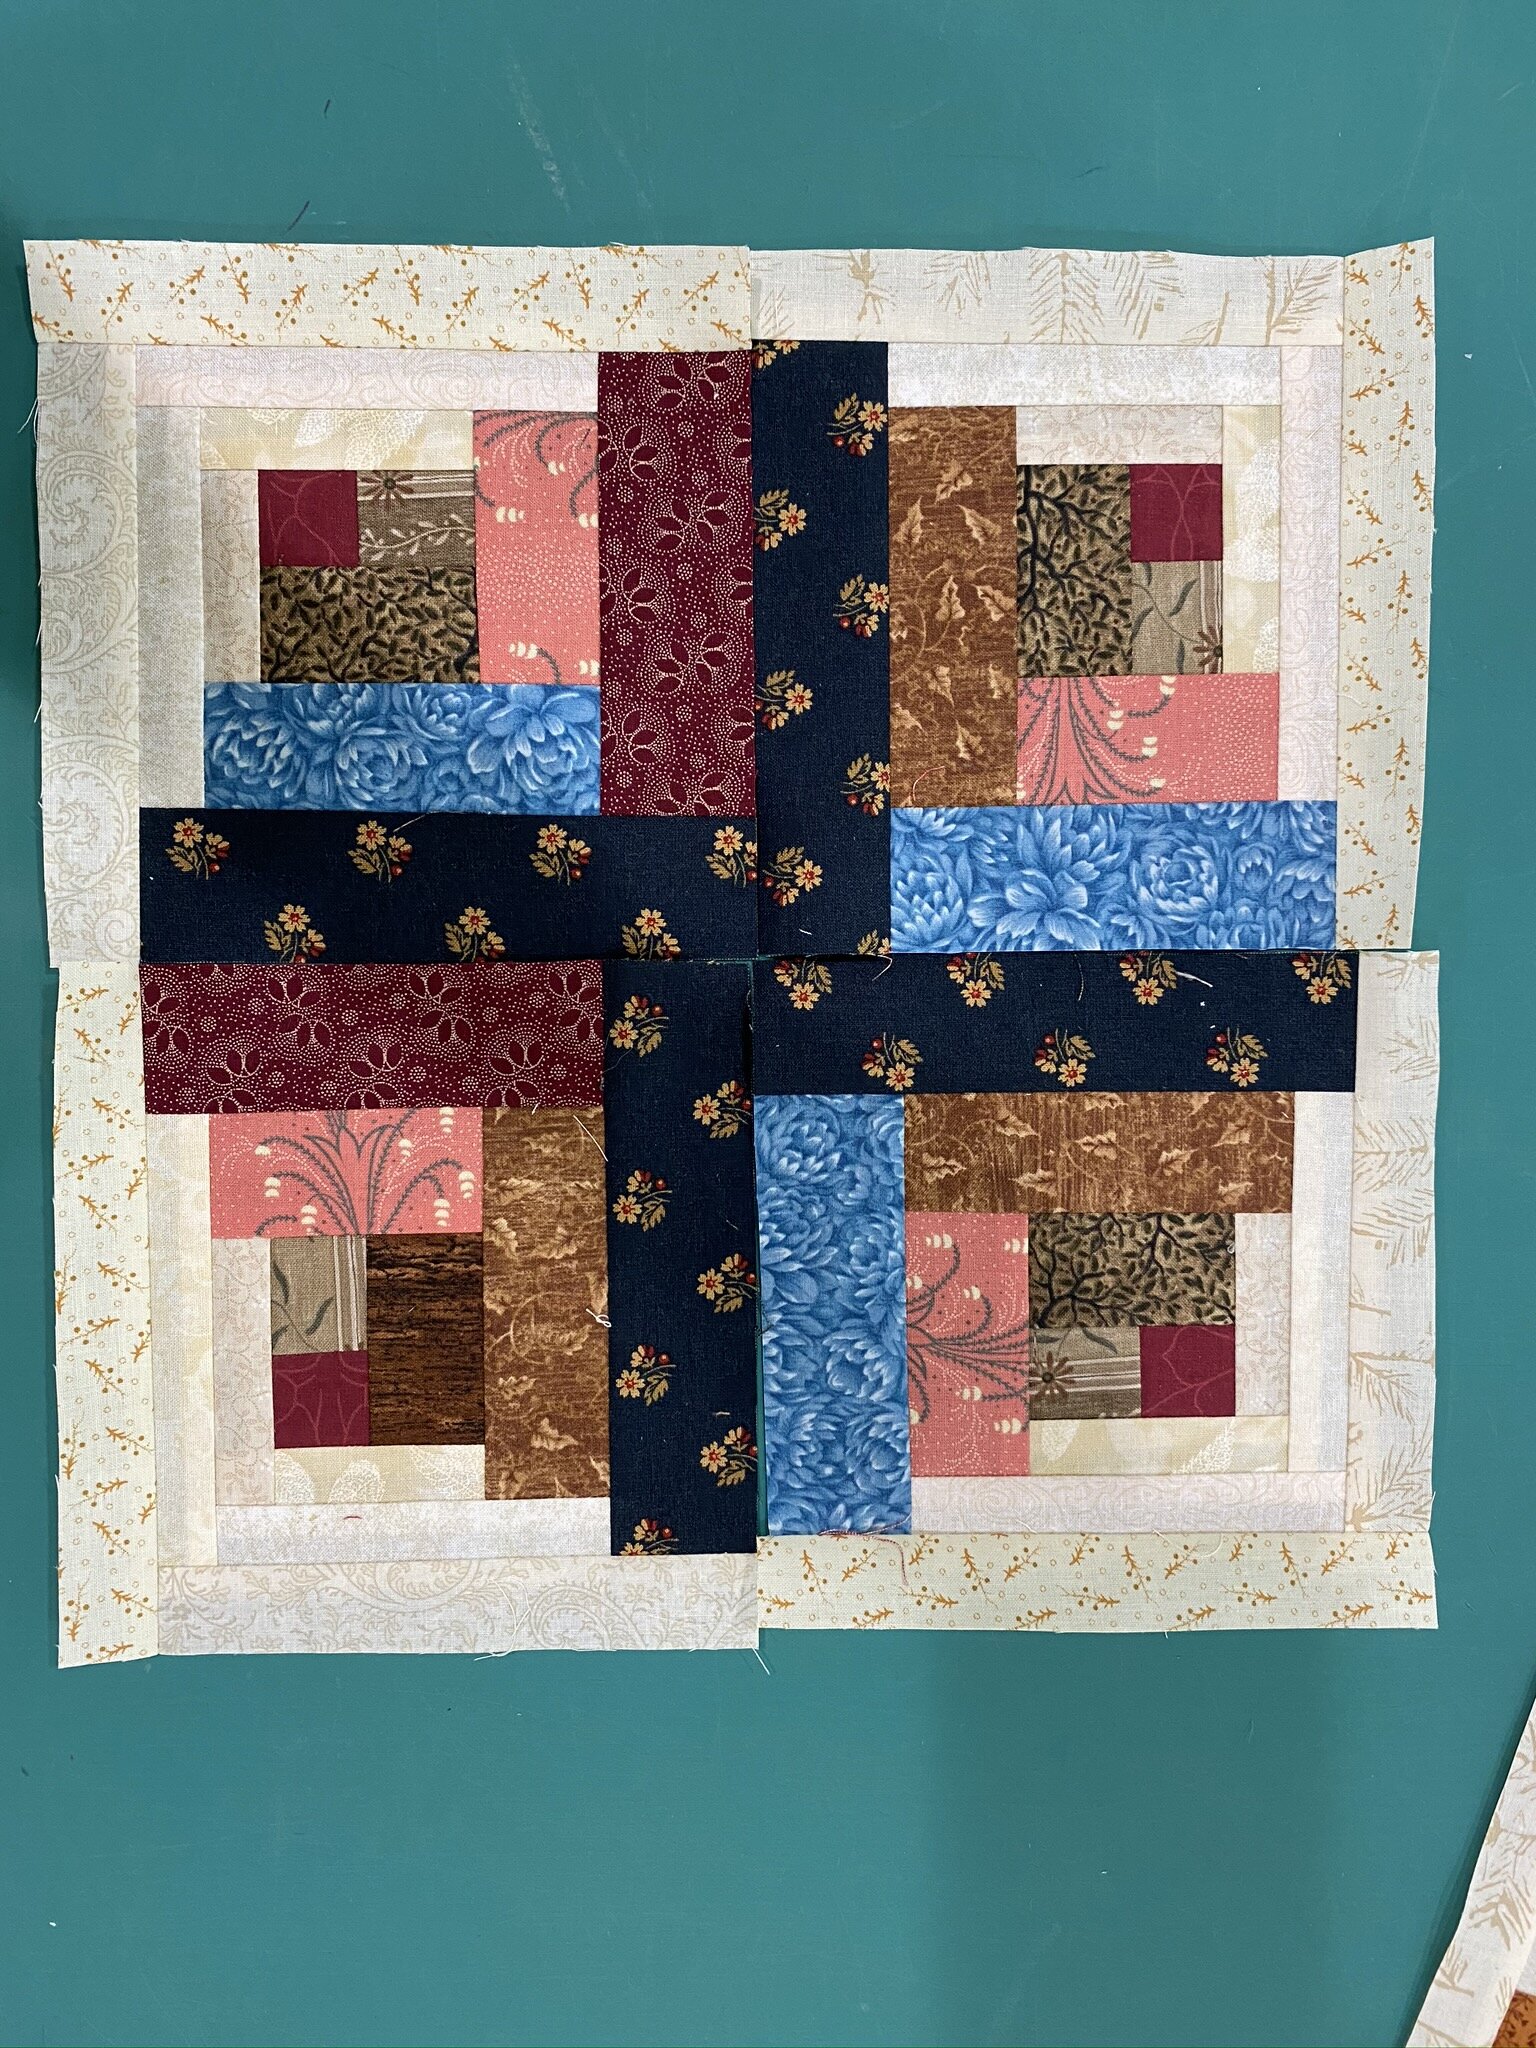
Photo 2: A close-up of one curvy log cabin block (using Creative Grids Curvy Log Cabin Trim Tool). You can tell I used three different quarter-inch seam presser feet in the process by the length of the longest “logs” next to each other. Having the trim tool saved me, though, as the block gets squared up every round of logs.So even though my seams weren’t altogether consistent due to the change of presser feet, the blocks themselves ended up all exactly the same size. Bonus.

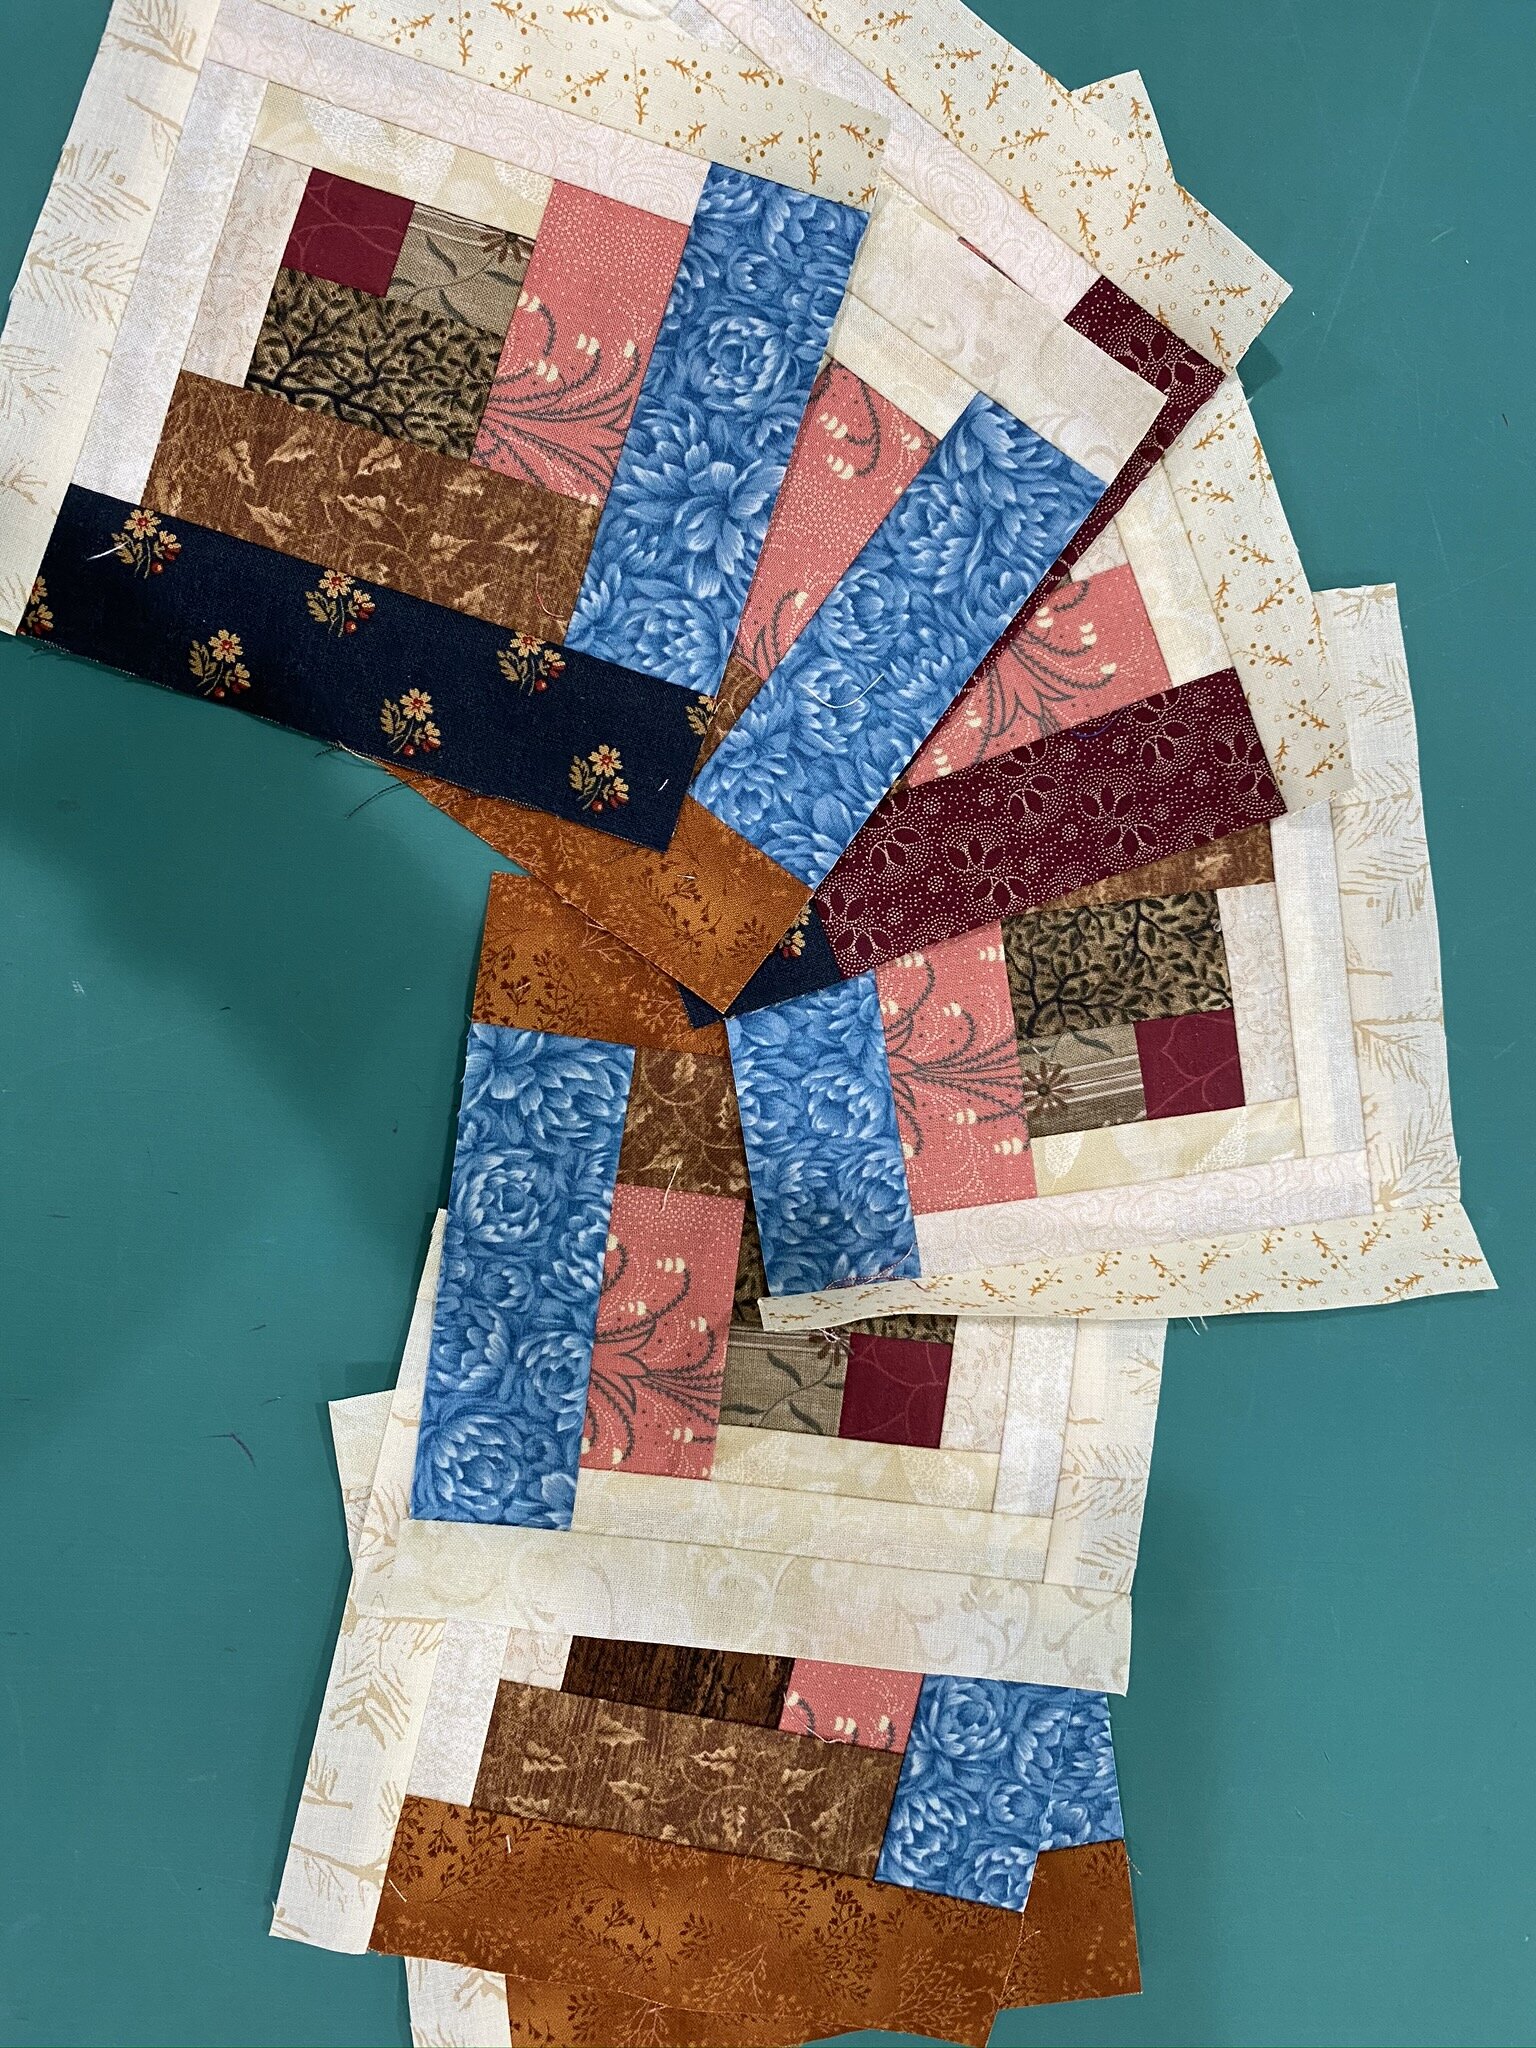
Photo 3: All the blocks completed. I’m still in the process of piecing the top together.

Staycation Day 2 and Online QuiltFest Class 2

Today’s was a much better class! I’d give it maybe an A-, but that’s only because there were long periods of silence while we were all doing our sewing. I joked in the chat room that our teacher should be telling us stories to keep us entertained but she didn’t see it. If we’d been in a classroom, you’d have heard some chatter and such, but it is what it is.

This was Curvy Log Cabin with Augusta Cole. Students had the option of using their regular rulers or using the Creative Grids Curvy Log Cabin Trim Tool. As I think I mentioned in a previous blog post, I have a thing for log cabin quilts and that includes curvy ones. My Mom made me a couple of different standard log cabins and then a curvy one as a college graduation/wedding gift, so some of it’s straight nostalgia. However, it’s mostly because I love a block that can create a completely different look depending on which way you twist it. (My other fave block is a Jacob’s Ladder for the same reason.)

I’d gotten a 4” Curvy Log Cabin ruler in a Sew Sampler box a few months ago and was quite excited about it, but wasn’t quilting at that point so didn’t ever play with it. I then decided to make a curvy log cabin quilt as a wedding quilt and designed it around an 8” block, so I went ahead and bought the 8” version of the ruler—I have a lot of trust in Creative Grids. This class used a 6” ruler. I dithered for awhile and then decided, “why not?” So I now own this same ruler in three sizes. I’m okay with that.


IMG_0783.JPEG

From a technological standpoint, today’s class went much, much better. Augusta knew how to use this platform to its advantage. She also had a couple of helpers present with her for managing, which was great. She began with a simple visual demonstration of the stages of the block.

However, as she had two groups of students—one with the curvy trim ruler, and one using standard rulers, she then used Zoom break-out rooms to separate the two groups. For each group, she had separate pre-recorded videos to show us within the appropriate break-out room.

Go, Augusta. Way to really leverage the utility of the platform!

The only thing I found myself wondering was whether the folks in the standard-ruler classroom got as much attention as we did, or if they were largely off in their own little world. There were only two of them, whereas there were 8 or so of us in the other room. We seemed to be seeing her most of the class, so I might have a different impression had I been in the other group.


IMG_0787.JPEG

We did one round of strips at a time, with a short video for each round and then sewing and trimming time with Q/A if we needed. It took me awhile to get the first round right. I had several reject blocks that I tossed aside and started with a new block as I wanted to get one block completely right before she got to the next section. It’s just one of those things that you need to logic out, and if you start off the wrong way you never get it straight. That, and the fact that twice I put the fabric wrong-way up while sewing. That was just distraction. I’ll be doing some seam-ripping and salvaging all those rejects but I didn’t take the time to do it during class. I had plenty of fabric to work with and just kept moving on.

BTW, at one point, I did sew a piece of fabric wrong-side showing, but as it was a light, and a very thin strip, you can’t even tell. That one stayed as-is. I’ll probably never even be able to find it once this whole thing is done.


I’m going full-on scrappy, to use up as many of my 2 1/2” strips as possible. The beautiful thing about the trim tool is I didn’t have to precut anything other than the initial center square. It all gets trimmed as you go.

(Photos at left—the 10 blocks I got done during class; four of them together so you can see the curvy effect. I wouldn’t try to put four matching logs like that together in the middle—that would take a whole lot more planning than I’m putting into this. They’ll be far more random.)

Note to self: Never, ever again fold fabric twice (WOF) to get the whole thing into my Creative Grids Stripology XL ruler. Everyone says you can do it. Every time I do it, I end up with wonky squares. I was trimming up my center squares today as I went but I’m still not happy. The rest of these are going to get cut with my traditional ruler. Does anyone know what I’m talking about? Any tips? (I own the 2 1/2” Accuquilt Strip Die but I don’t want to buy other strip dies quite yet. Trying to give the die purchasing a rest.)

I loved using the curvy log cabin ruler so much, and love how easy it made it to have a square block, that I ended up going online after class and buying the Creative Grids Log Cabin rulers—the 8” ruler and then the 6”/12” (both in one ruler). I can see making a lot of Log Cabins and Courthouse Steps in the rest of my quilt-making career, and even if I do end up buying the Accuquilt strip dies in the future, this ruler still keeps everything from getting whacked mid-block.

Time to close out this Staycation Day with some time on my patio with a novel: The Ballad of Songbirds and Snakes by Suzanne Collins. Thoroughly enjoying it!

Staycation Day 1 & Online QuiltFest Class 1

Today is my first day of my “staycation”—today, tomorrow, and all next week. I did have to put in a couple of hours work today and I’ll likely have to put in maybe an hour tomorrow with things I just couldn’t get finished up and am waiting on other people in order to get them squared away, but it is what it is.

I way overslept this morning as I had a slew of Zoom calls yesterday and a webinar in the evening, and was just fried. It’s okay to sleep in on a vacation day but I felt like I lost the whole morning as it took me awhile to get myself actually feeling awake. So the morning was mostly reading blogs, news, social media, and such.

By the way, Have you heard of the app Serial Reader? You choose the book you want to read and it gives it to you in daily 15-minute-reading increments. It’s got a bunch of the classics. I’m reading The Narrative of Sojourner Truth. I really like doing it in these short snippets because her writing style is, obviously, an older one and not always easy to get through. I think if I sat down and started it as a book, I’d get partway through and feel overwhelmed. But knowing I just have a few pages to get through makes it easy. It’s a really good book!


Getting ready for class

Getting ready for class

The main focus of my first day of vacation, however, was my first class of the Online Quilt Festival. I took “Not So Boring Stippling” with Julia Quiltoff, a three-hour class to help inspire us with all sorts of ways to do more interesting stippling designs.

The instructions were to log in at 11:30a (the class started at noon) so that she could check to make sure everyone’s audio and video were working. Since I’m a Zoom Maven, I was able to just say “yep” and “yep” and then I turned my video and audio off and proceeded to straighten up my sewing area while other folks were doing the usual, “Can you hear me? Can you hear me? What mute button?” or being really chatty (which I still wasn’t feeling awake enough to do).

Here’s a quibble for me, though: The teacher never took the time to walk people through the basics of using Zoom—mute yourself, use the chat room, pin the video. Turns out, partway through the class, the third time she froze and had to log out and back in again, this was the first time she’d used Zoom herself. She had used other platforms so clearly assumed it would be close enough. I wish she’d taken a little time to familiarize herself a bit more. I ended up being the Zoom Tipmaster for the class in the chat box. Don’t get me wrong—I certainly understand participants who may not have been comfortable with it (although please, people, look it up before you try to log in for the first time!). But for the teacher to not take the time to walk people through the basics? It just wasted a lot of time later in the class. And it felt WAY too much like a regular work day for me again rather than a fun vacation-day-quilt-class. But I got over myself.

(Really fun side note: Guess who was another student? Pokey Bolton! I private messaged her that I had her books and was happy she was in the class, which she appreciated. Julia Quiltoff clearly had no clue who she was so I wanted to let Pokey know that she was recognized!)


Julia demonstrating tips for better pearls

Julia demonstrating tips for better pearls

Julia started out by saying she was cramming a 10-hour class into our 3 hours so we should get ready for an intense class. It actually wasn’t that bad, although by Hour 2 I was having problems staying engaged. She went through five “tricks” for creating more complex designs at top speed, drawing everything out in a notebook. I was also drawing things out in my sketchpad along with her, but by Trick 4 it was pretty easy to figure out what the variation would be. I’m guessing in her 10-hour version, you do a lot of actual machine practice with each section so it breaks it up more.

Somewhere in Hour 2 she asked one of the participants to demonstrate a problem the participant had asked about. Said participant then took a good 5 minutes to get herself set up with her phone camera aimed at her sewing machine needle (including having to call someone in from another room to hold the phone), then sewed for a few minutes, and then the two of them talked it through. That’s exactly what classes are for, of course, but in a normal class, she’d have been standing with that student at a sewing machine while the rest of us were working away on whatever we were working away on. It was just really annoying to have to sit there and wait while everything got set up and such. I know. I sound like a crankbucket. I just spend WAY WAY WAY too much time on Zoom to have patience anymore.

So I turned on my sewing machine, grabbed some quilt sandwiches I made several years ago for practice (and then quickly stopped quilting at all, so I’ve still got quite a stash!), and with my video and audio still muted, just took the next half hour or so to practice myself.

Yikes.

IMG_0781.JPEG

It’s really not just like riding a bike. I was never a fantastic FMQer but I’d at least reached “Confident Beginner” stage, if not dabbling my toes into intermediate. I actually had gotten some decent feathers going on occasion. Today? Not so much.

One thing I did remind myself of, though. I had learned, back when I was doing this FMQ thing more regularly, that my drawing skills had nothing to do with my FMQ skills. I can’t draw worth a lick. But when I take a hen-scratch design from my sketchbook and did it as FMQ, I often had far better results.

Not today, of course. But there’s still a whole lotta rust on this girl from lack of use. I’ll get there again.

So, I think I’d give the class—in this online format—an overall grade of a B-. I got good ideas, but I could’ve gotten them in a shorter amount of time with a book and without the frustration of technological issues. That being said, I did like Julia Quiltoff quite a bit—she’s got great personality and clearly knows her stuff. I’d take an in-person class with her anytime. Some classes just translate better to an online format than others. She is sending us memory sticks with her full 10 hour class on them so that will help me feel like I got my money’s worth.

Now it’s time to do as much cutting as I can get done for tomorrow’s class on the curved log cabin. I’m really looking forward to that one—it’ll be good to have a project with progress to measure during the class!